 by
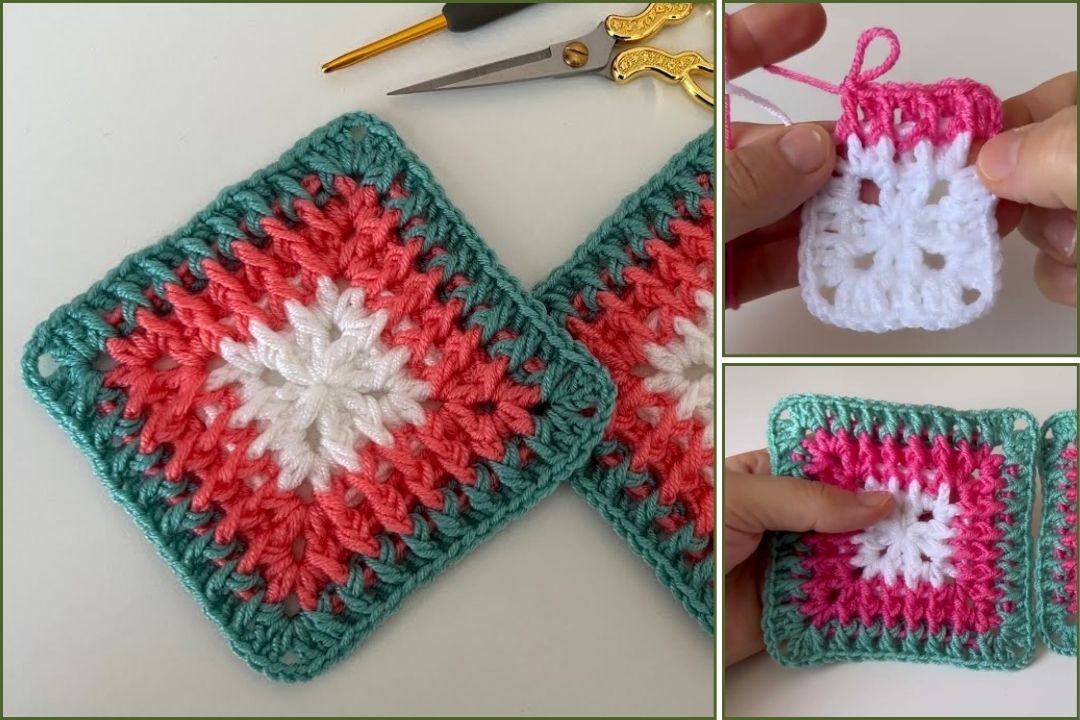
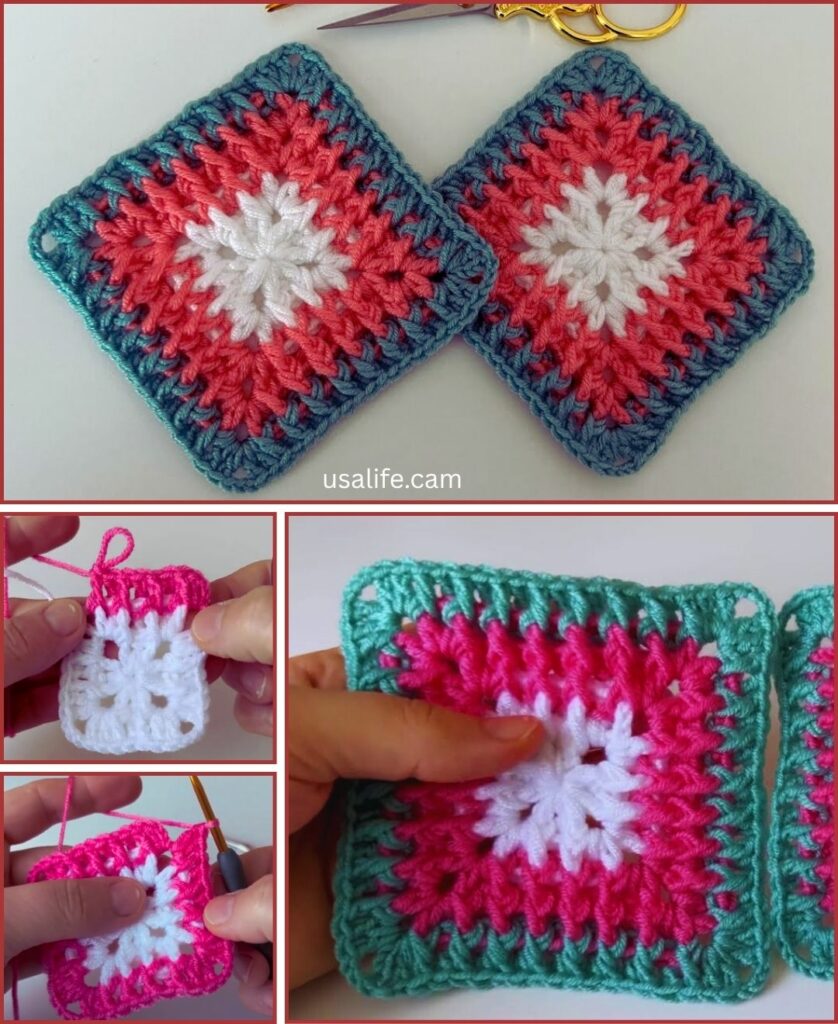
by Crocheting a blanket square is a fantastic skill to learn, whether you’re making a full-sized afghan from individual squares, a baby blanket, or just practicing your stitches. The most iconic and beloved blanket square is arguably the Granny Square, known for its simple repeat and versatility. This tutorial will focus on the classic granny square, which you can make in any size by simply adding more rounds.
For blankets, especially in a place like Phnom Penh, you have a lot of yarn choices. Acrylic yarn is a popular and affordable choice for blankets because it’s warm, durable, machine washable, and comes in a huge range of colors. Cotton blends are also excellent for a slightly cooler, more breathable blanket, and pure cotton can be great for lighter throws.

How to Crochet a Blanket Square (Classic Granny Square)
This detailed guide will walk you through creating a traditional granny square, which can be easily expanded to any size you desire for your blanket project.
1. Essential Materials You’ll Need
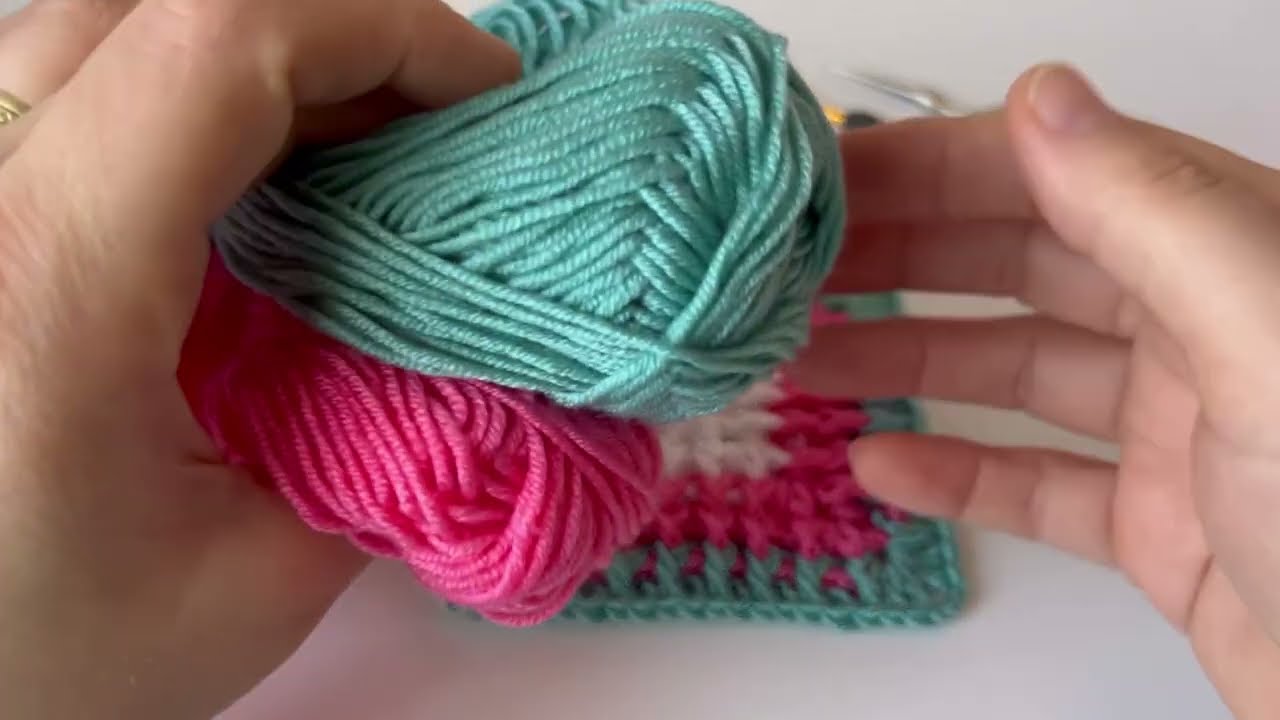
- Yarn: Any weight yarn can be used, but Worsted Weight (Aran / Medium / 4) is a common and versatile choice for blankets. Choose your favorite colors! You can use one color per square, or change colors every round for a vibrant look.
- Quantity: For a single square, you’ll need a small amount (e.g., 20-50 yards per square depending on its size). For a full blanket, you’ll need significantly more (hundreds to thousands of yards), depending on the blanket size and square count.
- Crochet Hook: The hook size will depend on your yarn weight.
- For Worsted Weight yarn, a 5.0mm (US H/8) or 5.5mm (US I/9) hook is a good starting point. Check your yarn label for recommended hook size.
- Choose a hook that allows you to create a fabric that is flexible but not too loose (you don’t want big gaps if it’s a blanket!).
- Scissors: For cutting yarn.
- Yarn Needle (Tapestry Needle): Essential for weaving in all those yarn ends.
- Optional: Stitch marker (helpful for marking the beginning of rounds, especially for beginners).
2. Basic Crochet Stitches You’ll Use
The granny square uses just a few fundamental crochet stitches, making it very beginner-friendly:
- Chain (ch): To begin your work and create chain spaces.
- Slip Stitch (sl st): Used for joining rounds.
- Double Crochet (dc): The main stitch that forms the “granny” clusters.
- Magic Ring (MR): (Also known as Magic Circle or Adjustable Ring). This is the best way to start the center of your granny square for a tight, hole-free beginning. An alternative chain method is also provided.
The Classic Granny Square Pattern
This pattern is worked in rounds, growing outwards from the center.
Abbreviations (US Crochet Terms):
- ch: chain
- sl st: slip stitch
- dc: double crochet
- st(s): stitch(es)
- sp: space
- MR: magic ring
Instructions:
- Start (Choose ONE method – use your first color):
- Method A: Magic Ring (Recommended for a tighter center)
- Create a Magic Ring (MR).
- Ch 3 (counts as your first dc).
- Work 2 dc into the Magic Ring.
- *Ch 3, work 3 dc into the Magic Ring*. Repeat from * to * 2 more times. (You will have 4 groups of 3 dc, separated by ch 3 spaces).
- Ch 3.
- Gently pull the yarn tail to close the center hole tightly.
- Join with a sl st to the top of the starting Ch 3. (4 clusters of 3 dc, 4 ch-3 spaces)
- Method B: Chain Method (Easier for Beginners)
- Ch 4.
- Join with a sl st to the first chain to form a ring.
- Ch 3 (counts as your first dc).
- Work 2 dc into the ring.
- *Ch 3, work 3 dc into the ring*. Repeat from * to * 2 more times.
- Ch 3.
- Join with a sl st to the top of the starting Ch 3. (4 clusters of 3 dc, 4 ch-3 spaces)
- Method A: Magic Ring (Recommended for a tighter center)
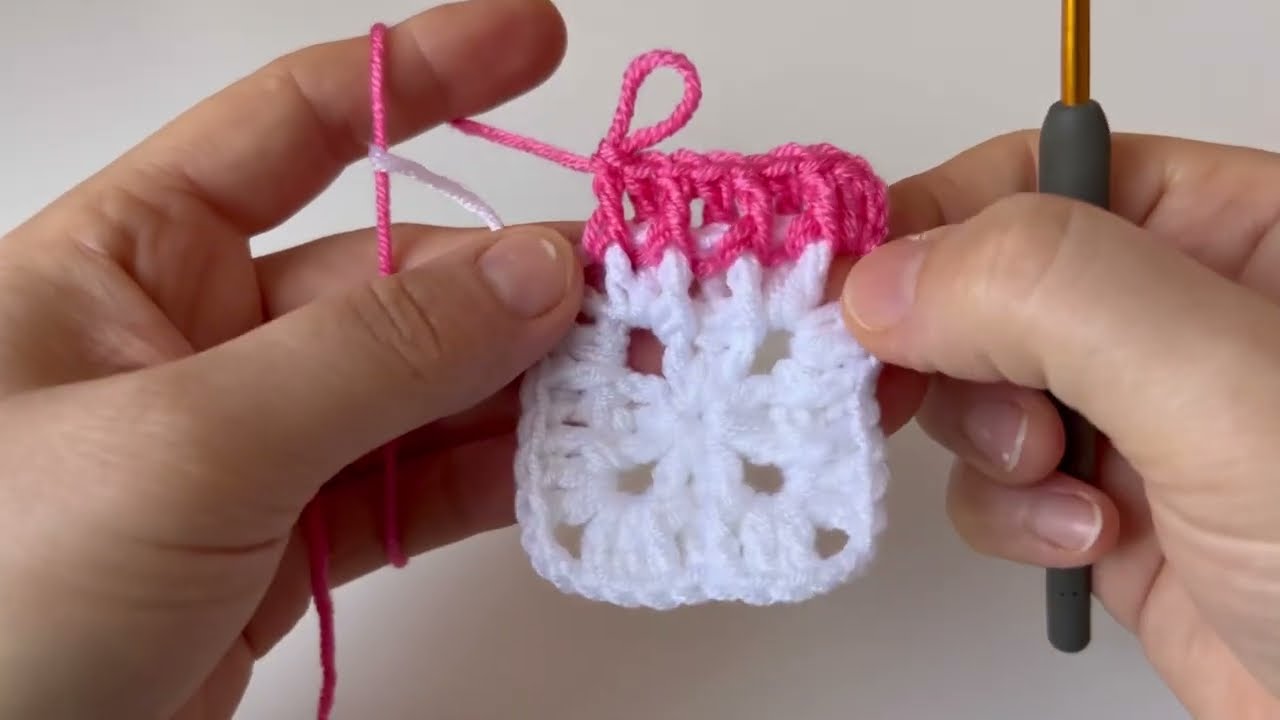
- Round 2 (Change colors here if desired):
- To change colors cleanly: On the very last sl st of the previous round, when you yarn over and pull through to complete the slip stitch, do so with your new color.
- Sl st into the first ch-3 space (this moves your hook to the correct starting position for the corner).
- Ch 3 (counts as 1 dc). Work (2 dc, ch 3, 3 dc) into the same ch-3 space (this creates your first corner).
- *Ch 1. Work (3 dc, ch 3, 3 dc) into the next ch-3 space (this creates your next corner).*
- Repeat from * to * 2 more times.
- Ch 1.
- Join with a sl st to the top of the starting Ch 3. (8 clusters of 3 dc, 4 ch-3 corner spaces, 4 ch-1 side spaces)
- Round 3 (Change colors here if desired):
- Sl st into the first ch-3 space (to move to the corner).
- Ch 3 (counts as 1 dc). Work (2 dc, ch 3, 3 dc) into the same ch-3 space (first corner).
- *Ch 1. Work 3 dc into the next ch-1 space (this fills in a side).
- Ch 1. Work (3 dc, ch 3, 3 dc) into the next ch-3 space (next corner).*
- Repeat from * to * 2 more times.
- Ch 1. Work 3 dc into the next ch-1 space. Ch 1.
- Join with a sl st to the top of the starting Ch 3. (12 clusters of 3 dc, 4 ch-3 corner spaces, 8 ch-1 side spaces)
- Round 4 and onwards (Continue in this pattern to grow your square):
- Sl st into the next ch-3 space (corner).
- Ch 3 (counts as 1 dc). Work (2 dc, ch 3, 3 dc) into the same ch-3 space (corner).
- *Ch 1. Work 3 dc into EACH ch-1 space along the side until you reach the next corner.
- Ch 1. Work (3 dc, ch 3, 3 dc) into the next ch-3 space (corner).*
- Repeat from * to * around.
- Ch 1 (after the last side cluster).
- Join with a sl st to the top of the starting Ch 3.
To make your blanket square larger, simply repeat Round 4 as many times as you like, always working (3 dc, ch 3, 3 dc) in the corners and 3 dc in each ch-1 space along the sides, with ch 1 in between the clusters.

Finishing Your Blanket Square
- Fasten Off: Once your square reaches the desired size, cut your yarn, leaving a tail of about 6-8 inches (15-20 cm). Pull the tail completely through the loop on your hook and pull tight to secure.
- Weave in All Ends: Use your yarn needle to carefully weave in all the yarn tails from your starting point and any color changes. Hide them securely within the stitches on the back of your square. This is crucial for a neat and durable blanket that won’t unravel.
- Blocking (Recommended for a polished look):
- Gently wet your crocheted square (you can spray it or immerse it in cool water).
- Carefully squeeze out excess water (do not wring!).
- Lay the square flat on a clean towel or a foam blocking mat. Gently shape it into a perfect square, making sure all sides are straight and corners are crisp. You can use rust-proof pins to hold it in place if needed.
- Allow it to air dry completely. Blocking helps to even out your stitches, ensures your square lays perfectly flat, and can slightly relax the yarn, giving it a nicer drape. This is especially helpful if you plan to join multiple squares together.
Tips for Crocheting Blanket Squares
- Tension is Key: Try to maintain a consistent tension throughout your work. This will ensure your squares are all the same size and shape, which is important if you plan to join them into a larger blanket.
- Counting: Especially when you’re learning, count your stitches and spaces at the end of each round to make sure you haven’t missed anything.
- Color Play: Granny squares are fantastic for experimenting with color. You can change colors every round, every two rounds, or stick to one solid color for a more minimalist look.
- Joining Squares: Once you have a collection of squares, there are many ways to join them (e.g., whip stitch, slip stitch join, single crochet join, join-as-you-go methods). Each gives a different aesthetic.
- Practice: Don’t get discouraged if your first square isn’t perfect. Crochet is a skill that improves with practice!
Now you’re ready to create a beautiful foundation for your next blanket project!