by
by 
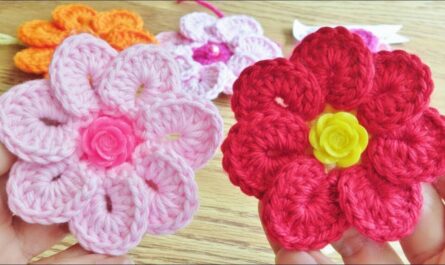
Crocheting a flower is a delightful project that’s perfect for beginners and experienced crocheters alike. It’s a small, quick project that allows you to experiment with colors, textures, and embellishments, and the finished product can be used in countless ways: adorn a headband, embellish a bag, brighten up a home décor piece, or simply add a touch of handmade charm to a gift.
This blog post will guide you through the steps of crocheting a simple, yet elegant flower. Feel free to customize it with your own creative flair!
Materials:
- Yarn in your desired color(s) (weight 4 is recommended)
- Crochet hook appropriate for your yarn weight (typically a size G or H)
- Yarn needle
- Scissors (optional)
- Stitch markers (optional)
Skill Level: Beginner
Stitches Used:
- Slip stitch (sl st)
- Single crochet (sc)
- Double crochet (dc)
- Chain (ch)
Instructions:
1. Magic Ring or Chain and Slip Stitch:
- Start with a magic ring or chain 4 and slip stitch to form a ring. This will be the center of your flower.
2. First Round (Petal Base):
- Ch 1, work 12 sc stitches evenly around the ring. Slip stitch to the first sc to join the round.
3. Second Round (Petal Body):
- Ch 2 (counts as first dc), dc in the same stitch, dc in each of the next 4 sc stitches, 2 dc in the next sc stitch (creates the base of the petal), dc in each of the next 5 sc stitches, slip stitch to the top of the ch-2 to join the round.
4. Third Round (Petal Shaping):
- Ch 2, 2 dc in the same stitch, dc in each of the next 2 dc stitches, 2 dc in the next dc stitch, dc in each of the next 4 dc stitches, 3 dc in the next dc stitch, dc in each of the next 4 dc stitches, 2 dc in the next dc stitch, dc in each of the next 2 dc stitches, 2 dc in the same stitch (top of the petal), sl st to the top of the ch-2 to join the round.
5. Repeat for More Petals:
- Repeat steps 3 and 4 four more times to create a total of five petals. You can adjust the number of petals for a different look.
6. Finishing Touches:
- Fasten off by weaving the yarn tail through the back loops of the last few stitches.
- You can add a slip stitch row around the base of the flower for a neater finish.
- For added dimension, you can sew small beads or sequins onto the petals.
- Attach your flower to your desired project using a yarn needle and thread.
Tips and Tricks:
- Use a stitch marker to mark the beginning of each round, especially if you’re working with multiple colors.
- Adjust the hook size and yarn weight for a different flower size.
- Experiment with different stitch combinations for the petals.
- Use contrasting colors for the petals and center for a bolder look.
- Get creative and add leaves, stems, or other embellishments to your flower.
With a little practice, you’ll be crocheting beautiful flowers in no time! Share your creations on social media and inspire others to bloom their creativity.
Additional Resources:
- For a visual guide, check out these helpful video tutorials:
- How To Crochet a Simple Flower – Absolute Beginners: [invalid URL removed]
- How to Crochet a Flower for Beginners: [invalid URL removed]
- Explore different flower patterns and variations online:
- Crochet Flower Roundup: [invalid URL removed]
Happy crocheting!
Video tutorial