 by
by 
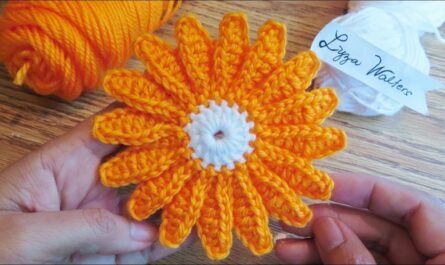
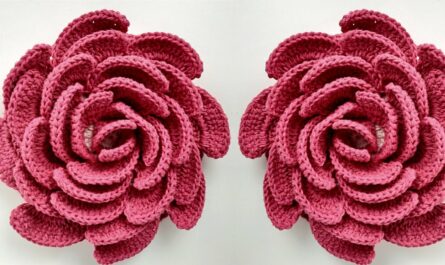
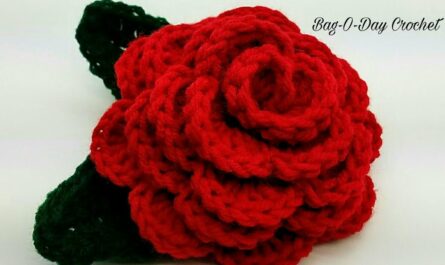
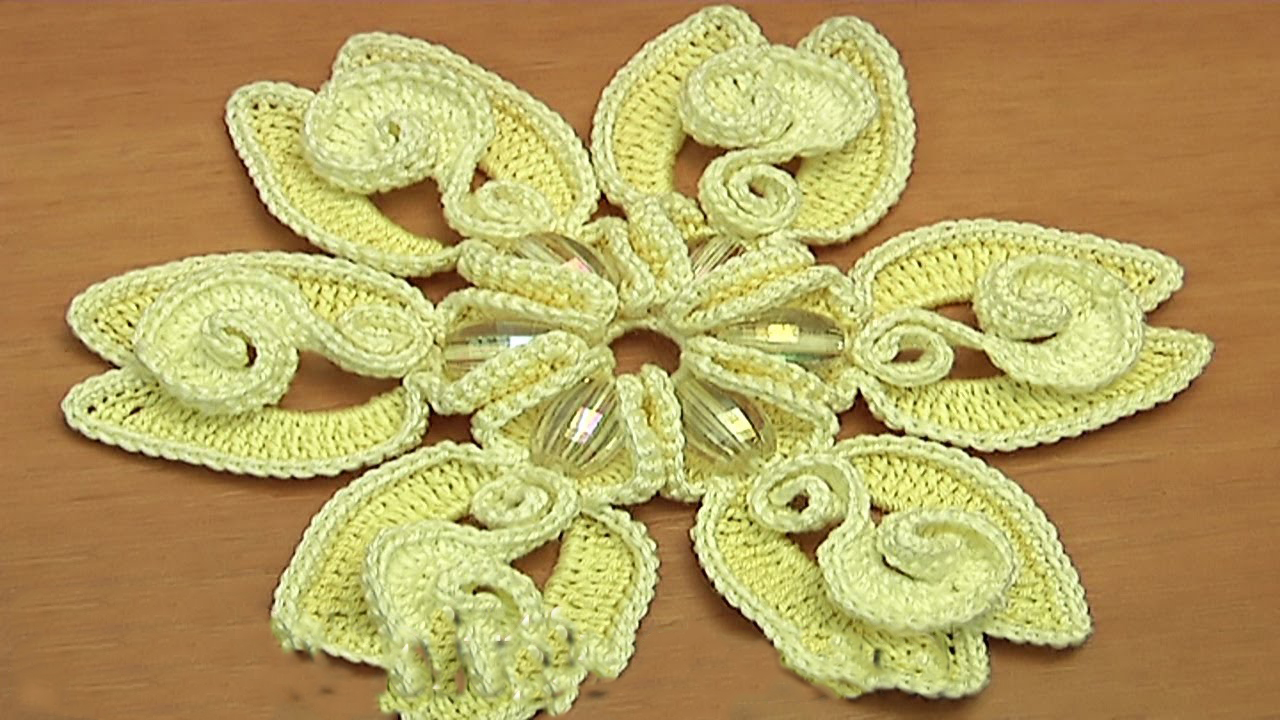
Get ready to add some floral flair to your projects with this stunning 3D crochet flower! This pattern is perfect for crocheters of all skill levels, from beginners looking for a challenge to experienced crafters seeking a beautiful statement piece.
Materials:
- Worsted weight yarn in two colors (one for the petals and one for the center)
- Crochet hook appropriate for your yarn weight (I used a size 5mm hook)
- Yarn needle
- Scissors
- Stitch marker (optional)
Gauge:
Gauge is not crucial for this project, as the size of the flower can be easily adjusted by changing the number of stitches or yarn weight. However, knowing your gauge will help you estimate the finished size of your flower.
Petals:
- Start with the center ring: Make a magic ring with your main color yarn. Chain 2, work 8 single crochets (sc) in the ring, slip stitch (sl st) to join. (8 sc)
- First round: Chain 2, 2 double crochets (dc) in each sc around, sl st to join. (16 dc)
- Second round: Chain 2, dc in first dc, 2 dc in next dc. Repeat from * to * around, sl st to join. (24 dc)
- Third round: Chain 2, dc in first 2 dc, 2 dc in next dc. Repeat from * to * around, sl st to join. (32 dc)
- Petal shaping: Chain 2, dc in first 2 dc, 2 dc in next dc, 3 dc in next dc, 2 dc in next dc, dc in next 2 dc. Repeat from * to * around, sl st to join. (40 dc)
- Petal shaping (continued): Chain 2, dc in first 3 dc, 2 dc in next dc, 4 dc in next dc, 2 dc in next dc, dc in next 3 dc. Repeat from * to * around, sl st to join. (48 dc)
- Petal shaping (continued): Chain 2, dc in first 4 dc, 2 dc in next dc, 5 dc in next dc, 2 dc in next dc, dc in next 4 dc. Repeat from * to * around, sl st to join. (56 dc)
- Petal shaping (continued): Chain 2, dc in first 5 dc, 2 dc in next dc, 6 dc in next dc, 2 dc in next dc, dc in next 5 dc. Repeat from * to * around, sl st to join. (64 dc)
- Petal shaping (continued): Chain 2, dc in first 6 dc, 2 dc in next dc, 7 dc in next dc, 2 dc in next dc, dc in next 6 dc. Repeat from * to * around, sl st to join. (72 dc)
- Continue shaping the petals in this way, increasing by 1 dc in the “tall” stitch group each round, until you reach your desired petal size. (I made 6 rounds of increases for a total of 96 dc and larger petals)
- Finish the petal by working one round of all dc around, then fastening off and weaving in the ends.
Center:
- Change to your contrast color. Make a magic ring, chain 2, work 6 sc in the ring, sl st to join. (6 sc)
- Increase round: Chain 2, 2 sc in each sc around, sl st to join. (12 sc)
- Continue increasing by working 2 sc in each sc around until you reach your desired center size. (I made 4 rounds of increases for a total of 48 sc)
- Finish the center by working one round of all sc around, then fastening off and weaving in the ends.
Assembly:
- Sew the center to the base of the petals.
- Optionally, you can add leaves or other embellishments to your flower.
Tips:
- You can adjust the size of the flower by changing the number of stitches in each round.
- Experiment with different colors and yarn weights to create different looks.
- Use a stitch marker to keep track of your place in the pattern.
- Block your finished flower to give it a neat and professional look.
Additional Resources:
- For a visual guide, check out this YouTube tutorial on crocheting a
Video tutorial