 by
by Creating a crochet coaster supla (often called a “placemat” or “charger” in English, as “supla” is the Portuguese word for placemat) is a wonderful way to add a touch of handmade elegance to your dining table or coffee area. It’s larger than a regular coaster, designed to sit under a plate or a larger coffee pot, protecting your table while adding a decorative layer.
Given that you’re in Phnom Penh, where it’s warm, using 100% cotton yarn is an excellent choice for a supla. Cotton is durable, absorbs spills, is heat-resistant, and is easily washable, which is perfect for dining accessories.
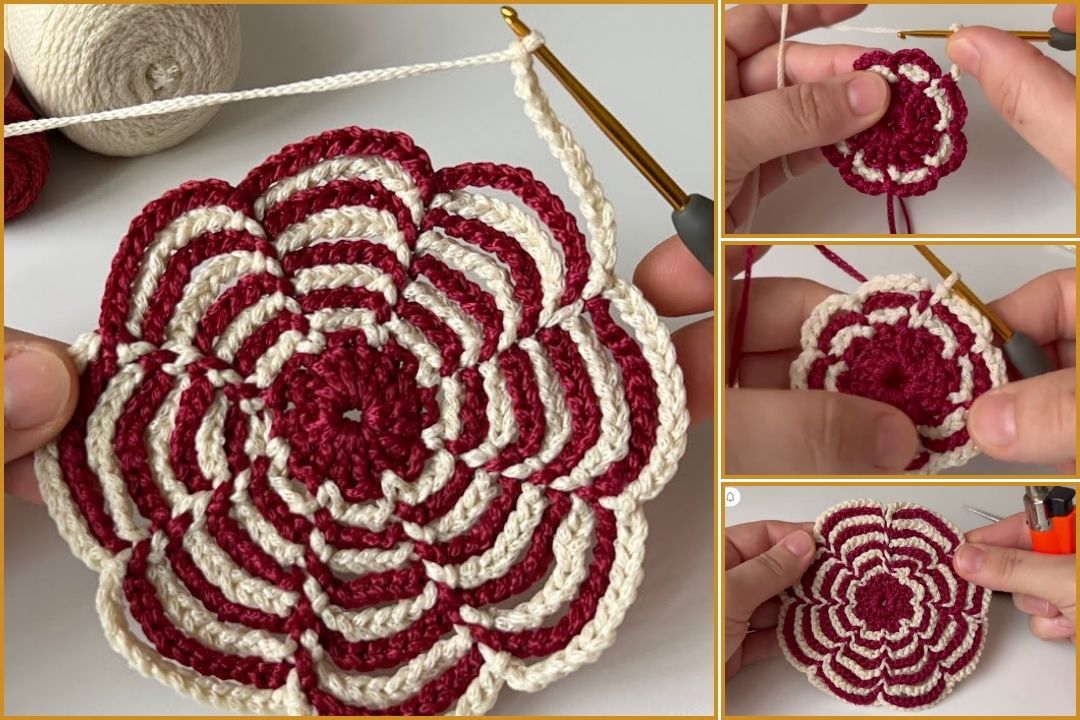
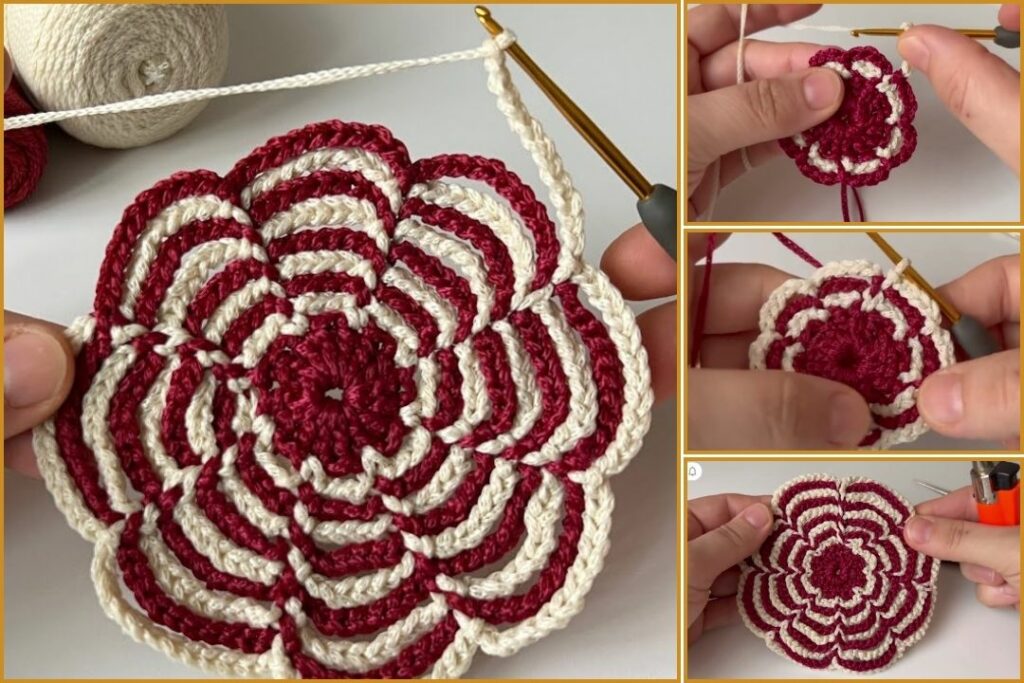
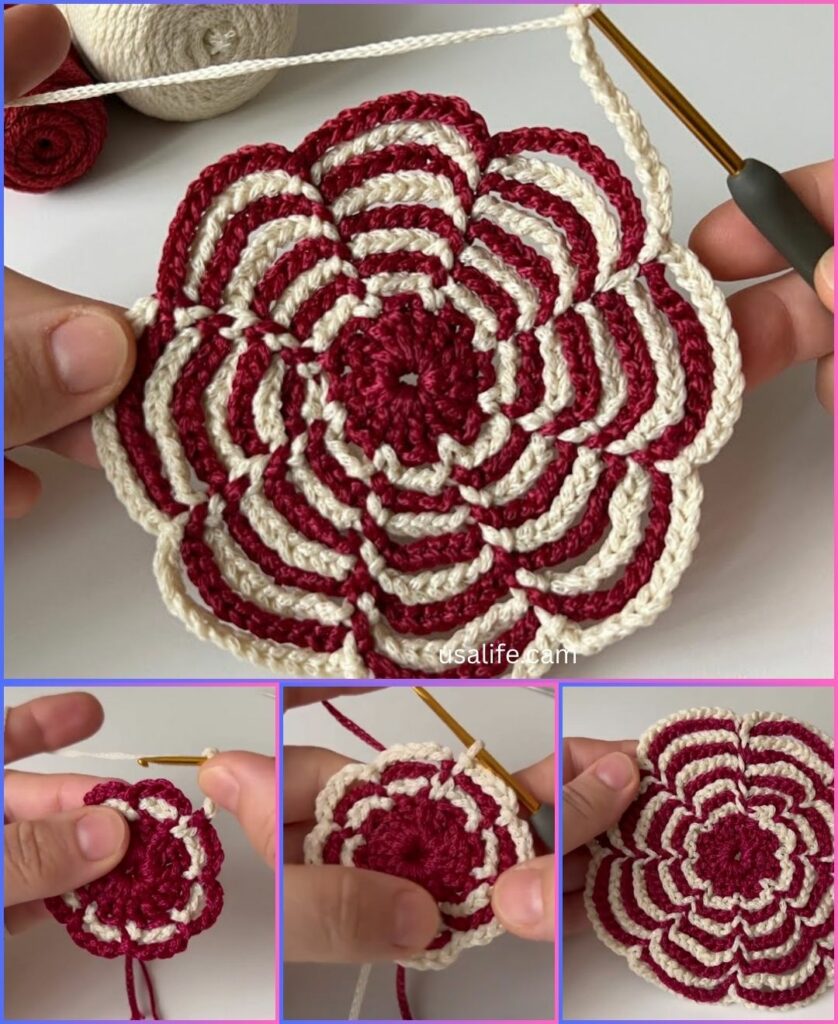
This detailed tutorial will guide you through making a circular coaster supla, often worked in rounds to achieve a flat, sturdy piece. We’ll use basic stitches, gradually increasing the size.
How to Crochet a Coaster Supla (Placemat)
This pattern creates a circular placemat, growing from the center outwards.
1. Essential Materials You’ll Need
- Yarn:
- Fiber: 100% Cotton Yarn is highly recommended for its durability, absorbency, heat resistance, and ease of cleaning. A cotton blend (e.g., 80% cotton/20% polyester) can also work. Avoid acrylic if you plan to place hot dishes on it, as acrylic can melt.
- Weight: Worsted Weight (Aran / Medium / 4) is a good standard choice. For a stiffer, more substantial supla, you could even use a thicker yarn like Bulky (Chunky / 5), but be prepared for a larger hook and faster work-up.
- Color(s): Choose a color that complements your dining decor. You can use one solid color, or change colors every few rounds for a striped effect.
- Quantity: For a single supla (approx. 13-15 inches / 33-38 cm diameter), you’ll need approximately 150-250 yards (135-230 meters) of worsted weight cotton yarn, depending on your tension and hook size.
- Crochet Hook:
- For Worsted Weight yarn, a 5.0mm (US H/8) or 5.5mm (US I/9) hook.
- For Bulky Weight yarn, a 6.0mm (US J/10) or 7.0mm (US K/10.5) hook.
- The goal is to achieve a firm, consistent tension so the supla lies flat and is sturdy. If your work looks loose or flimsy, try a smaller hook. If it’s cupping significantly, your tension might be too tight, or you need to adjust your increases (see “Tips” below).
- Scissors: For cutting yarn.
- Yarn Needle (Tapestry Needle): Essential for weaving in ends.
- Optional: Stitch marker (helpful for marking the beginning of rounds).
2. Basic Crochet Stitches You’ll Use
This pattern uses common crochet stitches, suitable for beginners comfortable with working in the round.
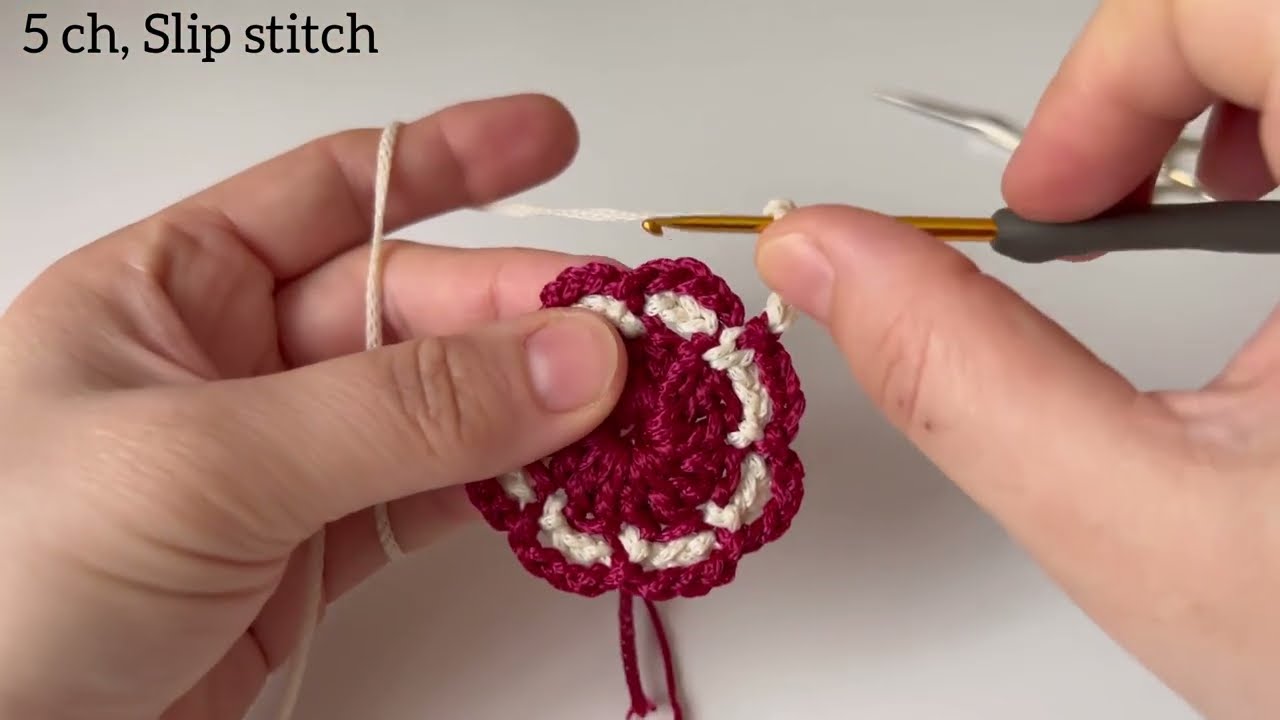
- Chain (ch): To begin and create spaces.
- Slip Stitch (sl st): For joining rounds.
- Single Crochet (sc): Creates a dense, sturdy fabric, good for edges or a very firm supla.
- Half Double Crochet (hdc): A medium-height stitch, creates a slightly more open fabric than sc.
- Double Crochet (dc): A taller stitch, works up quickly and creates a good drape. (This is the primary stitch for this pattern).
- Magic Ring (MR): (Also known as Magic Circle or Adjustable Ring). The best way to start the center for a tight, hole-free beginning. An alternative chain method is also provided.
The Circular Coaster Supla Pattern (Using Double Crochet)
This pattern grows in continuous rounds, with increases in each round to keep the circle flat.
Abbreviations (US Crochet Terms):
- ch: chain
- sl st: slip stitch
- sc: single crochet
- hdc: half double crochet
- dc: double crochet
- MR: magic ring
- inc: increase (work 2 stitches in the same stitch)
- st(s): stitch(es)
- sp: space
- *: repeat instructions between asterisks

Start (Choose ONE method for your center):
- Method A: Magic Ring (Recommended for a tighter center)
- Create a Magic Ring (MR).
- Ch 3 (counts as your first dc).
- Work 11 dc into the Magic Ring.
- Gently pull the yarn tail to close the center hole tightly.
- Join with a sl st to the top of the starting Ch 3. (12 dc)
- Method B: Chain Method (Easier for Beginners)
- Ch 4.
- Join with a sl st to the first chain to form a ring.
- Ch 3 (counts as your first dc).
- Work 11 dc into the center of the ring.
- Join with a sl st to the top of the starting Ch 3. (12 dc)
Working the Rounds (Continuing with the same color, or changing colors at the start of each new round):
Round 1: Ch 3 (counts as 1 dc). Work 1 dc in the same stitch as the ch 3. Work 2 dc in each st around (this is an “increase” in every stitch). Join with a sl st to the top of the starting Ch 3. (24 dc)
Round 2: Ch 3. Work 1 dc in the same stitch as the ch 3. Work 1 dc in the next st. *Work 2 dc in the next st (inc), 1 dc in the next st.* Repeat from * to * 10 more times. Join with a sl st to the top of the starting Ch 3. (36 dc)
Round 3: Ch 3. Work 1 dc in the same stitch as the ch 3. Work 1 dc in each of the next 2 sts. *Work 2 dc in the next st (inc), 1 dc in each of the next 2 sts.* Repeat from * to * 10 more times. Join with a sl st to the top of the starting Ch 3. (48 dc)
Round 4: Ch 3. Work 1 dc in the same stitch as the ch 3. Work 1 dc in each of the next 3 sts. *Work 2 dc in the next st (inc), 1 dc in each of the next 3 sts.* Repeat from * to * 10 more times. Join with a sl st to the top of the starting Ch 3. (60 dc)
Round 5: Ch 3. Work 1 dc in the same stitch as the ch 3. Work 1 dc in each of the next 4 sts. *Work 2 dc in the next st (inc), 1 dc in each of the next 4 sts.* Repeat from * to * 10 more times. Join with a sl st to the top of the starting Ch 3. (72 dc)
Continuing the Pattern for Larger Sizes:
The pattern for increasing a flat circle made of double crochet is to increase by 12 stitches evenly in each round. The number of single stitches between increases goes up by one each round.
- Round X: Ch 3. Work 1 dc in the same st as ch 3. Work 1 dc in each of the next (X-1) sts. *Work 2 dc in the next st (inc), 1 dc in each of the next (X-1) sts.* Repeat from * to * 10 more times. Join with a sl st to the top of the starting Ch 3.
Continue this pattern until your supla reaches your desired diameter (typically 13-15 inches / 33-38 cm for a placemat, or even larger for a charger plate).
Example progression of stitches between increases:
- Round 1: Inc in every st (0 sts between inc)
- Round 2: 1 dc, Inc (1 st between inc)
- Round 3: 2 dc, Inc (2 sts between inc)
- Round 4: 3 dc, Inc (3 sts between inc)
- Round 5: 4 dc, Inc (4 sts between inc)
- …and so on.

Finishing Your Coaster Supla
- Fasten Off: Once your supla reaches the desired size, cut your yarn, leaving a tail of about 6-8 inches (15-20 cm). Pull the tail completely through the loop on your hook and pull tight to secure.
- Weave in All Ends: This is crucial for a neat and durable supla, especially since it will be used on a table. Use your yarn needle to carefully weave in all the yarn tails (from your starting point and any color changes) securely into the stitches.
- Blocking (Highly Recommended): Blocking is key for any flat crochet piece like a supla to ensure it lays perfectly flat and looks professional.
- Gently wet your entire supla (you can spray it or immerse it in cool water).
- Carefully squeeze out excess water (do not wring!).
- Lay it flat on a clean towel or a foam blocking mat. Gently stretch and shape the supla into a perfect circle, making sure it lies completely flat without any ripples or cupping. Use rust-proof pins to hold the edges in place if needed.
- Allow it to air dry completely. Blocking will even out your stitches and give the supla a polished, flat appearance.
Tips for Making a Perfect Coaster Supla
- Consistent Tension: This is the most important factor for a flat circle. If your supla starts to “cup” (curl up like a bowl), your tension might be too tight, or you might need to add a few extra increases in a round. If it starts to “ripple” or “frill” (become wavy), you might have too many increases, or your tension might be too loose.
- Counting Stitches: Always count your stitches at the end of each round to ensure you have the correct number. This prevents errors that can cause cupping or rippling.
- Hiding Increases: To make your increases less noticeable, you can occasionally shift the placement of your “inc” stitch. Instead of always placing it in the exact same spot relative to the previous increase, you can offset it slightly. For example, in a round of “X dc, inc,” you could sometimes do “inc, X dc” or “X/2 dc, inc, X/2 dc.” This helps distribute the bulk.
- Experiment with Borders: Once your main supla is done, you can add a decorative border. A round of single crochet, a shell stitch border, or even a picot edge can add a beautiful finish.
- Care for Cotton: Cotton is generally machine washable and dryable (cold water, low heat), but always check your specific yarn label for care instructions.
You now have a detailed guide to crochet a beautiful and functional coaster supla! Enjoy creating these elegant additions to your table setting.