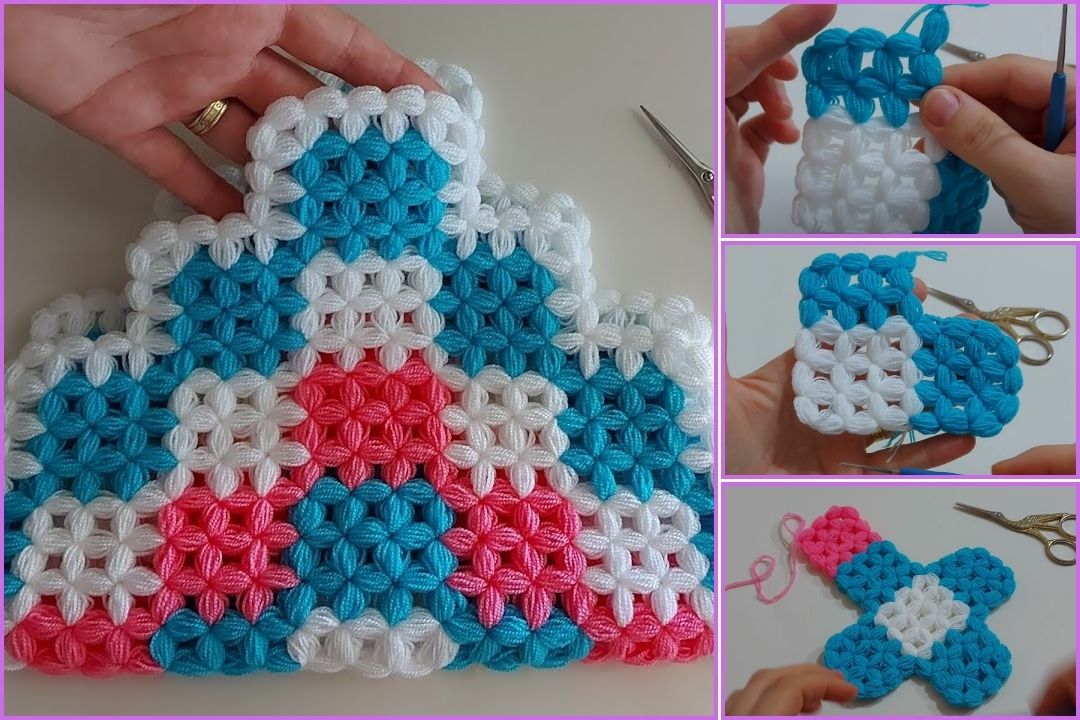
You’re looking to create a beautiful Puff Stitch Baby Blanket! That’s a fantastic choice, especially for a baby, as the puff stitch creates a wonderfully squishy, textured, and warm fabric. While it looks impressive, the puff stitch is actually quite repetitive and easy to master for beginners once you get the hang of it. And for Phnom Penh’s climate, a 100% cotton yarn or a soft cotton blend would be ideal, offering breathability alongside that lovely texture.
This tutorial will guide you through making a baby blanket using the puff stitch, perfect for beginners.
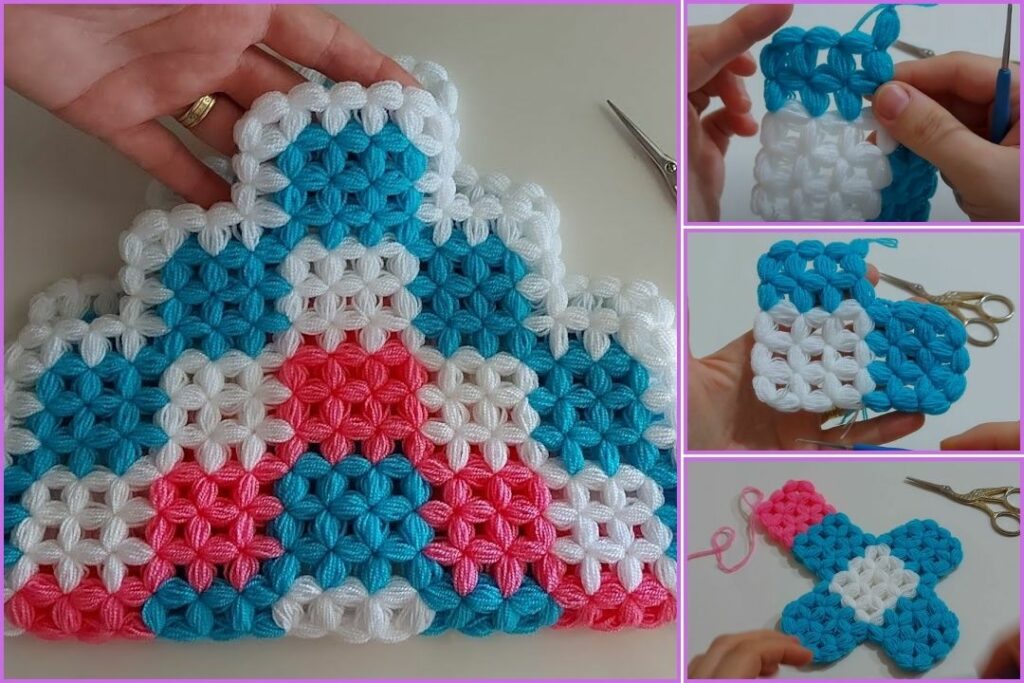
How to Crochet a Puff Stitch Baby Blanket for Beginners
This pattern creates a wonderfully textured, soft, and warm blanket by working rows of puff stitches, separated by single crochet rows to help them stand out.
1. Essential Materials You’ll Need
- Yarn:
- Fiber: Choose 100% Cotton, a Cotton Blend, or a soft, premium Acrylic Yarn. Look for yarn specifically labeled “baby yarn” or that feels incredibly soft and has good drape. The puff stitch really shines with a yarn that has some body but isn’t too stiff.
- Weight: Worsted Weight (Aran / Medium / Category 4) is highly recommended. It creates a good-sized puff stitch and works up at a reasonable pace.
- Colors: You can use one solid color for a sophisticated, textured look, or introduce 2-4 (or more!) colors for cheerful stripes. Pastels, brights, or modern neutrals all look wonderful with the puff stitch.
- Quantity: For a standard baby blanket size (approx. 30×35 inches or 75×90 cm), you’ll typically need around 900 to 1200 yards (approximately 820-1100 meters) of Worsted Weight yarn. If using multiple colors for stripes, ensure you have enough yardage for each chosen color.
- Crochet Hook: A 5.5mm (US I/9) or 6.0mm (US J/10) hook.
- Always check your yarn label for the recommended hook size, but don’t be afraid to go up half a size. The puff stitch tends to draw in fabric, so a slightly larger hook than you’d typically use for double crochet with the same yarn can help your blanket stay flexible and prevent it from becoming too stiff.
- Scissors: For cutting your yarn.
- Yarn Needle (Tapestry Needle): This is essential for neatly weaving in all your yarn ends at the beginning, end, and whenever you change colors.

2. Basic Crochet Stitches You’ll Use & The Puff Stitch Tutorial
This pattern uses fundamental crochet stitches, plus the star of the show: the puff stitch!
- Chain (ch): Used to create your starting foundation row and as a “turning chain” at the beginning of each new row.
- Single Crochet (sc): Used in between the puff stitch rows to help define them and keep the fabric stable.
- Puff Stitch (Puff st): This is the special stitch that creates the lovely texture.How to Make a Puff Stitch (Puff st):
- Yarn over (YO).
- Insert your hook into the indicated stitch.
- YO, pull up a loop. (You now have 3 loops on your hook).
- YO, insert your hook into the same stitch.
- YO, pull up a loop. (You now have 5 loops on your hook).
- YO, insert your hook into the same stitch.
- YO, pull up a loop. (You now have 7 loops on your hook).
- YO, pull through all 7 loops on your hook.
- Ch 1 to close the puff stitch. (This chain-1 secures the puff and counts as part of the stitch for spacing in the pattern).
The Puff Stitch Baby Blanket Pattern
This pattern creates a wonderfully squishy and textured blanket by alternating rows of single crochet and puff stitches.
Abbreviations (US Crochet Terms):
- ch: chain
- sc: single crochet
- Puff st: puff stitch (as described above)
- st(s): stitch(es)
- ea: each
- sk: skip

Step 1: Determine Your Blanket Width and Create Your Starting Chain
The number of chains you start with will determine the width of your finished blanket. The puff stitch pattern requires a specific multiple for the starting chain.
- For a standard baby blanket width (approx. 30 inches / 75 cm):
- Using Worsted Weight (4) yarn and a 5.5mm (I/9) or 6.0mm (J/10) hook, you will chain 100 stitches.
- This chain count is a multiple of 2 + 2, which fits the pattern repeat. You can adjust this chain count to make your blanket wider or narrower, just ensure it’s an even number (or a multiple of 2 plus 2 if you prefer).
Instructions (Using your chosen main blanket color):
- Foundation Chain: Ch 100. (Count carefully! It’s worth double-checking your chain count before moving on to the first row).
Step 2: Crocheting the Main Body of the Blanket
You will alternate rows of single crochet (for stability) and puff stitches (for texture).
- Row 1 (Single Crochet Row):
- Work 1 sc into the 2nd chain from your hook.
- Work 1 sc into each remaining chain all the way across your foundation chain.
- You should have 99 sc stitches.
- Ch 1 (does NOT count as a stitch) and turn your work.
- If you’re planning to change colors here for stripes: Fasten off current yarn (leaving a 6-inch tail). Attach your new color by making a slip stitch (sl st) into the first sc of the row. Then, ch 1 with your new color and turn your work.
- Row 2 (Puff Stitch Row):
- Work 1 sc into the first sc of the previous row.
- * Sk 1 st, then work 1 Puff st into the next st (the puff stitch should be worked into the single crochet stitch from the previous row).
- Sk 1 st, then work 1 Puff st into the next st.* Repeat from * to * across the row until you have 2 stitches remaining.
- Work 1 sc into the very last st.
- You should have a total of 49 Puff stitches and 2 sc stitches.
- Ch 1 (does NOT count as a stitch) and turn your work.
- If changing colors: Fasten off current yarn. Attach new color with a sl st into the first sc of the row, then ch 1 with new color and turn your work.
- Row 3 (Single Crochet Row):
- Work 1 sc into the first sc of the previous row.
- Work 1 sc into the top of the first Puff st (this is the chain-1 you made to close the puff).
- Work 1 sc into the sc stitch you worked in between the Puff stitches.
- Continue working 1 sc into the top of each Puff st and 1 sc into each sc stitch from the previous row, all the way across.
- Work your last sc into the final sc stitch of the row.
- You should have 99 sc stitches again.
- Ch 1 (does NOT count as a stitch) and turn your work.
- If changing colors: Fasten off current yarn. Attach new color with a sl st into the first sc of the row, then ch 1 with new color and turn your work.
- Repeat Rows 2 and 3: Continue alternating Row 2 (Puff Stitch Row) and Row 3 (Single Crochet Row) until your blanket reaches your desired length.
- A common finished length for a baby blanket is around 35-40 inches (90-100 cm). You can measure as you go!
- If you’re making stripes: A popular choice is to change colors after every 2-4 rows (or after every 1-2 Puff Stitch + Single Crochet pairs) for a classic striped look.

Step 3: Finishing Your Baby Blanket
Once your blanket reaches the desired size, it’s time to complete it with a neat finish.
- Fasten Off: After completing your very last row (ideally ending on a Row 3/Single Crochet Row for a clean edge), cut your yarn, leaving a tail of about 6-8 inches (15-20 cm). Pull this tail completely through the loop that is still on your hook and pull it tight to secure the last stitch.
- Weave in All Ends: This is an absolutely crucial step for a professional-looking and durable blanket. Use your yarn needle to carefully weave in every single yarn tail – from your starting chain, from fastening off, and from all your color changes. Hide them securely within the stitches of your blanket, making sure they won’t unravel with use or washing.
- Optional: Add a Border (Highly Recommended for a Polished Look):
- A simple border can give your blanket a beautifully finished edge and a more substantial feel. A single crochet (sc) border is easy and effective for beginners.
- Join yarn (either your main blanket color or a contrasting color) with a slip stitch (sl st) into any corner stitch of your blanket.
- Round 1 (Border):Ch 1 (this chain does NOT count as a stitch).
- Work single crochet stitches evenly around the entire perimeter of the blanket.
- When you reach a corner, work (2 sc, ch 2, 2 sc) into that corner stitch/space. This helps the corner turn neatly without puckering.
- Along the sides of the blanket (where you’re working into the ends of your rows), work approximately 1 sc into the side of each sc row, and 2 sc into the side of each Puff st row to create an even edge. Adjust slightly if needed to keep it flat.
- After working all the way around the blanket, join with a sl st to the top of the first sc you made in this border round.
- Optional Round 2 (For a Thicker Border): If you desire an even more substantial border, you can add another round. Ch 1. Work 1 sc in each sc stitch around, remembering to work (2 sc, ch 2, 2 sc) in each corner’s ch-2 space. Join with a sl st.
- Fasten off your yarn after your final border round and weave in any remaining ends.
- Blocking (Optional but Recommended):
- Blocking is a finishing technique that can make a significant difference in your blanket’s appearance and drape. It helps puff stitches pop and the blanket lay flat.
- Gently wet your entire blanket (you can spray it lightly with water or immerse it in cool water for a few minutes).
- Carefully squeeze out any excess water (do NOT wring or twist the blanket, as this can stretch or damage the stitches!).
- Lay the blanket flat on a clean towel, a foam blocking mat, or even a dry bedsheet. Gently stretch and shape it to the correct dimensions, ensuring all edges are straight and the corners are square. If you have rust-proof pins, you can use them to gently pin the blanket in place to maintain its shape while it dries.
- Allow the blanket to air dry completely. Blocking helps to even out your stitches, relax the yarn fibers, and gives your blanket a beautifully polished drape and shape.
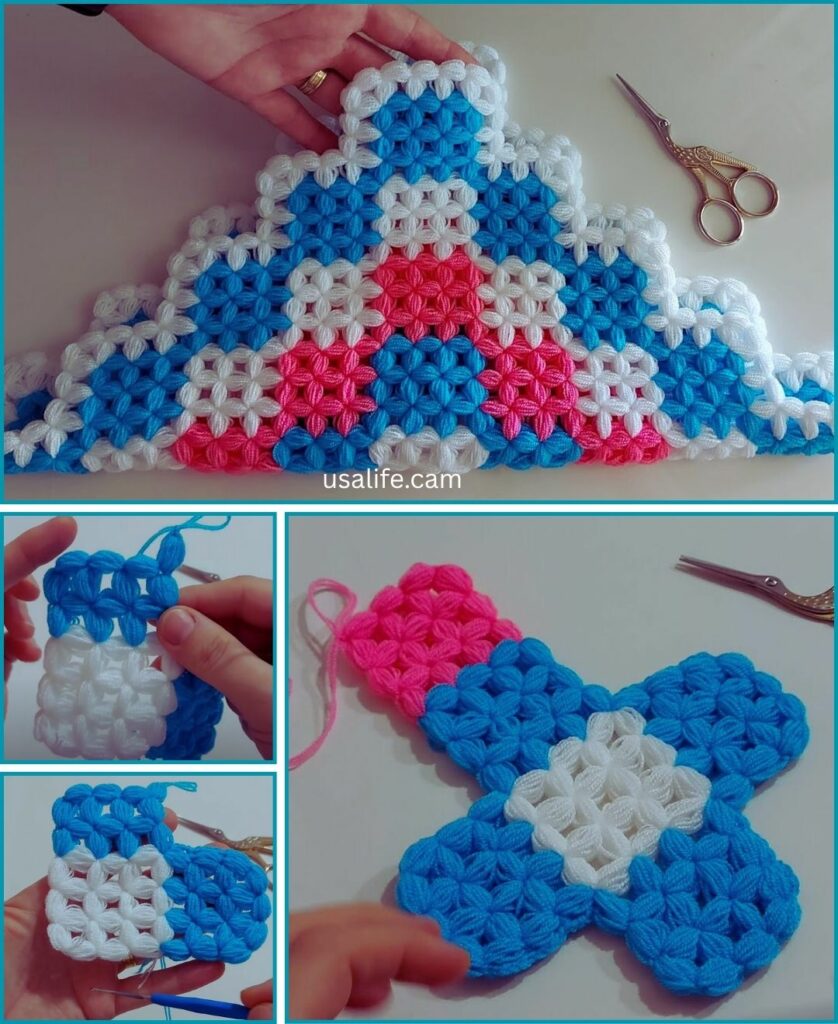
Key Tips for Beginner Puff Stitch Blanket Crocheters
- Puff Stitch Tension: The key to great puff stitches is to pull up your loops to a consistent height. If they’re too short, the puff will be small; too long, it will be floppy. Experiment to find a height that looks good to you.
- Counting Your Stitches: It’s a good habit to count your stitches, especially the single crochet rows, to ensure your blanket maintains its width.
- Don’t Skip the Chain 1: Remember that after each puff stitch, you chain 1 to close the stitch. This chain-1 is important for the structure and spacing of the puff stitch.
- Straight Edges: Even with puff stitches, consistent single crochet stitches on the ends of your rows (when you work the sc row) and making sure you get the last stitch correctly will help maintain straight edges.
- Relax and Enjoy! The puff stitch can feel a bit fiddly at first, but it quickly becomes rhythmic. Don’t be afraid to pull out stitches (“frogging”) if you make a mistake. It’s all part of the learning process.
- Washing Instructions: If you’re making this blanket as a gift, always include a small tag with washing instructions for the specific yarn you used (e.g., “Machine wash cold, tumble dry low” or “Hand wash, lay flat to dry”).
You now have a comprehensive guide to crochet a beautiful and luxuriously textured Puff Stitch Baby Blanket! This project is a fantastic way to expand your crochet skills, and the finished blanket will undoubtedly be a treasured item.
