by
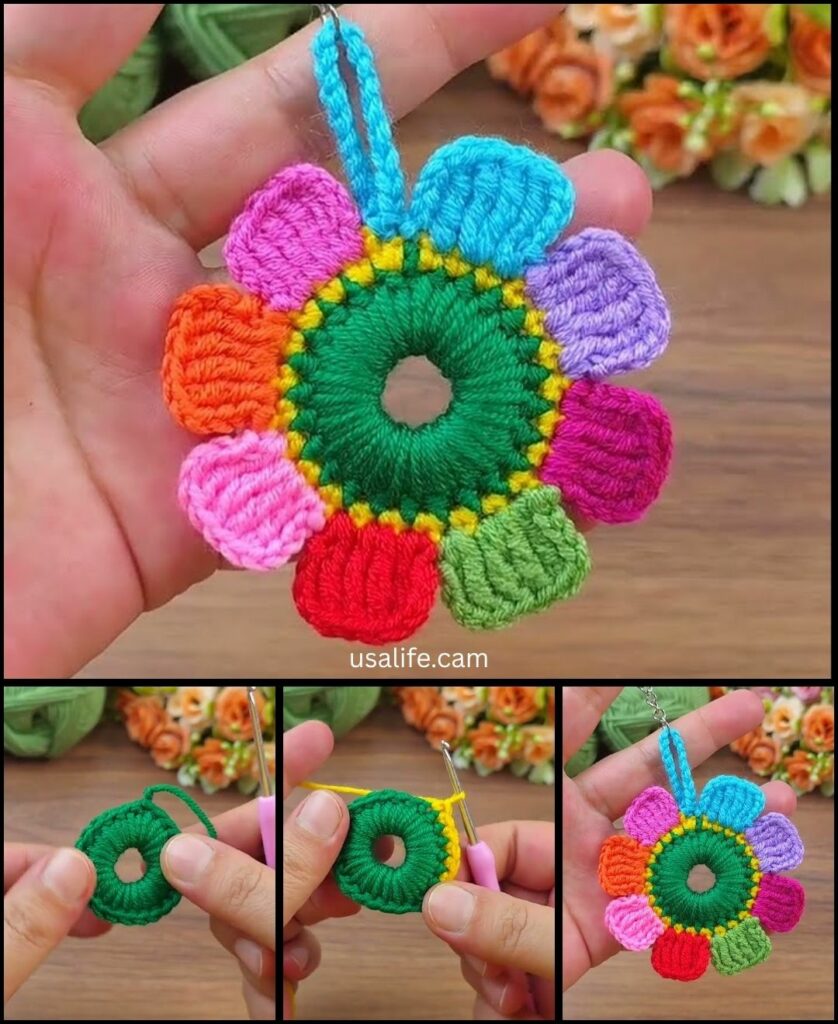
by Crocheting a cute flower keychain is a fantastic project for beginners! It’s quick, uses very little yarn, and lets you learn some fundamental stitches while creating a beautiful decorative piece. The skills you learn making a flower can be applied to many other projects, from blankets to hats to bags.
Since you’re in a warm place like Phnom Penh, 100% cotton yarn or a smooth acrylic yarn would be great choices. Cotton gives a very crisp, defined look to the petals, while acrylic is widely available and comes in every color imaginable.
How to Crochet a Cute Flower Keychain: A New Pattern for Beginners
This pattern creates a lovely, textured flower that is perfect for a keychain. It looks more complicated than it is, making it a great project to impress yourself and others!
1. Essential Materials You’ll Need
- Yarn:
- Petal Color (PC): For the petals of the flower. Worsted Weight (Aran / Medium / Category 4) is a good standard.
- Center Color (CC): For the center of the flower. Worsted Weight, matching PC.
- Quantity: You’ll only need a few grams of each color. This is a perfect project for using up yarn scraps!
- Crochet Hook:
- A 4.0mm (US G/6) or 4.5mm (US 7) hook. Choose a hook size that feels comfortable with your yarn and makes a fabric that isn’t too tight or too loose.
- Scissors: For cutting yarn.
- Yarn Needle (Tapestry Needle): Essential for weaving in ends and securing the layers.
- Key Ring/Split Ring: The key component that makes it a keychain!
2. Basic Crochet Stitches You’ll Use
This pattern uses just a handful of very common stitches:
- Magic Ring (MR) / Adjustable Ring: (Highly Recommended!) Creates a tight, neat center for your flower.
- Chain (ch): For foundation and spacing.
- Slip Stitch (sl st):: For joining and moving across stitches.
- Double Crochet (dc): A taller stitch, perfect for forming the petals.
- Fasten Off: Securely ending your work.
- Weaving in Ends: Hiding yarn tails for a neat finish.
Crochet Flower Keychain Pattern
This pattern is a step-by-step guide to making a lovely multi-layered flower.
Abbreviations (US Crochet Terms):
- CC: Center Color
- PC: Petal Color
- MR: Magic Ring
- ch: chain
- sl st: slip stitch
- dc: double crochet
- st(s): stitch(es)
(...): work stitches into the same stitch or space[...]: repeat instructions in brackets- FO: Fasten off
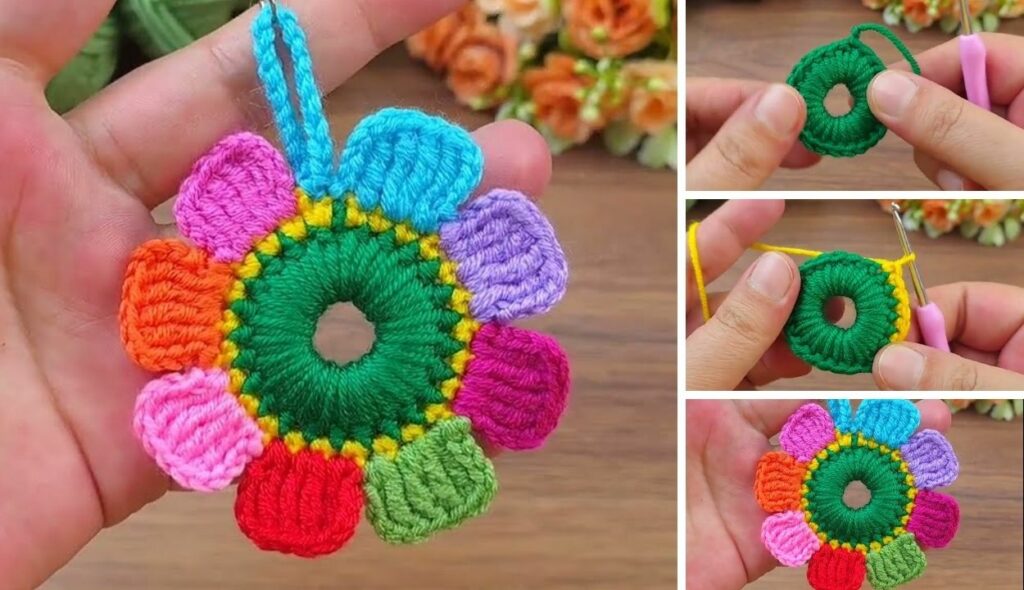
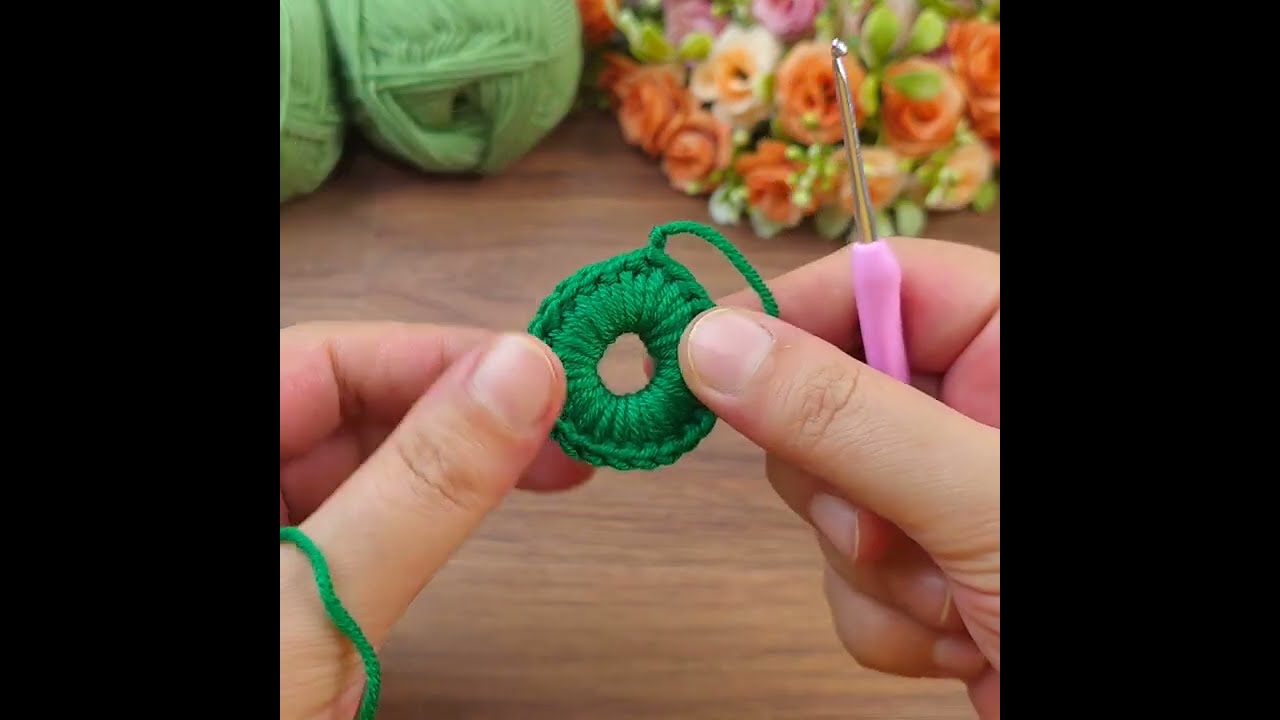
Part 1: The Flower Center & Petals
- Start (Center): With CC, create a Magic Ring (MR).
- (Alternatively: Ch 4, then sl st to join into the 1st ch to form a ring.)
- Round 1: Ch 1 (does not count as a stitch). Work 8 sc into the MR. Join with a sl st to the first sc. (8 sc)
- FO CC, leaving a small tail for weaving in.
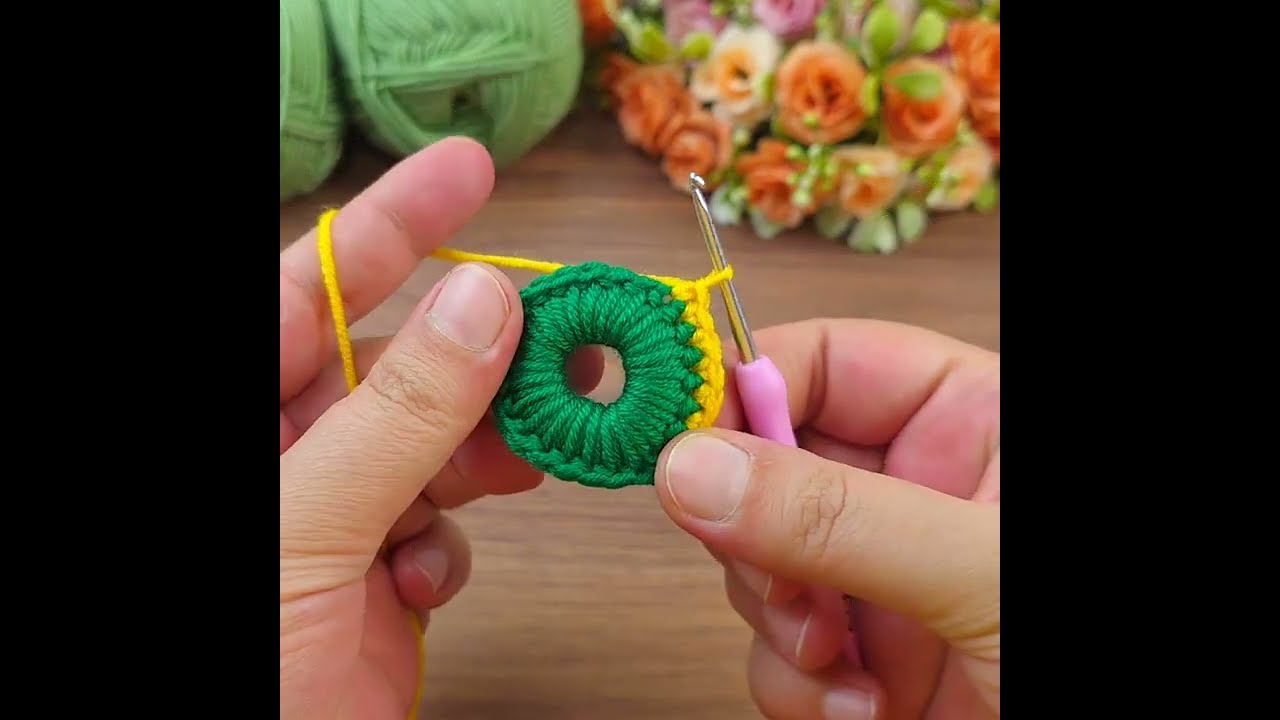
- Round 2 (Petals):
- Join PC with a sl st into any sc stitch from Round 1.
*Ch 2 (does not count as st). Work (2 dc) into the same stitch. Sl st into the next stitch.*- Repeat from
*to*7 more times. You will have 8 petals. - After the last petal, sl st to the very first sl st you made to join the round.
- FO PC, leaving a long tail for weaving in or sewing the flower to something.
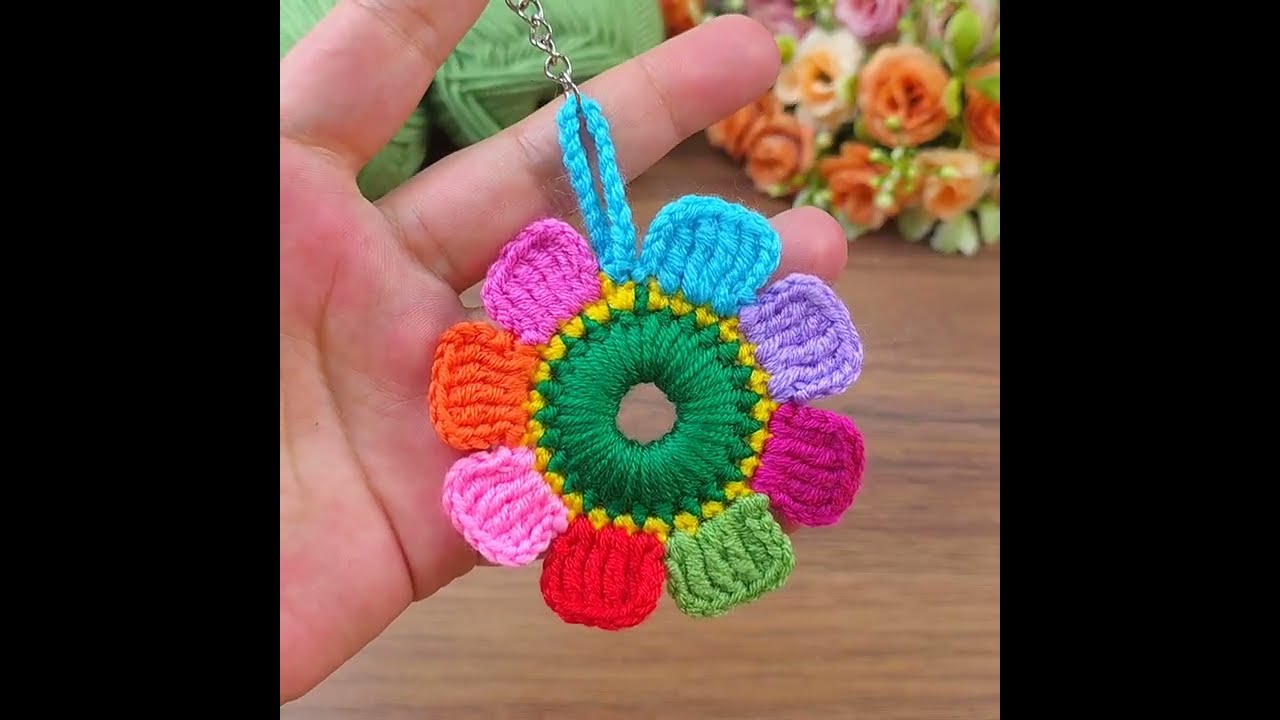
Part 2: Finishing and Attaching the Keychain
- Weave in All Ends NEATLY: This is crucial for a professional look. Use your yarn needle to carefully weave in every single yarn tail on the back of the flower.
- Attach the Key Ring:
- Use your yarn needle to thread the long tail from your PC through a few stitches on the back of your flower.
- Loop the yarn through your key ring and back into the flower.
- Securely stitch the yarn to the flower’s back, making sure the key ring is firmly attached.
- Knot the yarn and weave in the remaining tail.
- Use Your Keychain: Now you have a beautiful, textured flower keychain! You can use it to accessorize your keys, bag, or backpack.
Tips for Customizing Your Crochet Flower Keychain
- Different Colors: Use a contrasting color for the center and petals for a bold look. A light color for the center and a dark color for the petals makes the center pop.
- Size Adjustment:
- Larger Flower: Add more stitches to your starting Magic Ring (e.g., 10 or 12 sc), and then adjust the number of stitches you work into for each petal to make more petals. You can also add more stitches within each petal (e.g.,
ch 2, 3 dc, sl st). - Smaller Flower: Start with fewer stitches (e.g., 6 sc in the center).
- Larger Flower: Add more stitches to your starting Magic Ring (e.g., 10 or 12 sc), and then adjust the number of stitches you work into for each petal to make more petals. You can also add more stitches within each petal (e.g.,
- Stitch Variety: Instead of
dc, experiment withhdcfor flatter, smaller petals ortrfor taller, more dramatic petals. - Embellishments: Sew a decorative button or a bead to the center of the flower for extra flair.
- A New “New” Pattern: Once you’re comfortable with this pattern, try creating your own! Start with a center and a first petal layer. Then, instead of working into the stitches from the first round, try working into the back loops only of your first petal layer stitches to create a new surface to crochet a third layer of petals. The possibilities are endless!