 by
by Crocheting a bikini top, even as a complete beginner, is totally achievable and incredibly rewarding! It’s a fantastic way to make something stylish and personalized. Since you’re in Phnom Penh where it’s warm, choosing the right yarn is super important.
100% cotton yarn is the absolute best choice for swimwear. Here’s why:
- Breathable: Cotton is naturally airy, keeping you comfortable in the heat.
- Absorbent: It soaks up water well, making it practical for swimming.
- Durable: It holds up beautifully to wear and washing, which is essential for swimwear.
- Soft: Most cotton yarns feel lovely against your skin.
- Less Stretch: Unlike acrylic, cotton won’t stretch out too much when wet, helping your top keep its shape.
Avoid acrylic yarns for swimwear if you can, as they don’t breathe well, can get heavy when wet, and tend to lose their shape over time.

How to Crochet a Simple Triangle Bikini Top for Complete Beginners
This pattern is designed to be as straightforward as possible, focusing on a classic triangle-style bikini top. We’ll make two identical cups, then add the neck and back straps. This guide is for an adult small/medium size, with tips on how to adjust for other sizes.
1. Essential Materials You’ll Need
- Yarn:
- 100% Cotton Yarn (DK/Light Worsted Weight or Worsted Weight): About 100-150g, depending on the size and your tension. Pick a fun, vibrant color or two!
- Crochet Hook:
- A 3.5mm (US E/4) or 4.0mm (US G/6) hook. A smaller hook creates a denser fabric, which is great for swimwear as it provides more coverage and helps the top hold its shape when wet.
- Scissors: For cutting your yarn.
- Yarn Needle (Tapestry Needle): Absolutely essential for weaving in all those loose ends.
- Stitch Markers (Optional but Highly Recommended!): These are incredibly helpful for marking the center increase stitch on your cups, especially when you’re just starting out.
2. Basic Crochet Stitches You’ll Use
This pattern uses just a few fundamental crochet stitches. If you can do these, you can make this bikini top!
- Chain (ch): The very first step in most crochet projects.
- Slip Stitch (sl st): Used for joining rows and making things neat.
- Single Crochet (sc): Creates a dense, sturdy fabric.
- Half Double Crochet (hdc): A medium-height stitch that works up relatively quickly and offers good coverage for the cups.
- Working in Rows: You’ll crochet back and forth in rows to build the cup shape.
- Fasten Off: The way you secure your work so it doesn’t unravel.
- Weaving in Ends: Hiding those yarn tails for a clean, professional finish.
Crochet Beginner Bikini Top Pattern (Adult Small/Medium)
This pattern makes two identical triangle cups, then adds the neck and back ties.
Abbreviations (US Crochet Terms):
- ch: chain
- sl st: slip stitch
- sc: single crochet
- hdc: half double crochet
- st(s): stitch(es)
(...): work stitches into the same stitch or space
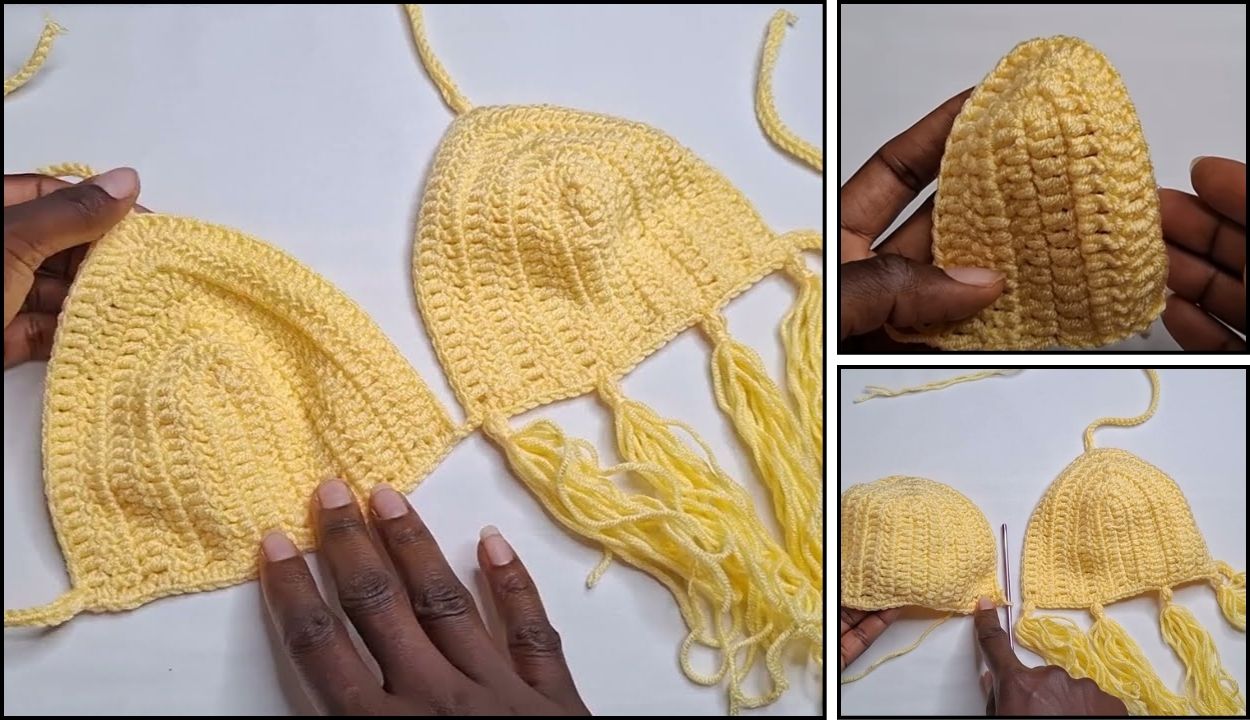
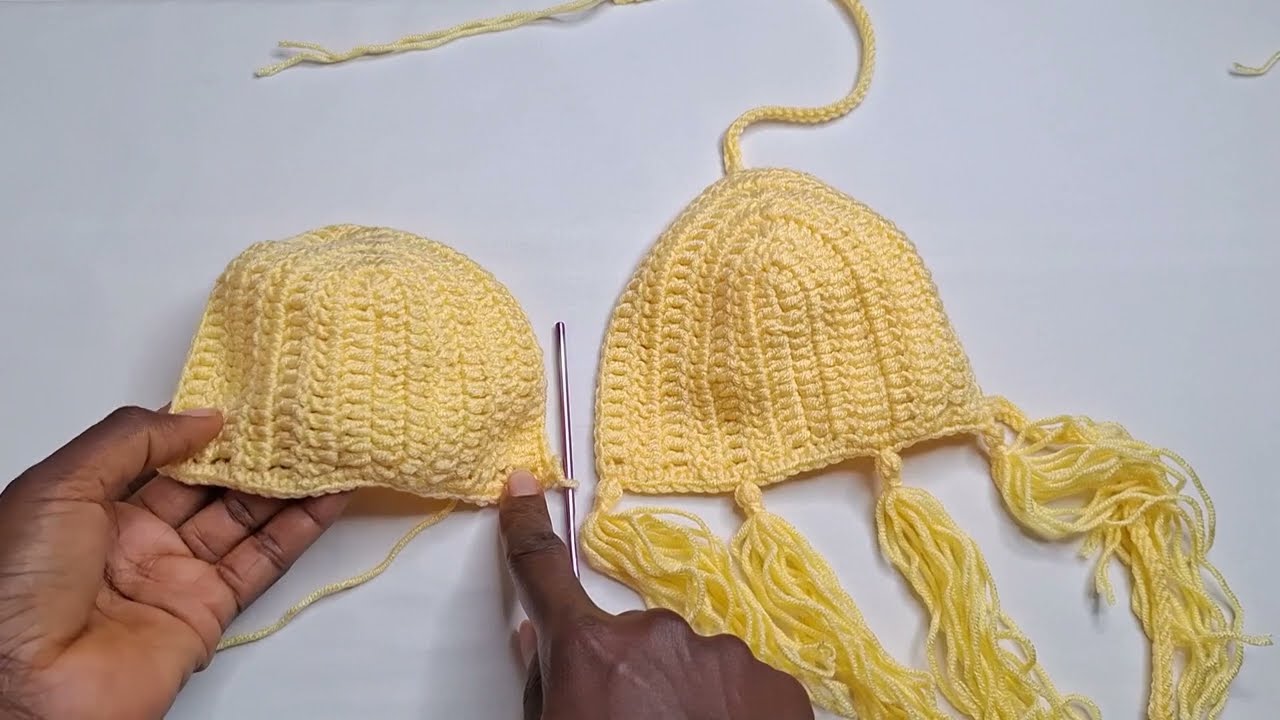
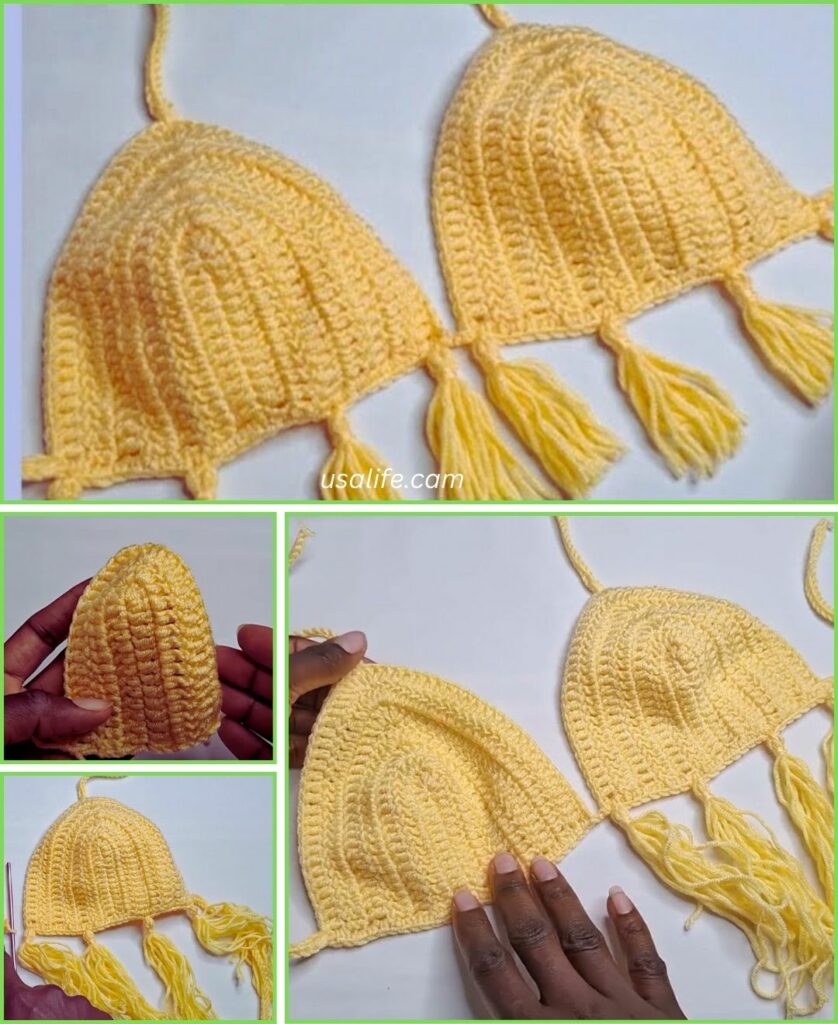
Part 1: Crocheting One Bikini Cup (Make 2 Identical Cups)
Each cup is worked in rows, increasing at the center top to form the classic triangle shape.
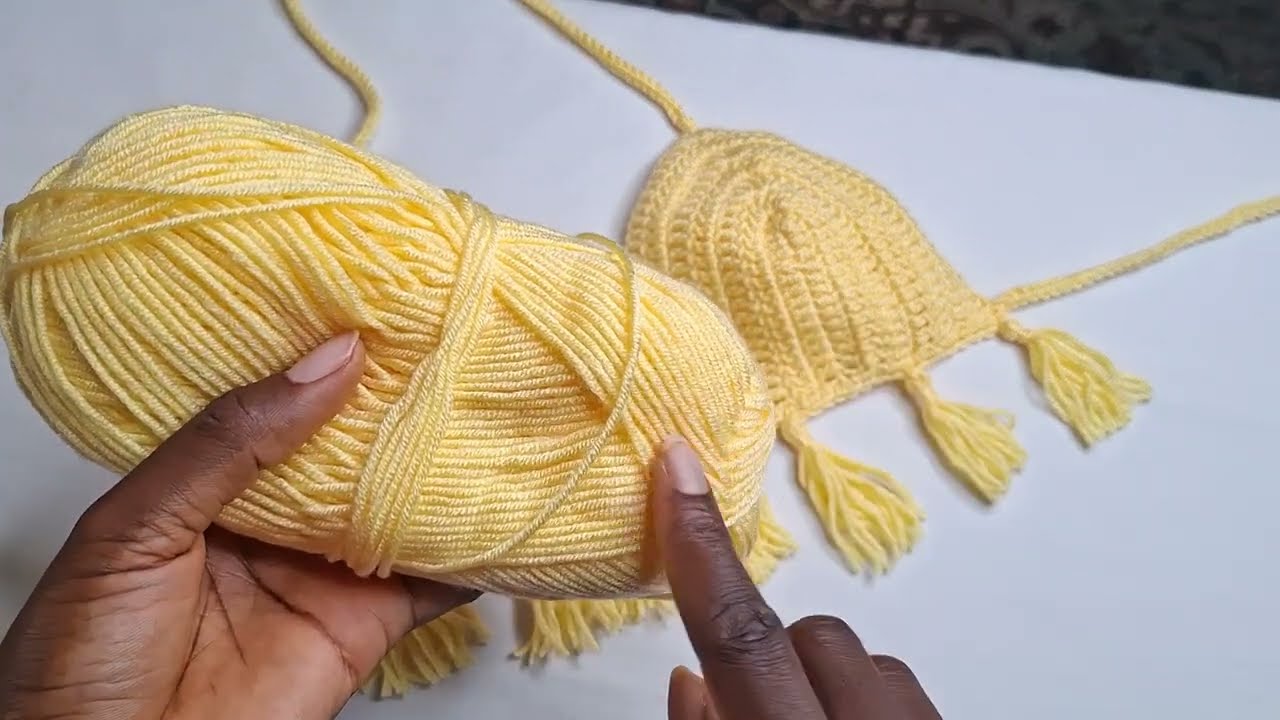
- Foundation Chain: Ch 16. (This chain length determines the width/height of your cup. For a slightly larger cup, add 2-4 more chains; for a smaller cup, remove 2-4 chains).
- Row 1: Hdc in the 3rd ch from hook (the first 2 ch count as a ch-2 for turning, but we’re ignoring that for the hdc count). Hdc in each ch across until you reach the last chain. In that last chain, work (2 hdc, ch 2, 2 hdc). Now, working down the opposite side of your foundation chain (into the unused loops), hdc in each st across. (You’ll end up with 2 hdc in the very first chain of your original row).
- Place a stitch marker in the ch-2 space you just created at the very top point of the cup. This is where your increases will always happen.
- Row 2: Ch 2 (this counts as your first hdc of the row), turn your work. Hdc in each st across until you reach the ch-2 space (where your stitch marker is). In the ch-2 space, work (2 hdc, ch 2, 2 hdc). Hdc in each remaining st across, making sure to work into the top of the turning chain from the previous row if it was used as a stitch.
- Move your stitch marker to the new ch-2 space.
- Repeat Row 2 for a total of 8-10 rows, or until your cup reaches the desired size for coverage.
- For a slightly larger size, you might do 11-13 rows.
- For a very small cup, 6-7 rows might be enough.
- Remember, cotton will stretch slightly when wet, so err on the side of making the cup slightly smaller than you think you need.
- Fasten off, leaving a tail of about 6 inches (15 cm) for weaving in.
- Repeat steps 1-5 to make the second identical cup.
Part 2: Edging and Attaching Straps
Now you’ll join the cups (optional) and add the neck and back ties.
- Join the Cups (Optional): If you want a small gap between the cups, skip this step. If you want them slightly closer:
- Take one cup and sl st into the very bottom corner stitch. Ch 1-2 (for a tiny connecting chain). Sl st into the corresponding bottom corner stitch of the second cup.
- Fasten off, weave in ends. This creates a small connector.
- Create the Top Neck Straps (from the center point of each cup):
- Take one cup. Join your yarn with a sl st into the ch-2 space at the very top point of the cup (where your stitch marker is).
- Ch 60-80 (adjust for desired neck strap length and tie allowance).
- Sc in the 2nd ch from hook and in each ch back down the strap. Sl st back into the original ch-2 space on the cup to secure.
- Fasten off, weave in end.
- Repeat for the second cup.
- Create the Bottom Back Straps (from the bottom side of each cup):
- Take one cup. Join your yarn with a sl st into the bottom outer corner stitch of the cup (the corner furthest from where the cups might connect).
- Ch 60-80 (adjust for desired back strap length and tie allowance).
- Sc in the 2nd ch from hook and in each ch back down the strap. Sl st back into the original bottom corner stitch on the cup to secure.
- Fasten off, weave in end.
- Repeat for the remaining bottom corner of the second cup.
- Add a Bottom Band (Optional but Highly Recommended for Stability): This helps stabilize the bottom of the top and keeps the cups aligned.
- Join your yarn with a sl st into the bottom corner stitch of one cup (where a back strap starts).
- Ch 1. Work sc stitches evenly across the entire bottom edge of that cup.
- If you joined the cups with a short chain, sc into that chain.
- Continue working sc stitches evenly across the bottom edge of the second cup.
- Continue working sc stitches evenly across the top edge of the back straps if desired to create a continuous band.
- Join with a sl st to the first sc.
- Fasten off and weave in ends.

Part 3: Finishing Touches
- Weave in ALL Ends NEATLY: This is crucial for a professional look and, more importantly, to prevent unraveling during wear and washing. Use your yarn needle to carefully weave in every single yarn tail securely. Take your time with this step!
- Try On/Check Fit: Try on the top or compare it to a well-fitting bra/swimsuit to ensure a good fit.
- Blocking (Optional): For cotton items, a gentle wet block can help even out stitches and improve the drape.
- Gently wet the bikini top.
- Lay it flat on a towel, gently shaping the cups and straps. You can pin the straps to a blocking mat if you want them perfectly straight.
- Allow it to air dry completely. Blocking helps even out your stitches and gives the top a more finished look.
Tips for Customizing Your Bikini Top
- Sizing Up/Down:
- For cups: Adjust the starting chain length (more chains for wider/taller cups) and the number of rows (more rows for larger cups).
- For straps: Adjust the chain length for ties as needed.
- Stitch Variety: Instead of hdc for the cups, you could use single crochet (sc) for a very dense, firm cup (might require more rows for the same size) or double crochet (dc) for a lacier, quicker cup (might need more rows or a slightly smaller hook for coverage).
- Edging: For a cute detail, add a final row of sc stitches or picot stitches around the outer edges of the cups, or around the bottom band for a slight ruffle.
- Color Blocking: Use different colors for each row of the cup, or make the straps a contrasting color.
- Embellishments: Sew on a small crocheted flower or a few beads (ensure beads are securely attached and won’t irritate skin).
- Lining (Advanced): For true swimwear, a fabric lining is recommended to prevent transparency when wet. This would involve basic sewing skills to create and insert a lining. You could even use pre-made bra cups as a lining.
You’ve got this! Start with confidence, take your time with each step, and don’t be afraid to pull out stitches and try again if something doesn’t look right. Happy crocheting!