 by
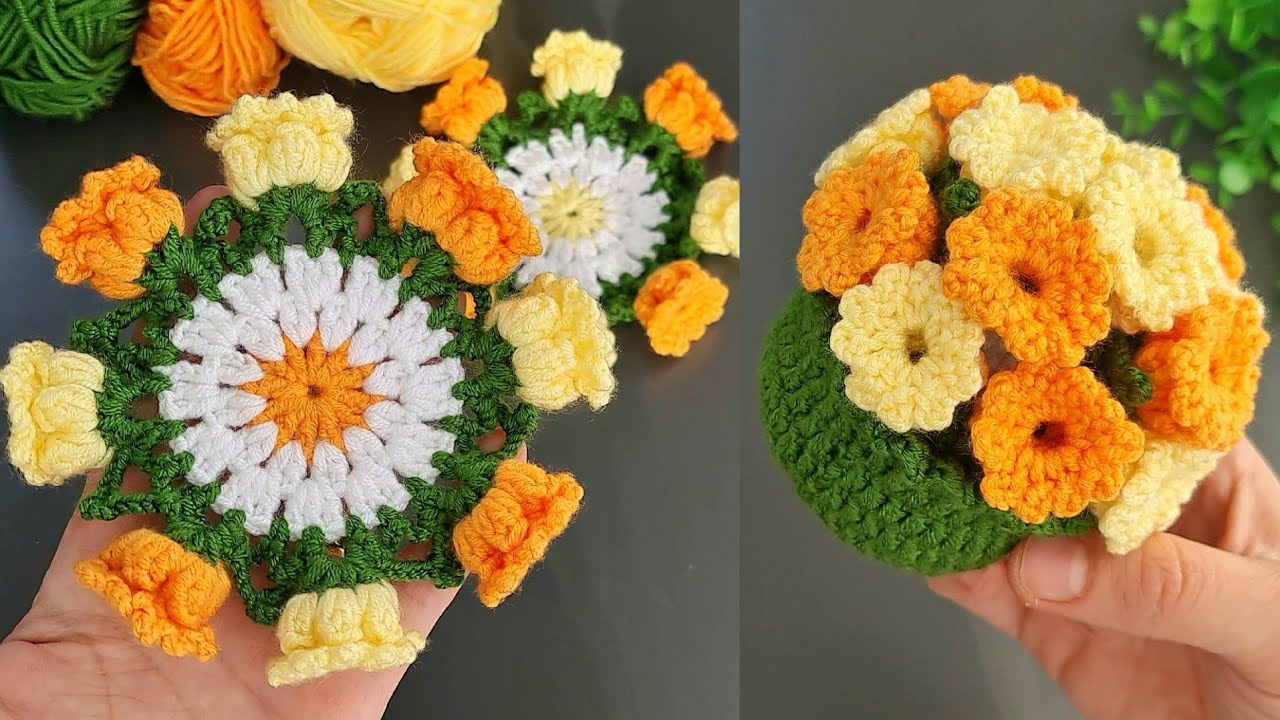
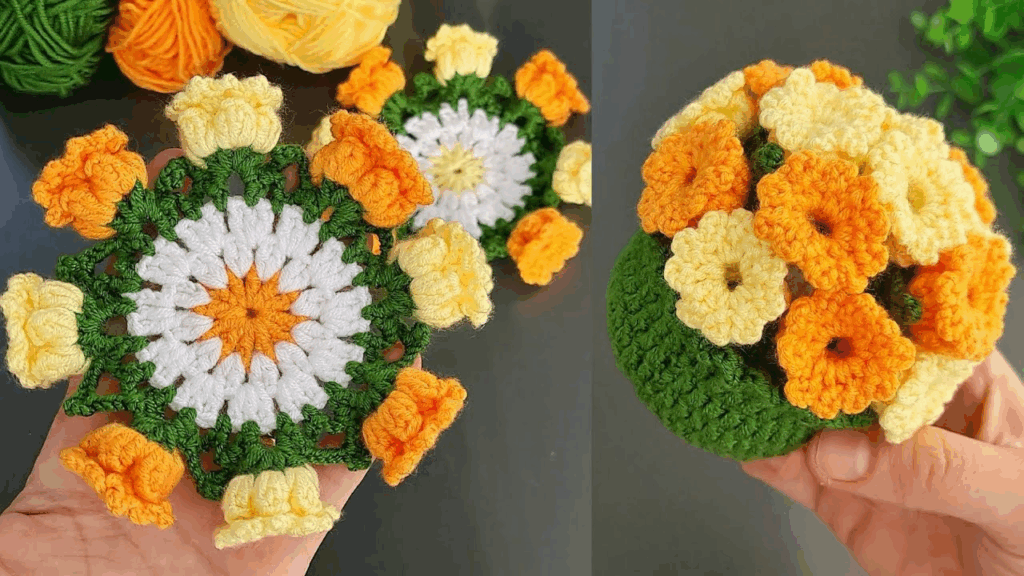
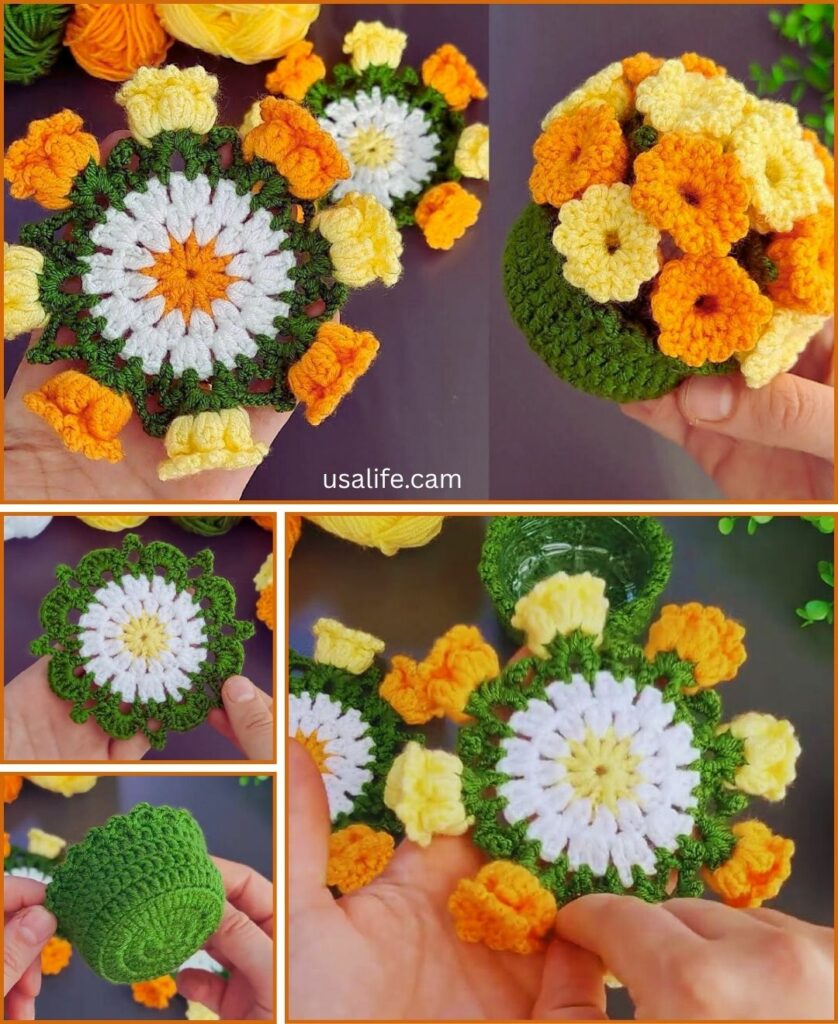
by You’re ready to dive into making those lovely Colorful Flower Coasters for Coffee Cups! This is a fantastic project because it’s both practical for protecting your surfaces and adds a beautiful, cheerful pop of color to your home decor. Given our warm climate here in Phnom Penh, 100% cotton yarn is absolutely the best choice for these coasters. It’s super absorbent, can withstand the heat from coffee cups, and is easy to wash, which is perfect for items that might get spills.
Let’s break down how to create these charming, multi-layered flower coasters step-by-step.
How to Crochet Colorful Flower Coasters for Coffee Cups
This pattern focuses on building up a vibrant, layered flower motif that is sturdy and flat enough to function perfectly as a coaster. You’ll be using several different yarn colors to achieve the “colorful” effect for each layer.
1. Essential Materials You’ll Need
- Yarn:
- Flower Center Color (Color A): A small amount of 100% Worsted Weight Cotton Yarn. Think bright yellow, a rich brown, or a vivid contrasting color to make the center pop.
- First Petal Layer Color (Color B): A small amount of 100% Worsted Weight Cotton Yarn. Soft pink, light blue, peach, or a gentle lavender would be lovely here.
- Second Petal Layer Color (Color C): A small amount of 100% Worsted Weight Cotton Yarn. This could be a deeper shade of Color B, a contrasting color like purple or green, or even a different bright color to add more vibrancy.
- Outer Layer/Base Color (Color D): A small amount of 100% Worsted Weight Cotton Yarn. White, cream, light grey, or a color that beautifully highlights your flower petals would work well.
- Total yarn needed per coaster is approximately 30-40 yards (27-36 meters), distributed among your chosen colors.
- Crochet Hook: A 4.0mm (US G/6) or 4.5mm (US 7) hook. The goal is to achieve a tight tension so that your coaster is dense and provides good protection. If your stitches look loose and gappy, consider going down to a smaller hook size.
- Scissors: For cutting your yarn.
- Yarn Needle (Tapestry Needle): Absolutely essential for neatly weaving in all those yarn ends from your color changes.
2. Basic Crochet Stitches You’ll Use
This project utilizes fundamental crochet stitches, making it accessible for anyone familiar with the basics:
- Chain (ch): Used to begin your work and to create spaces in your pattern.
- Slip Stitch (sl st): Used for joining rounds and for moving your yarn across stitches without adding height.
- Single Crochet (sc): A short, dense stitch, perfect for the flower’s center and for creating a firm border.
- Half Double Crochet (hdc): A medium-height stitch, often used in petal shaping.
- Double Crochet (dc): A taller stitch, forming the main body of your petals.
- Triple/Treble Crochet (tr): An even taller stitch, used for creating more pronounced, dimensional petals.
- Magic Ring (MR): (Also known as Magic Circle or Adjustable Ring). This is the best method for starting the very center of your flower, as it creates a perfectly tight hole-free start. An alternative method using chains is also provided if you’re new to the Magic Ring.

The Colorful Flower Coaster Pattern: Step-by-Step
We’ll build this flower coaster in distinct layers, changing colors at the end of each major section to create a beautiful, vibrant effect.
Abbreviations (US Crochet Terms):
- ch: chain
- sl st: slip stitch
- sc: single crochet
- hdc: half double crochet
- dc: double crochet
- tr: triple crochet (or treble crochet)
- MR: magic ring
- st(s): stitch(es)
- sp: space
Part 1: Flower Center (Color A – e.g., Sunny Yellow)
This forms the very middle of your flower.
- Starting Your Center (Choose ONE method):
- Method A: Magic Ring (Recommended for a perfectly closed center)
- Create a Magic Ring (MR).
- Ch 1 (this chain is for height and does NOT count as a stitch).
- Work 8 sc into the Magic Ring.
- Gently pull the yarn tail of the Magic Ring to close the center hole as tightly as possible.
- Join with a sl st to the top of the first sc you made to close the round. (You should have 8 single crochet stitches in this round.)
- Method B: Chain Method (Easier for Beginners)
- Ch 2.
- Work 8 sc into the second chain from your hook (this means you insert your hook into the very first chain you made).
- Join with a sl st to the top of the first sc you made to close the round. (You should have 8 single crochet stitches in this round.)
- Method A: Magic Ring (Recommended for a perfectly closed center)
- Fasten off Color A. Cut the yarn, leaving a short tail (about 4-6 inches / 10-15 cm) to weave in later.
Part 2: First Petal Layer (Color B – e.g., Soft Pink)
This layer will create 8 lovely, defined petals that sit around your center.
- Join Color B with a sl st into any sc stitch from the previous Round 1 (your yellow center).
- Round 2 (Petals): *Ch 2 (this chain is for height and does NOT count as a stitch). Work (1 hdc, 1 dc, 1 hdc) all into the same stitch where you just joined Color B. Then, sl st into the next sc stitch from Round 1.* Repeat this sequence from * to * 7 more times.
- (You will have created a total of 8 small petals. Each petal is formed by a hdc-dc-hdc cluster, and you use a slip stitch to connect it to the base and move to the next starting point for the following petal.)
- Fasten off Color B. Cut the yarn, leaving a short tail to weave in.
Part 3: Second Petal Layer (Color C – e.g., Deep Purple)
This layer will appear behind and slightly taller than the first layer of petals, adding beautiful dimension and making your flower truly 3D. You’ll work into the slip stitches from Round 2.
- Join Color C with a sl st into any sl st from Round 2. These are the slip stitches you made between the petals in the previous round, connecting them to the central Round 1 stitches. You’ll be inserting your hook behind the petals of Color B.
- Round 3 (Larger Petals): Ch 3 (this counts as your first dc). Work (1 dc, 1 tr, 1 dc) all into the same slip stitch where you just joined Color C.
- *Then, sl st into the next sl st from Round 2 (which is found between the next two petals of Color B). Ch 3 (counts as 1 dc), then work (1 dc, 1 tr, 1 dc) all into the same sl st where you just connected.*
- Repeat this sequence from * to * 6 more times. After the last petal, sl st into the very next available sl st.
- Join with a sl st to the top of the starting Ch 3 of this round.
- (You will have created 8 larger, more prominent petals. Each petal is formed by a dc-tr-dc cluster, and they will appear to “pop up” from behind the first layer of petals.)
- Fasten off Color C. Cut the yarn, leaving a short tail to weave in.

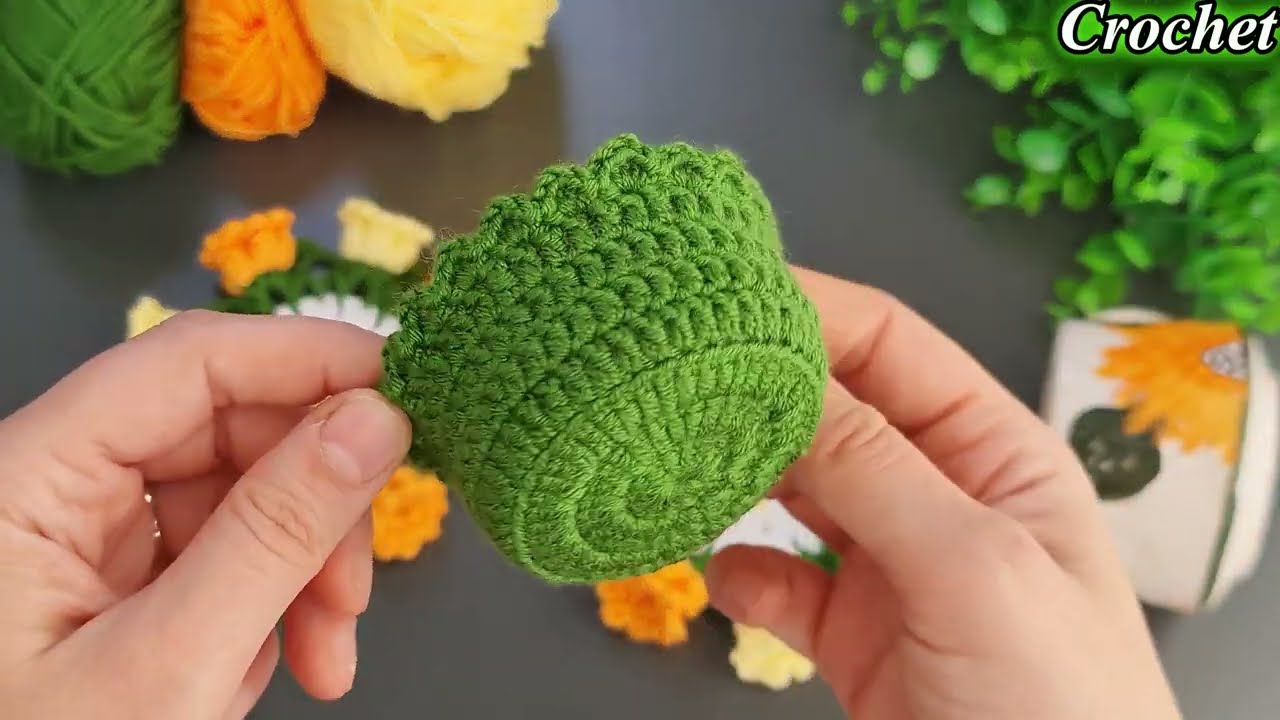
Part 4: Outer Layer / Coaster Base (Color D – e.g., Crisp White)
This final layer will create a sturdy, flat base for your coaster, ensuring it sits well on a table and adds a clean border to your beautiful flower.
- Join Color D with a sl st into any sl st from Round 3. These are the slip stitches you made between the petals in the previous round, connecting them. You’re still working behind the petals.
- Round 4 (Solid Backing): Ch 1 (does NOT count as a stitch). Work 1 sc in the same sl st where you joined.
- Now, you’ll be working stitches to cover the back of the petals from Round 3.
- Work 2 sc into each of the dc stitches within the petal in front of you (from Round 3).
- Work 3 sc into the tr stitch (the tallest stitch) of the petal in front of you (from Round 3).
- Work 1 sc into the next sl st (between petals from Round 3).
- Repeat this sequence around the entire flower. You are essentially creating a solid disc of single crochet stitches on the back of your flower. Adjust your stitch count slightly if needed to ensure the fabric remains flat.
- Join with a sl st to the top of the first sc you made in this round.
- (This creates a solid, flat, and dense circular backing for your flower, which is essential for a functional coaster.)
- Optional Round 5 (For a Slightly Larger & More Defined Edge): If you want a slightly larger coaster or a more pronounced border, add this round.
- Ch 1 (does NOT count as a stitch).
- Work 1 sc in each sc stitch around the entire coaster.
- Join with a sl st to the top of the first sc you made.
- (This adds a neat, sturdy edge to your coaster.)
- Fasten off Color D. Cut your yarn, leaving a tail of about 6-8 inches (15-20 cm).

5. Finishing Your Colorful Flower Coaster
- Weave in All Ends: This is a crucial step for creating a professional-looking and durable coaster. Use your yarn needle to carefully weave in every single yarn tail from all your color changes. Hide them neatly and securely within the stitches on the back of the coaster. Take your time with this to ensure no ends pop out later.
- Blocking (Highly Recommended): Blocking makes a world of difference in the final appearance and functionality of your coaster.
- Gently wet your entire crocheted flower coaster (you can spray it with water or lightly immerse it in cool water).
- Carefully squeeze out any excess water (do not wring or twist!).
- Lay the coaster flat on a clean towel or a foam blocking mat. Gently shape it into a perfect circle, ensuring it lays completely flat. Arrange the flower petals nicely so they fan out and look appealing. If you have rust-proof pins, you can use them to hold the shape while it dries.
- Allow the coaster to air dry completely. Blocking will help to even out your stitches, ensure the coaster lays perfectly flat (preventing wobbles for your coffee cup!), and showcases the beautiful 3D details of your flower.
Tips for Making Truly Beautiful Colorful Flower Coasters
- Color Palette Exploration: This is the most exciting part! Don’t be afraid to experiment with different color combinations. You could try:
- Bright, contrasting colors for a cheerful pop.
- A gradient of shades for a more subtle and elegant look.
- Varying your “greenery” (Color C) to be a true green for a more natural floral look.
- Using different outer border colors to match different decor.
- Consistent Tension: Maintaining consistent, firm tension throughout your work is essential. This ensures your coaster lays flat, has a good dense fabric (to protect your surfaces), and creates even stitches. If your coaster starts to ruffle, your tension might be too loose or you might have too many stitches; if it cups excessively, your tension might be too tight.
- Stitch Placement: Pay close attention to where you’re inserting your hook, especially when you’re working behind previous layers of petals (e.g., into the slip stitch between petals, not directly into the petals themselves). This creates the layered effect.
- Practice Makes Perfect: If your first coaster isn’t absolutely perfect, that’s completely normal! Crochet is a skill that improves with practice, and each coaster you make will likely look better and be more consistent than the last.
You’ve now got a comprehensive guide to create stunning and functional Colorful Flower Coasters for your coffee cups! These will be a delightful addition to your home or make wonderful handmade gifts. Enjoy your crafting!