by
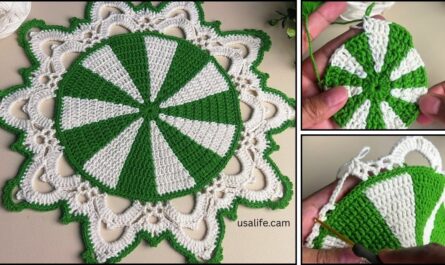
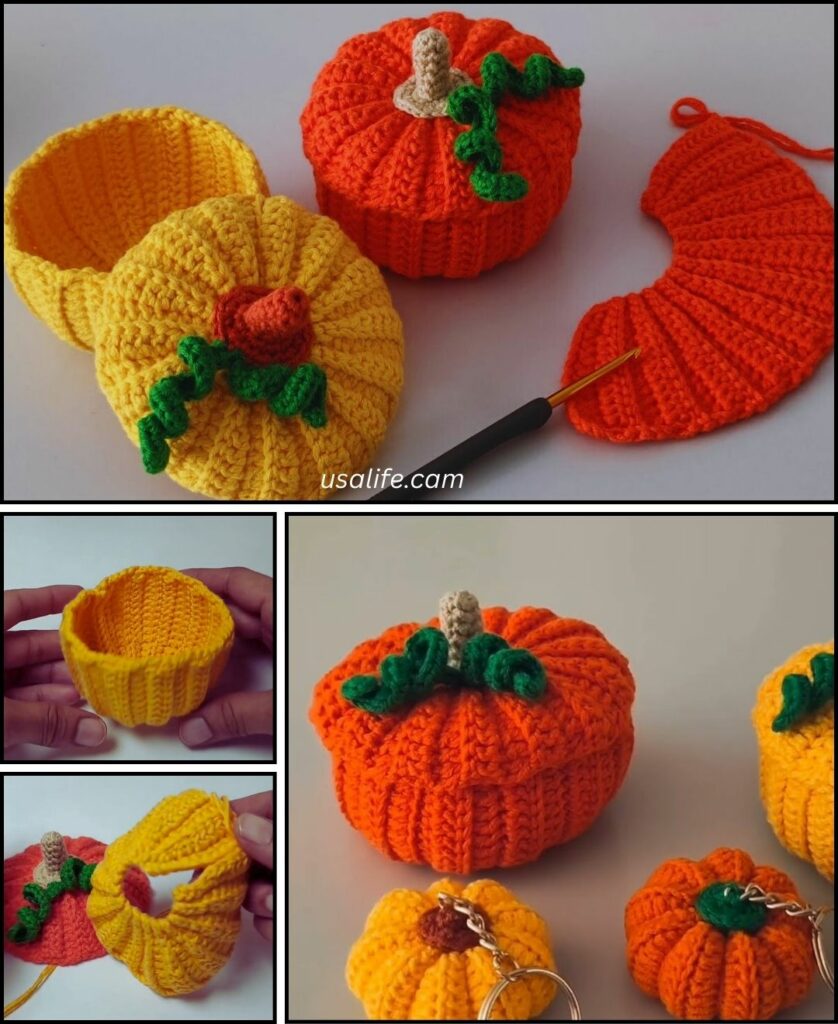
by Autumn is a delightful time for crochet, and a crochet pumpkin basket is an absolutely charming project! It’s both decorative and functional, perfect for holding treats, small crafts, or just adding a festive touch to your home decor.
Given your location in Phnom Penh, where it’s warm, you’ll want to think about yarn choices that are suitable for the climate but still evoke autumn. 100% cotton yarn or a sturdy cotton blend (like cotton/acrylic or cotton/linen) would be excellent choices. Cotton is durable, holds its shape well for a basket, and is breathable. For autumn, you can still use traditional pumpkin colors (orange, deep red, cream, forest green) but with a cotton fiber, it won’t feel out of place in a warmer climate. If you want a softer basket, a chunky acrylic yarn can also work well.
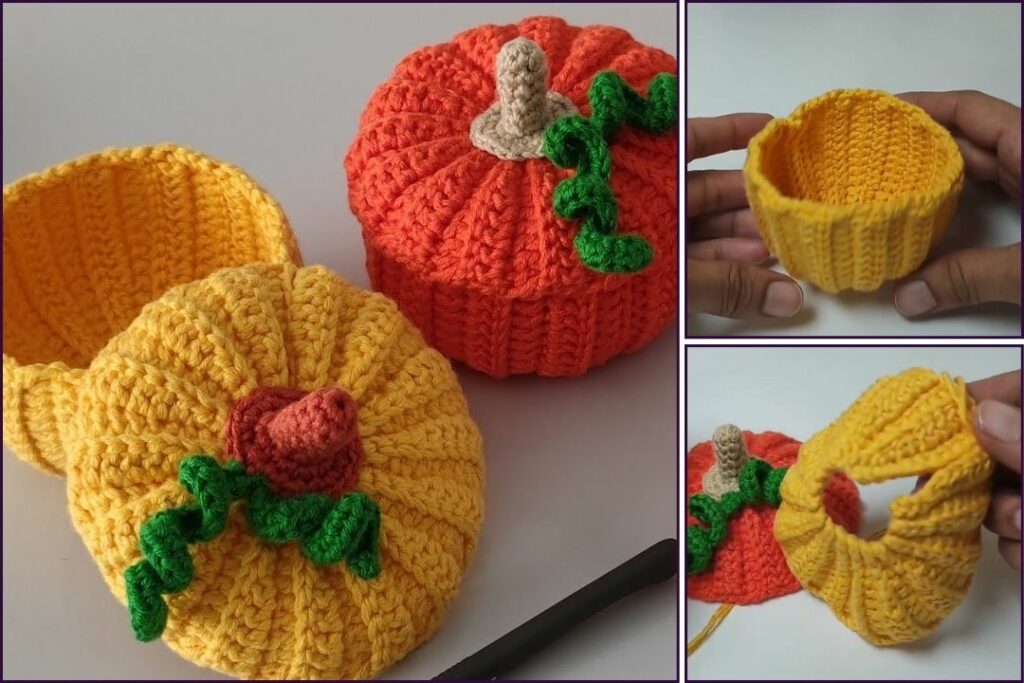
How to Crochet a Sturdy Pumpkin Basket for Autumn
This tutorial will guide you through creating a charming pumpkin-shaped basket. We’ll focus on making a sturdy base, building up the rounded body, adding the characteristic pumpkin ridges, and finishing with a stem and optional leaves/vines.
1. Essential Materials You’ll Need
- Yarn:
- Main Color (MC): For the pumpkin body (e.g., orange, burnt orange, rust, cream, white). Worsted Weight (Aran / Medium / Category 4) is a good standard. For a stiffer basket, consider a Chunky/Bulky (Category 5) cotton or even holding two strands of worsted weight together.
- Stem Color (SC): Brown, forest green, or even black for the stem (small amount).
- Optional Leaf/Vine Color (LC): Green (various shades) for leaves and vines (small amount).
- Quantity: For a medium basket (around 6-8 inches diameter), you’ll need approximately 100-200g of MC yarn, plus scraps for accent colors.
- Crochet Hook:
- For Worsted weight yarn, a 5.0mm (US H/8) or 5.5mm (US I/9) hook is common. For a sturdy basket, you want a hook size that makes your stitches quite dense – go down a size if your fabric feels too loose. If using bulky yarn, a 7.0mm to 9.0mm hook might be needed.
- Scissors: For cutting yarn.
- Yarn Needle (Tapestry Needle): Essential for weaving in ends and shaping the pumpkin.
- Stitch Marker (Highly Recommended!): Crucial for keeping track of rounds when working in a spiral.
- Optional: Polyester fiberfill (Poly-fil) or yarn scraps for stuffing the stem (just a tiny bit).
2. Basic Crochet Stitches You’ll Use
This pattern involves working in continuous rounds for the main body and then some specific stitches for texture and details.
- Magic Ring (MR) / Adjustable Ring: (Highly Recommended!) Creates a tight, hole-free start for the bottom of the basket.
- Chain (ch): For foundation and small elements.
- Slip Stitch (sl st): For joining rounds or neatening.
- Single Crochet (sc): Creates a dense, sturdy fabric.
- Half Double Crochet (hdc): A medium-height stitch, good for some shaping.
- Double Crochet (dc): A taller stitch, used here for texture.
- Single Crochet Increase (inc): Work 2 sc into the same stitch.
- Half Double Crochet Increase (hdc-inc): Work 2 hdc into the same stitch.
- Back Loop Only (BLO): Working stitches only into the back loop of the stitch from the previous round/row.
- Front Post Double Crochet (FPDC): Used for creating ridges.
- Back Post Double Crochet (BPDC): Used for creating ridges.
- Fasten Off: Securely ending your work.
- Weaving in Ends: Hiding tails for a neat finish.

Crochet Pumpkin Basket Pattern (Medium Size)
This pattern creates a basket that’s roughly 6-8 inches (15-20 cm) in diameter and about 4-5 inches (10-12 cm) tall (excluding the stem).
Abbreviations (US Crochet Terms):
- MC: Main Color (Pumpkin)
- SC: Stem Color
- LC: Leaf Color
- MR: magic ring
- Rnd: Round
- ch: chain
- sl st: slip stitch
- sc: single crochet
- hdc: half double crochet
- dc: double crochet
- inc: increase (2 sc in next st)
- hdc-inc: half double crochet increase (2 hdc in next st)
- BLO: back loop only
- FPDC: front post double crochet
- BPDC: back post double crochet
- st(s): stitch(es)
- FO: Fasten off
Part 1: The Base of the Pumpkin Basket (MC)
We’ll start with a flat circle, working in continuous rounds. Use a stitch marker.
- Rnd 1: Start with a MR. Work 8 sc into the MR. Pull tail to close ring tightly. (8 sc)
- Place stitch marker in the first sc.
- Rnd 2: [Inc] in each st around. (16 sc)
- Rnd 3: [Sc 1, inc] 8 times. (24 sc)
- Rnd 4: [Sc 2, inc] 8 times. (32 sc)
- Rnd 5: [Sc 3, inc] 8 times. (40 sc)
- Rnd 6: [Sc 4, inc] 8 times. (48 sc)
- Rnd 7: [Sc 5, inc] 8 times. (56 sc)
- Rnd 8: [Sc 6, inc] 8 times. (64 sc)
- Your base should now be a flat circle. Adjust the number of increase rounds based on your desired basket size. Stop increasing when the base is the desired diameter.

Part 2: Forming the Body of the Pumpkin (MC)
Now we’ll make the sides stand up and begin forming the rounded shape and ridges.
- Rnd 9: Work 1 sc in the back loop only (BLO) of each st around. (64 sc)
- This creates a crisp edge, making the sides turn upwards.
- Rnd 10: Sc in each st around (working through both loops now). (64 sc)
- Rnd 11 (Creating Ridges):
- Ch 2 (does not count as st).
- [FPDC around the next st, BPDC around the next st] repeated around.
- Join with a sl st to the top of the first FPDC. (64 sts)
- This round creates a slight textured ridge. You can also do FPDC around an entire group of stitches for a thicker ridge, or just skip this round for a smoother pumpkin.
- Rnd 12-18 (Body Height): Work 1 hdc in each st around. (64 hdc)
- Repeat this round until the basket reaches your desired height for the pumpkin’s body (before it starts decreasing for the top). Around 7-8 rounds usually works well for a medium size.
- Optionally, every 2-3 rounds, you can repeat Rnd 11 to add more distinct ridges if you like. For a smooth pumpkin, skip the FPDC/BPDC rounds and just do hdc.
Part 3: Shaping the Top of the Pumpkin (MC)
Now we’ll decrease to create the rounded top of the pumpkin.
- Rnd 19: Ch 1. [Sc 6, sc2tog] 8 times. (56 sc)
- Rnd 20: Ch 1. [Sc 5, sc2tog] 8 times. (48 sc)
- Rnd 21: Ch 1. [Sc 4, sc2tog] 8 times. (40 sc)
- Rnd 22: Ch 1. [Sc 3, sc2tog] 8 times. (32 sc)
- Fasten off MC, leaving a medium-long tail for weaving in.
- You should have a nice rounded pumpkin shape now.

Part 4: The Stem (SC)
This forms the top of your pumpkin.
- Start with a MR.
- Rnd 1: Work 6 sc into the MR. Pull tail to close. (6 sc)
- Place stitch marker.
- Rnd 2: Sc in each st around. (6 sc)
- Rnd 3: [Sc 1, inc] 3 times. (9 sc)
- Rnd 4-6: Sc in each st around. (9 sc for 3 rounds)
- Fasten off SC, leaving a long tail for sewing.
- Optional: Lightly stuff the stem with a tiny bit of fiberfill or yarn scraps to help it stand upright.
Part 5: Optional Leaves and Vines (LC)
These add beautiful, realistic pumpkin details.
Leaf (Make 1 or 2):
- Ch 6.
- Sl st into 2nd ch from hook. Sc in next ch. Hdc in next ch. Dc in next ch. (Dc, ch 2, sl st in 2nd ch from hook, dc) all in the last ch (this forms the pointed end).
- Working down the other side of the chain: Dc in next ch. Hdc in next ch. Sc in next ch. Sl st in last ch.
- Fasten off LC, leaving a tail for sewing.
Vine (Make 1 or 2):
- Ch 15-20. (Adjust length as desired).
- Sl st in the 2nd ch from hook. Then, work 2 sl st in each remaining ch across. This will make the chain curl naturally into a spiral vine.
- Fasten off LC, leaving a tail for sewing.
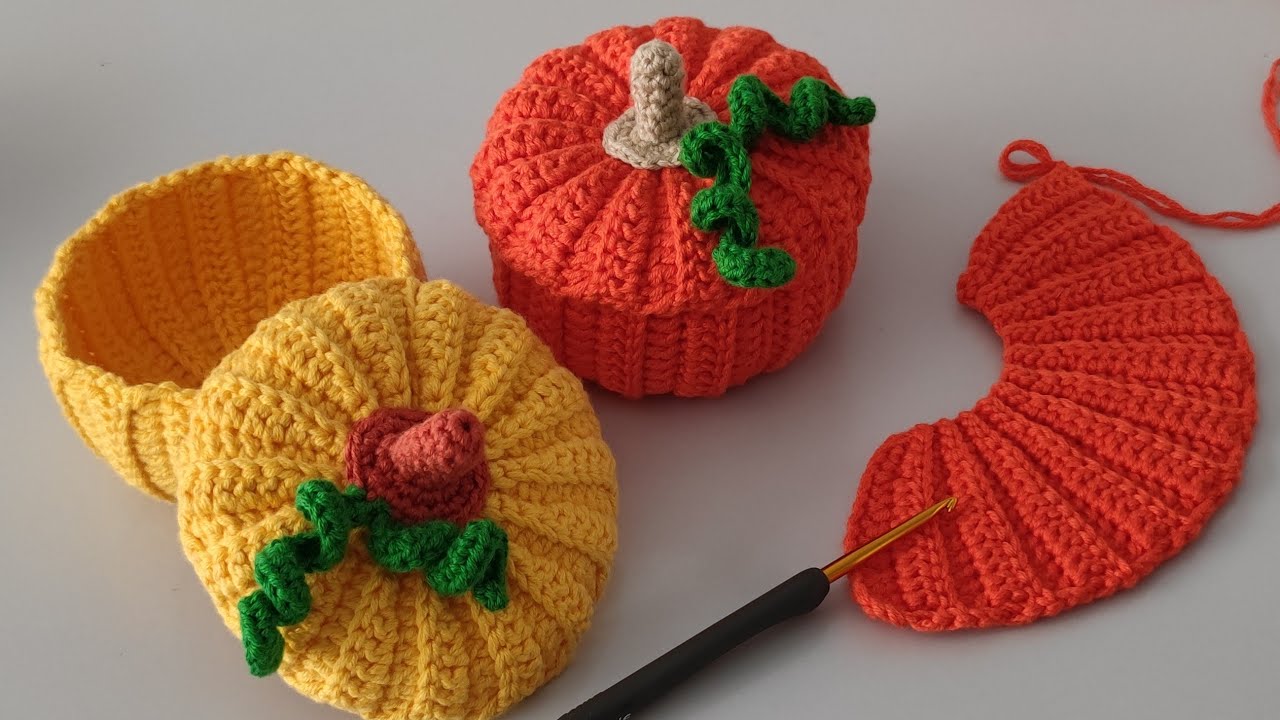
Part 6: Assembly
- Attach Stem:
- Position the crocheted stem in the center of the pumpkin basket’s opening.
- Using the long tail from the stem and your yarn needle, carefully sew the stem securely to the top of the pumpkin. Go through both loops of the stem and into the stitches of the pumpkin top, ensuring it’s firmly attached and stands upright.
- Attach Leaves/Vines (Optional):
- Position the leaves and vines around the base of the stem.
- Using the tails from the leaves and vines, sew them securely into place. You can wrap the vine around the stem a bit or let it dangle.
- Weave in All Remaining Ends: Double-check every part of your pumpkin basket for loose yarn tails. Weave them in thoroughly and securely into the stitches. This is important for both appearance and durability.
7. Tips for a Beautiful Pumpkin Basket
- Yarn Choice: For a stiffer basket, choose a cotton yarn that doesn’t have much drape, or use a larger hook with a thicker yarn. You can also hold two strands of worsted weight yarn together.
- Consistent Tension: Maintain even tension throughout your project to ensure the basket holds its shape well and looks uniform.
- Sturdy Base: The single crochet in the back loop only (BLO) for Round 9 is crucial for making the sides stand up neatly.
- Ridge Definition: The FPDC/BPDC rounds create lovely, defined pumpkin ridges. Experiment with placing these every 1, 2, or 3 rounds for different effects. You could also use a surface slip stitch later to draw in vertical lines and create ridges if you want a smoother overall basket.
- Stuffing: If you find the basket a bit “floppy” or if you want it to retain a specific shape, you can add a cardboard insert to the bottom for extra rigidity, or even a very thin layer of quilt batting around the inside.
- Personalize:
- Color Variations: Beyond traditional orange, consider cream, white, or even dusty rose for modern farmhouse style pumpkins.
- Stripes: Add subtle stripes with a contrasting autumn color.
- Facial Features: For a Halloween-themed basket, you could embroider simple jack-o’-lantern faces onto the front using black yarn.
You now have a detailed guide on how to crochet a charming pumpkin basket for autumn! Enjoy the process of bringing this festive piece to life for your home.