 by
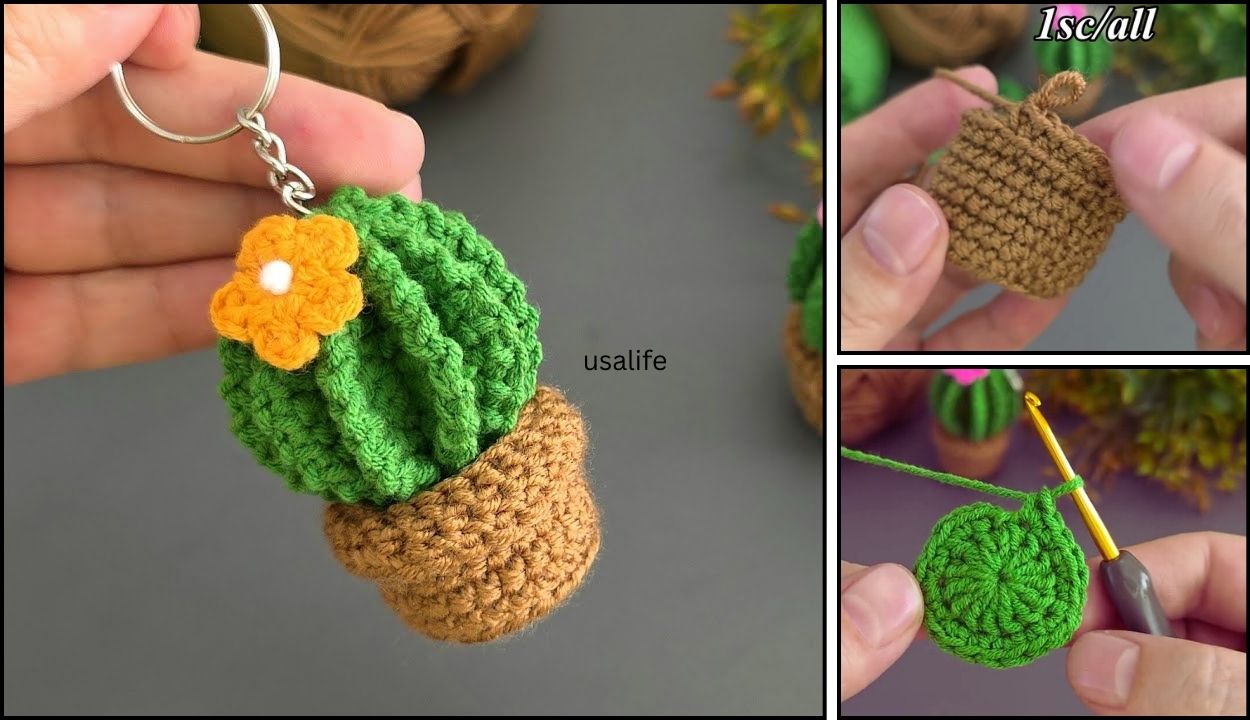
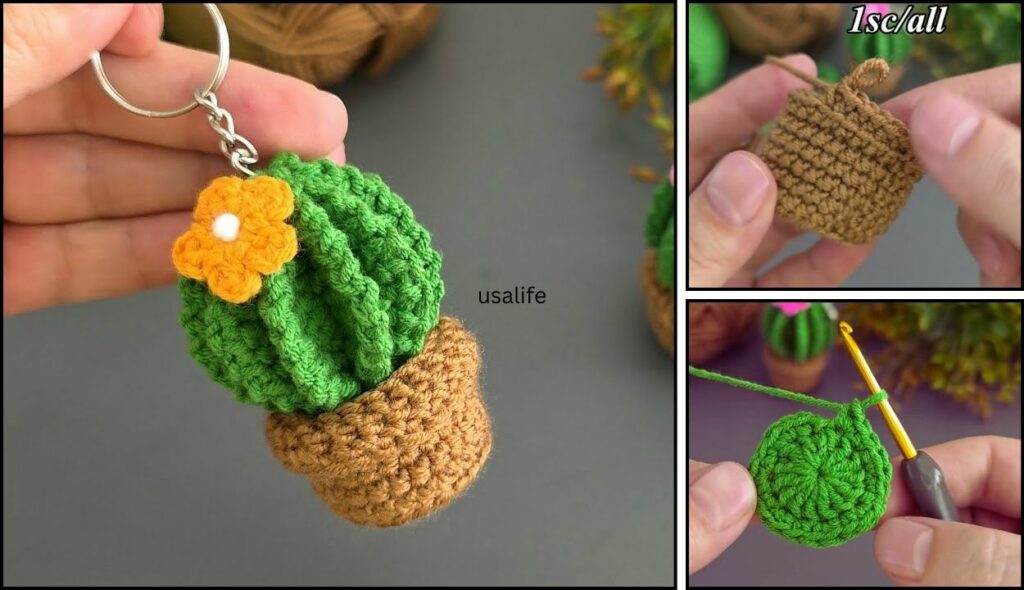
by Making an amigurumi cactus keychain is a fun, quick project that’s perfect for beginners. It’s an excellent way to practice working in the round, increasing, and decreasing to create a three-dimensional shape. The result is a cute, tiny cactus that’s perfect for a keychain or a bag charm.
Materials Needed
- Yarn: Small amounts of medium-weight yarn in green for the cactus body, brown for the soil, and a tiny amount of pink or red for the flower.
- Crochet Hook: The size that matches your yarn.
- Stuffing: Polyester fiberfill.
- Keychain Hardware: A key ring or clip.
- Scissors
- Tapestry Needle: For sewing and weaving in ends.
- Stitch Marker: Essential for keeping track of your rounds.
Abbreviations
- ch: chain
- sl st: slip stitch
- sc: single crochet
- inc: increase (work two single crochet stitches in the same stitch)
- dec: decrease (work a single crochet two together, or sc2tog)
- st(s): stitch(es)
- [ ]: repeat instructions in brackets the specified number of times
- ( ) the number of stitches you should have at the end of the round.
How to Make the Cactus
This pattern is worked in continuous rounds, which means you will not join with a slip stitch at the end of each round. Use a stitch marker to mark the first stitch of each round and move it up as you go.
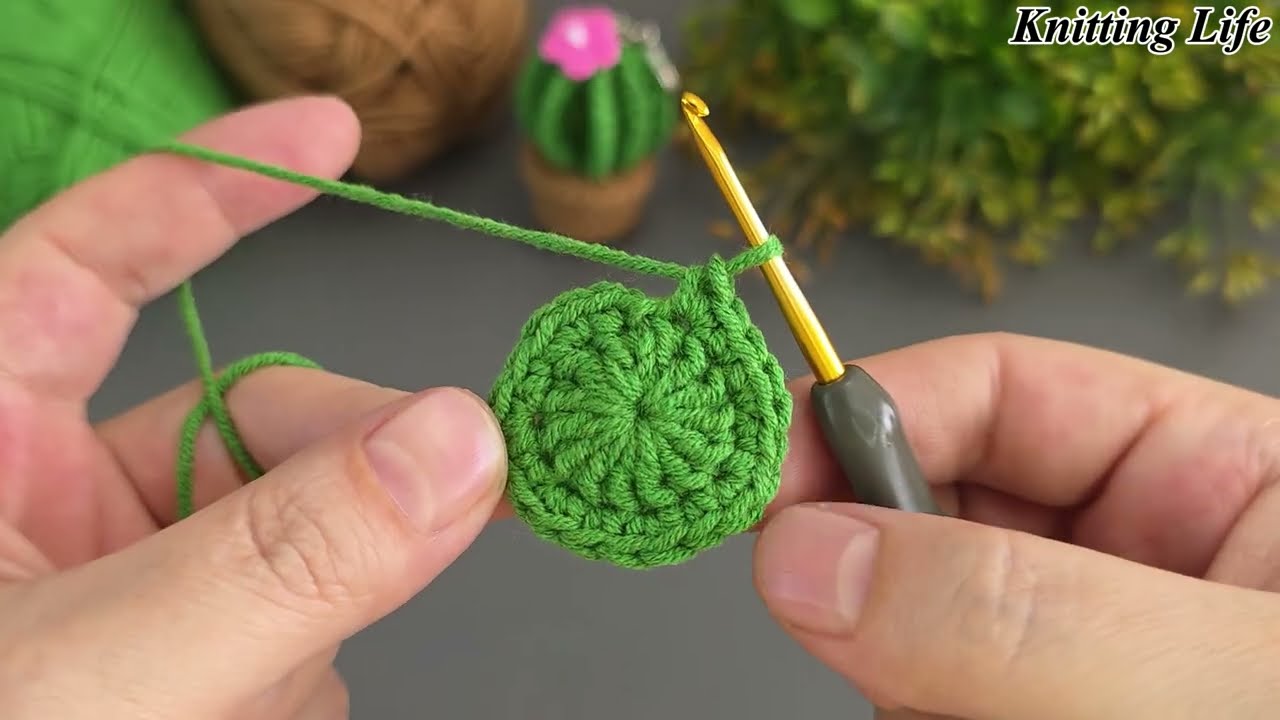
Part 1: The Soil (in brown yarn)
- Round 1: Start with a magic ring. Work 6 sc into the ring. (6)
- Round 2: inc in each stitch around. (12)
- Round 3: [sc in the next st, inc] 6 times. (18)
- Round 4: [sc in the next 2 sts, inc] 6 times. (24)
- Fasten off. Weave in the tail. You now have a flat, circular base for your cactus.
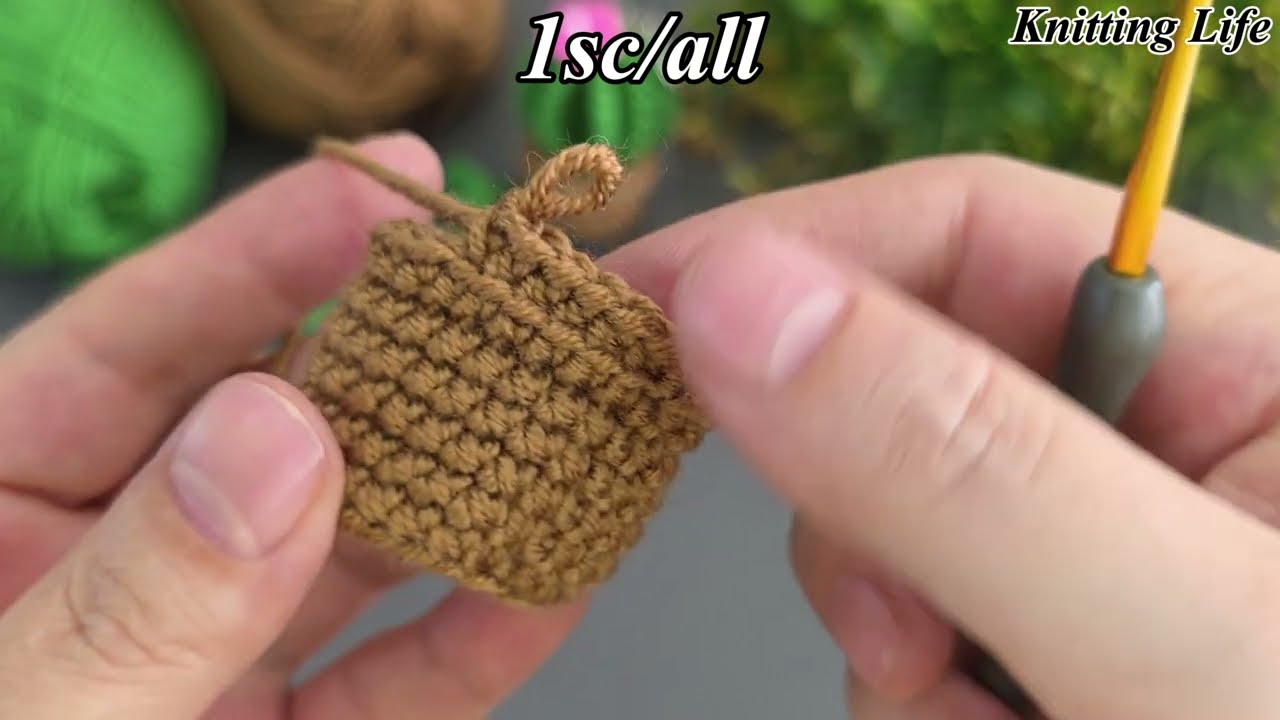
Part 2: The Cactus Body (in green yarn)
- Join your green yarn to any stitch on the edge of the brown circle.
- Round 5: Working in the back loop only for this round, sc in each stitch around. (24)
- Rounds 6-10: sc in each stitch around. (24)
- Round 11: [sc in the next 2 sts, dec] 6 times. (18)
- Stuff the cactus firmly with fiberfill. Continue to stuff as you decrease.
- Round 12: [sc in the next st, dec] 6 times. (12)
- Round 13: dec 6 times. (6)
- Fasten off, leaving a tail. Use a tapestry needle to weave the tail through the remaining stitches and pull tight to close the hole. Weave in the end.

Part 3: The Flower (in pink or red yarn)
- Start with a magic ring.
ch 1, then work 5 sc into the ring. (5)- Join with a sl st to the first
sc. - Fasten off, leaving a tail for sewing.
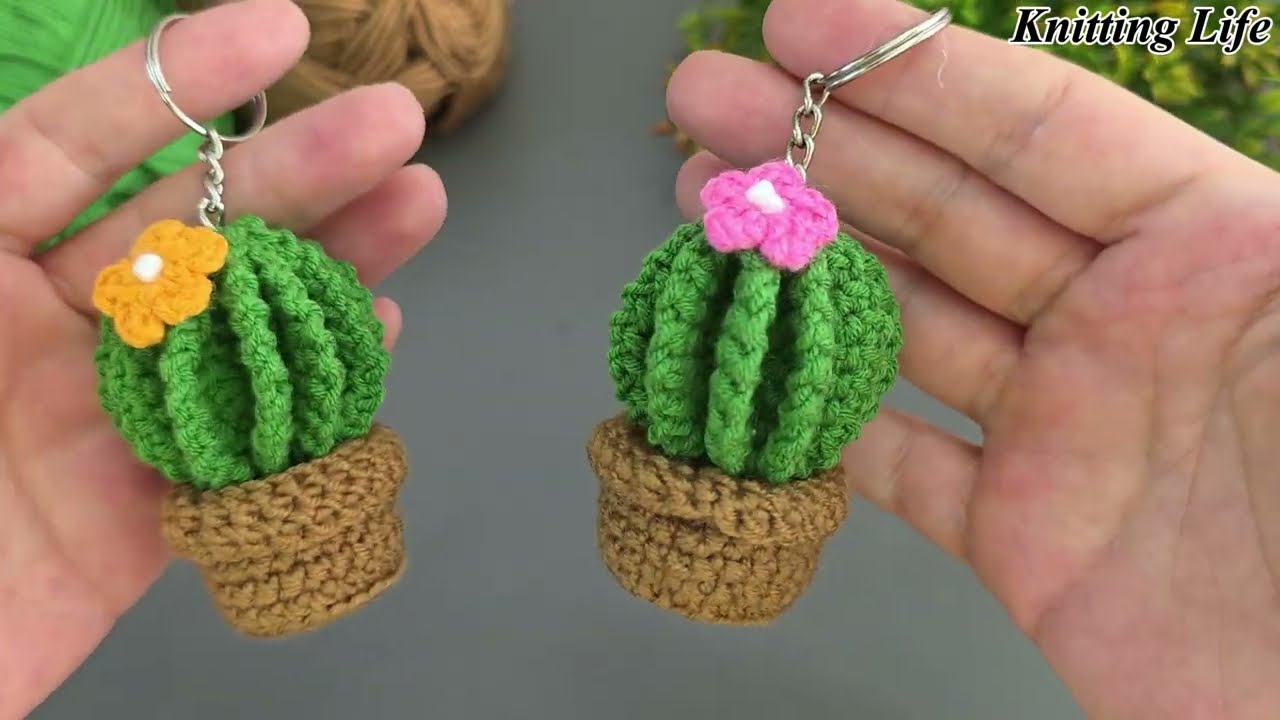
Assembly
- Sew the Flower: Using the tail and a tapestry needle, sew the small flower to the top of your cactus.
- Attach the Keychain Hardware: Thread your key ring or clip through a loop at the top of the cactus, or through the magic ring of the flower. For a more secure attachment, you can crochet a small loop (
ch 10,sl stto form a loop) and sew it to the top before attaching the hardware. - Weave in All Ends: Neatly weave in any remaining loose yarn ends.
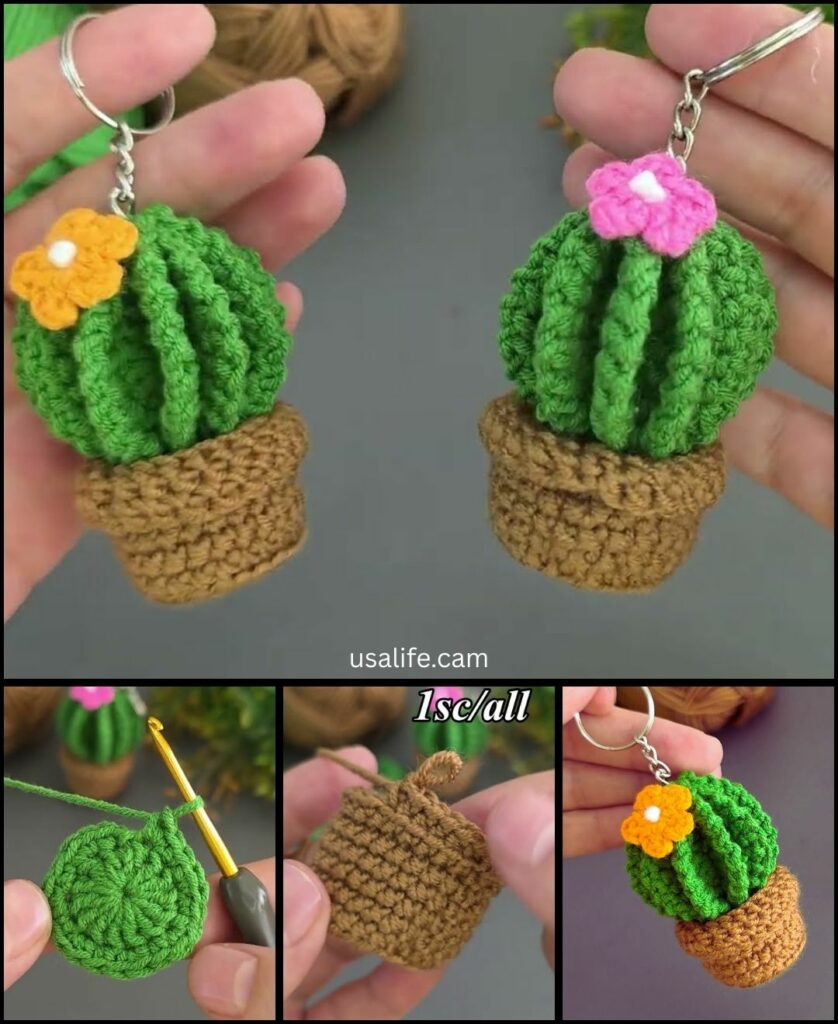
You now have a finished amigurumi cactus keychain! It’s a great project for using up small scraps of yarn and makes a perfect gift.
Video tutorial: