by
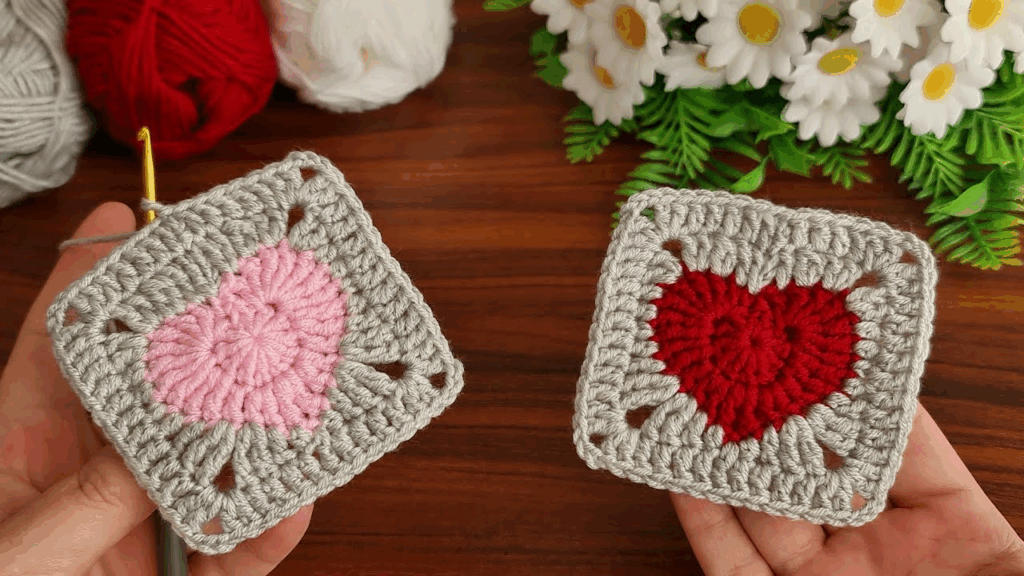
by To crochet a heart granny square, you’ll combine a classic granny square’s structure with a central heart motif. This project is perfect for crocheters who are comfortable with basic stitches and want to try colorwork or a more intricate design. The heart is formed by working a series of stitches directly into the center of the square.
Here is a detailed guide on how to crochet a “Heart” granny square.
Materials Needed
- Yarn: Two different colors of medium-weight yarn. A main color for the background and a contrasting color for the heart.
- Crochet Hook: The size that matches your yarn.
- Scissors: To cut the yarn.
- Tapestry Needle: To weave in the ends.
Abbreviations
- ch: chain
- sl st: slip stitch
- sc: single crochet
- hdc: half double crochet
- dc: double crochet
- tr: treble crochet
- sp: space
- st(s): stitch(es)
Pattern Instructions
We’ll start with the heart in the center and then build the granny square around it.
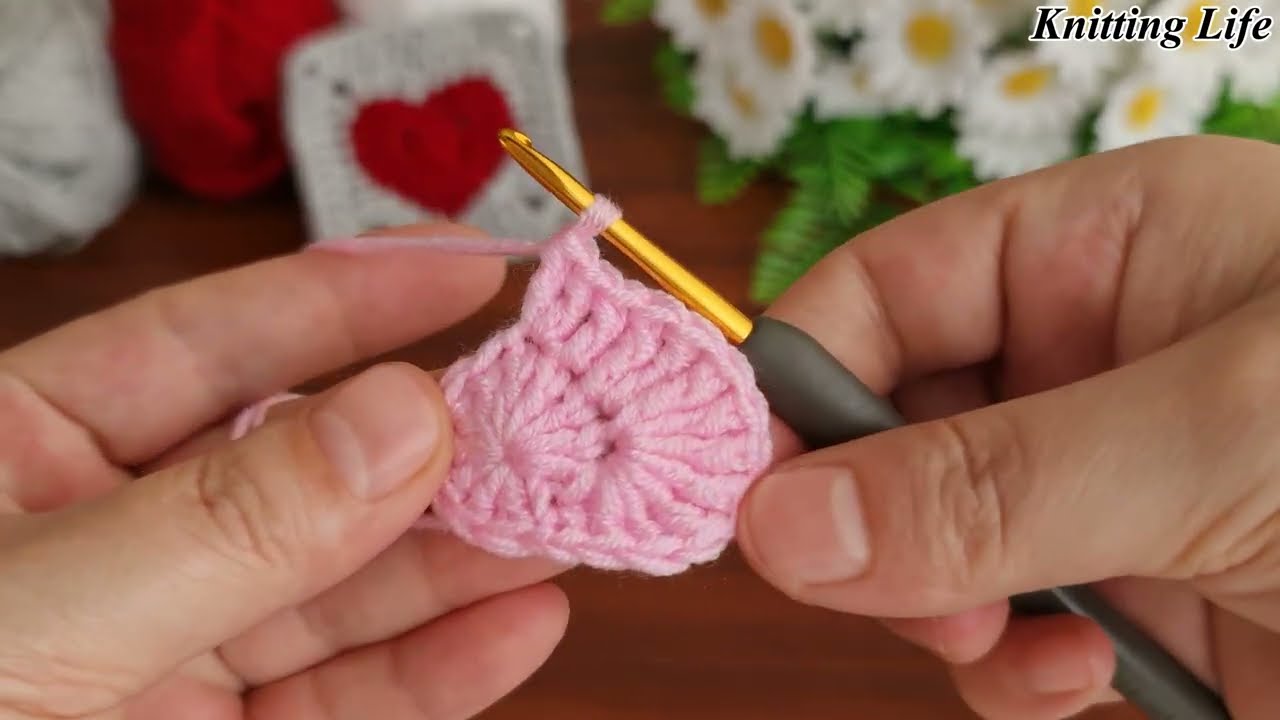
Round 1: The Heart
- With your heart color, make a magic ring.
- Work
3 dc,3 hdc,ch 1,1 dc,ch 1,3 hdc,3 dcinto the ring. - Pull the tail of the magic ring to tighten the center.
- Join with a sl st to the first
dcto complete the heart. - Cut the yarn, leaving a short tail. Weave in the starting and ending tails to secure the heart.
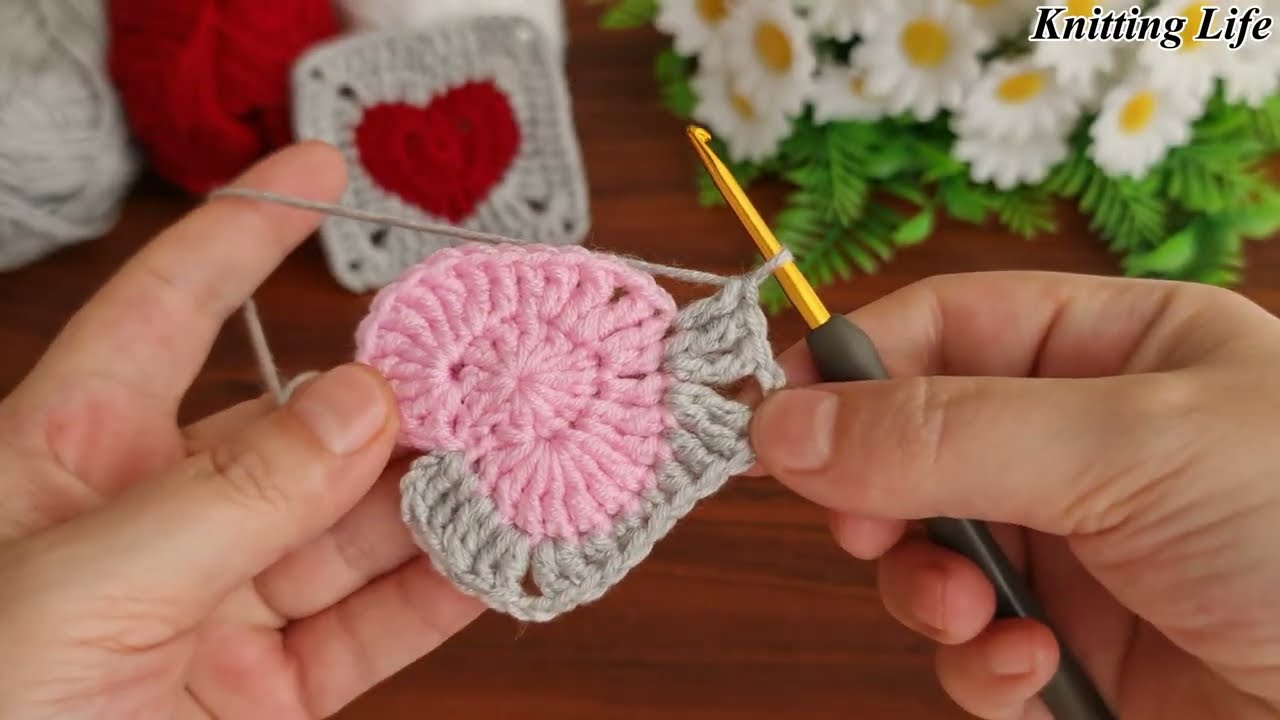
Round 2: Building the Square
- Join your main color in the
ch-1space at the top of the heart. ch 3(counts as firstdc), work 2 dc into the samech-1space. This forms your first granny cluster.ch 2(this is your first corner).- Work
3 dcinto the nextch-1space (at the bottom point of the heart).ch 2. - Work
3 dcinto the nextch-1space (at the top of the heart again).ch 2. - Join with a sl st to the top of the beginning
ch 3.
Round 3: Expanding the Square
sl stinto the firstch-2corner space.ch 3(counts asdc), work 2 dc,ch 2, 3 dc into the same corner space. This is your first corner.ch 1(this is the side space).- Work
3 dcinto the nextch-2side space.ch 1. - Work 3 dc,
ch 2, 3 dc into the nextch-2corner space. ch 1.- Work
3 dcinto the nextch-2side space.ch 1. - Join with a sl st to the top of the beginning
ch 3.
Round 4: The Final Round
sl stinto the firstch-2corner space.ch 3(counts asdc), work 2 dc,ch 2, 3 dc into the same corner space.ch 1.- Work
3 dcinto the nextch-1space. ch 1.- Work
3 dcinto the nextch-1space. ch 1.- Work 3 dc,
ch 2, 3 dc into the nextch-2corner space. ch 1.- Repeat steps 4-9 two more times.
- Join with a sl st to the top of the beginning
ch 3. - Fasten off and weave in all ends.
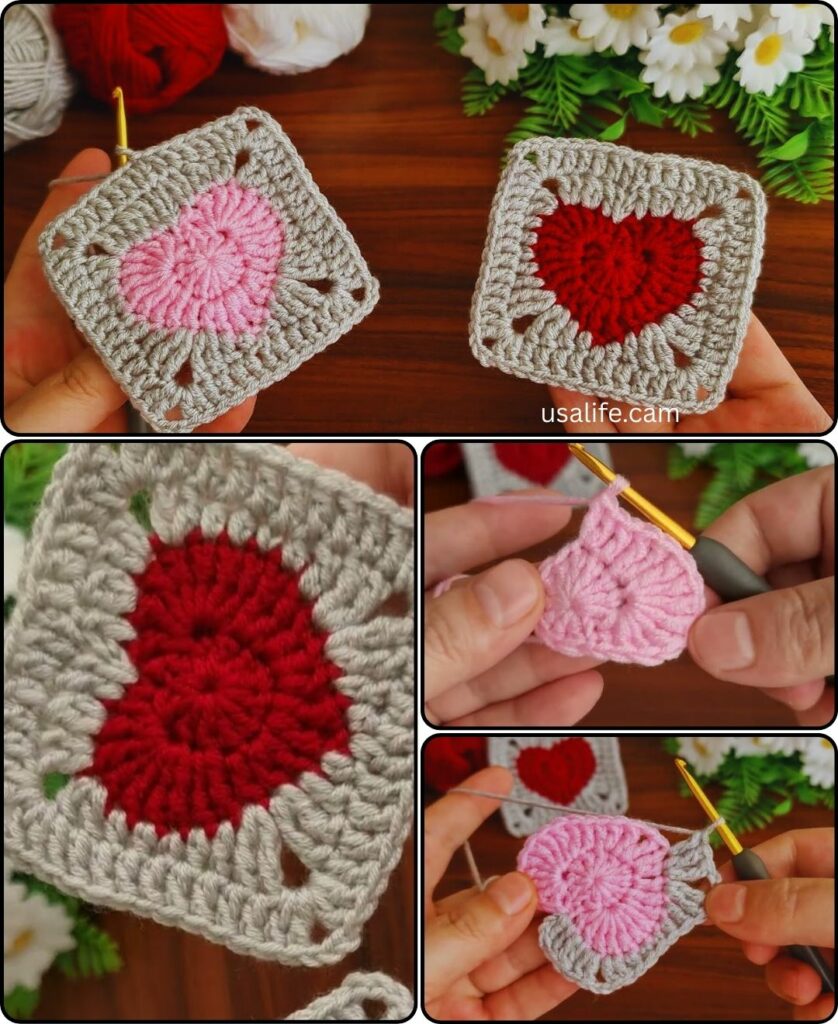
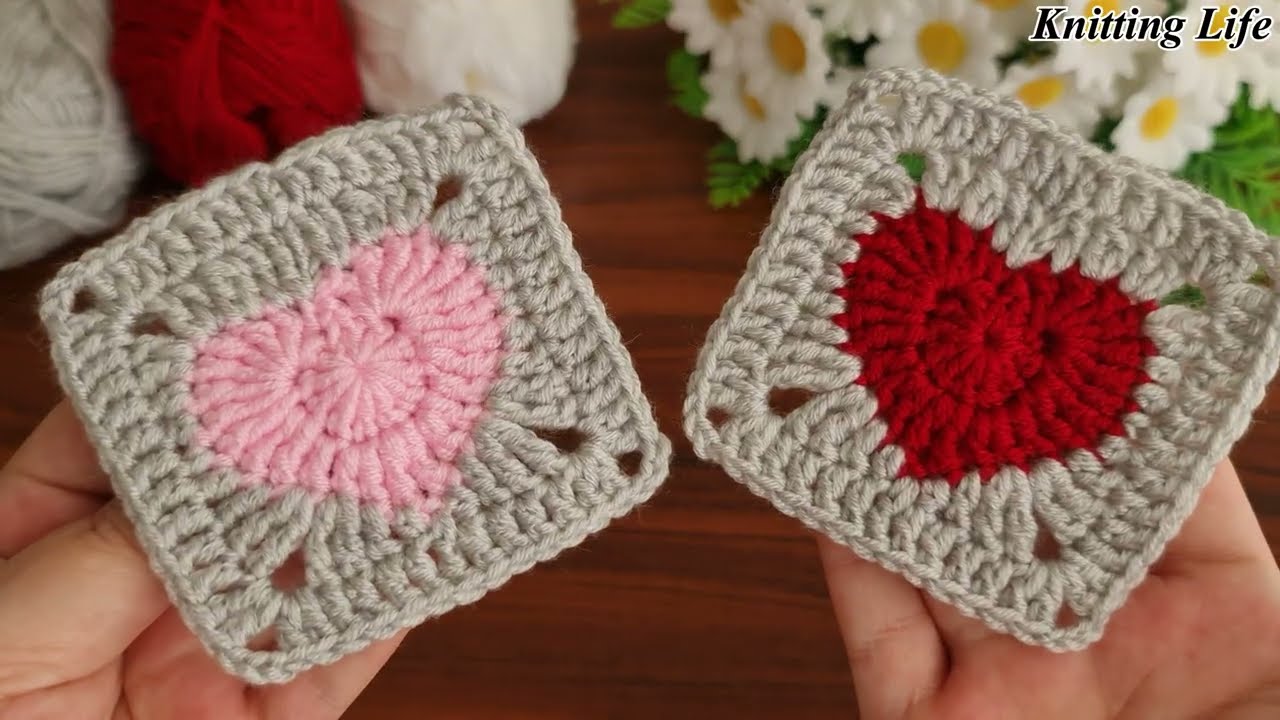
You have now created a beautiful heart granny square! This pattern can be the basis for a blanket, a pillow, or any other project where you want to add a touch of love.
Video tutorial: