by
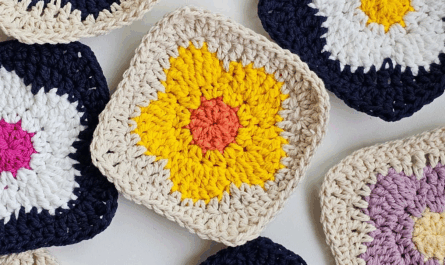
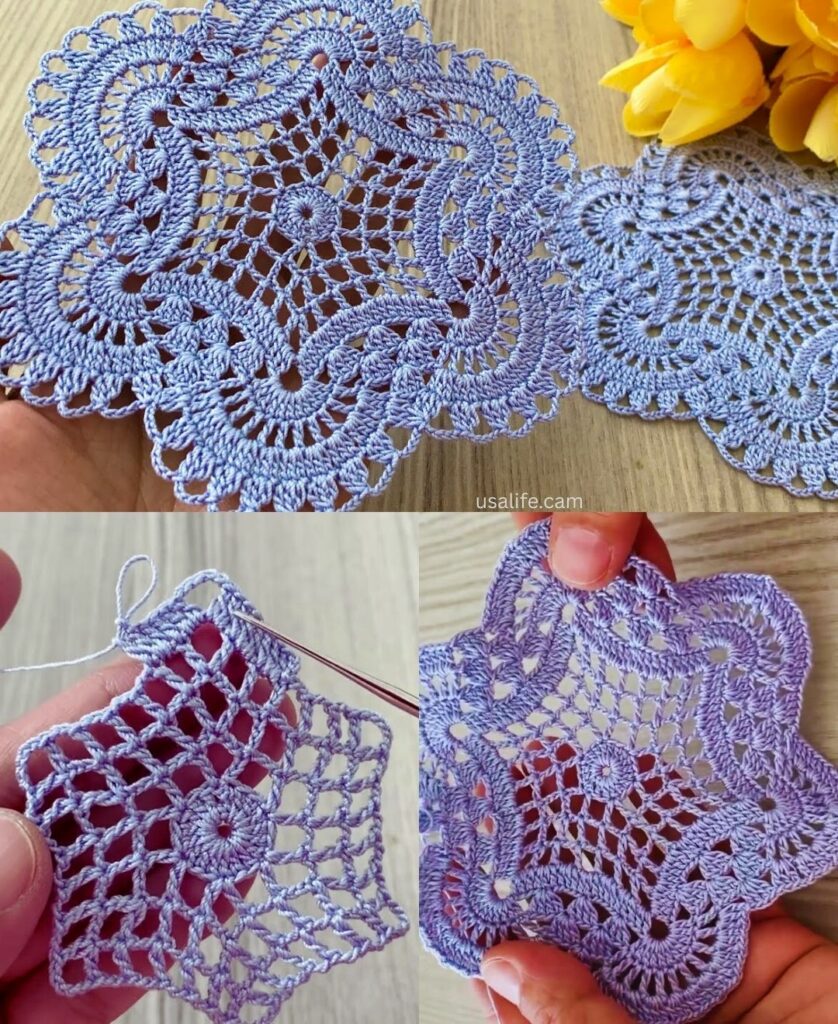
by That is a wonderful and versatile project request! The Hexagon Motif is a fantastic alternative to the square, as it joins easily to create unique, soft-draping fabric perfect for blouses, runners, or blankets. Its natural six-sided structure lends itself well to garments and geometric patterns.
I will detail the pattern for the Classic Granny Hexagon Motif, which is the easiest and most foundational hexagonal pattern, followed by assembly guides.
🔶 Classic Granny Hexagon Motif Tutorial
This motif is built using the same clusters of three double crochet (dc) stitches as a square, but utilizes six corners instead of four.
Materials You’ll Need
- Yarn: Medium-weight yarn (worsted/size 4) for clear stitch definition. DK or Sport weight is better for a lightweight blouse.
- Crochet Hook: The size appropriate for your yarn (e.g., 5.0 mm).
- Scissors, Tapestry Needle.
Key Crochet Terms
| Abbreviation | Stitch Name |
| ch | Chain |
| sl st | Slip Stitch |
| dc | Double Crochet |
| Cluster | 3 dc worked into the same space |
| Corner | (Cluster, ch 2, Cluster) |
Part 1: Crocheting the Motif
Round 1: Creating the Center and First Six Sides
We establish the center ring and the first six corners.
- Start the Ring: Make a Magic Ring (or chain 5 and sl st into the first chain to form a ring).
- First Cluster: ch 3 (This counts as your first dc). Work 2 dc into the center ring.
- Corner Space: ch 2.
- Repeat: Work [3 dc into the ring, ch 2] 5 more times. (You will have 6 clusters and 6 corner spaces).
- Finish: Pull the yarn tail tight to close the center hole. Join the round with a sl st to the top of the beginning ch 3.

Round 2: Expanding the Hexagon
We now work entirely into the chain spaces from the previous round.
- Move to Corner: sl st into the next 2 dc stitches and then sl st into the ch-2 corner space (this centers you).
- First Corner: ch 3. Work (2 dc, ch 2, 3 dc) into the same corner space (This is a complete Corner).
- Next Corner: ch 1 (This is the separator between clusters along the side).
- Repeat: Work [Corner (3 dc, ch 2, 3 dc) in the next ch-2 space, ch 1 (Separator)] 5 more times.
- Finish: Join with a sl st to the top of the beginning ch 3.
Round 3: Continuing to Grow the Sides
The sides of the hexagon now grow by adding a new side cluster into the separator chain space from the previous round.
- Move to Corner: sl st over the next 2 dc stitches and sl st into the ch-2 corner space.
- First Corner: ch 3. Work (2 dc, ch 2, 3 dc) into the corner space.
- First Side: ch 1. Work 3 dc into the next ch-1 separator space.
- Repeat: Continue the sequence [ch 1, Corner (3 dc, ch 2, 3 dc) in the next ch-2 corner sp, ch 1, 3 dc in the next ch-1 separator sp] 5 more times.
- Finish: Join with a sl st to the top of the beginning ch 3.
Continuing to Grow
To make the hexagon larger, simply repeat Round 3. The number of side clusters increases by one in every round.

Part 2: Assembly Guide
1. Joining the Motifs
For both projects, the easiest join is the Join-as-You-Go (JAYG) method while working the final round of the second motif.
- When working a separator chain on the side that touches another motif, replace the
ch 1with asl stinto the corresponding ch-1 space of the finished motif. - When working a corner that joins to another motif, replace the
ch 2withch 1, sl st into the finished motif's ch-2 corner, ch 1.
2. Project Layouts
| Project | Shape/Layout | Customization Tips |
| Table Runner | Shape: A single line of hexagons (e.g., 1×8 or 2×8). The six sides help the runner lie flatter than a square chain. | Edging: Finish the perimeter with a simple border of 2-3 rounds of SC. The long sides should be straight, and the short ends naturally have a decorative scallop. |
| Blouse/Garment | Construction: Join the hexagons together to form a large yoke (top section) or two large body panels. | Shaping: The hexagons naturally fit around curves (bust, shoulders). For the bottom edge of the yoke or body, fill the gaps between the motifs with triangular half-motifs to create a straight hemline. |
3. Final Blocking
Blocking is essential, especially for a blouse, to ensure the garment drapes well and the seam lines are smooth. Wet the finished piece, gently stretch it to the correct shape, and pin it flat until completely dry.
Would you like instructions on how to crochet a half-hexagon (triangle) to straighten the bottom edge of a garment?
Video tutorial: