 by
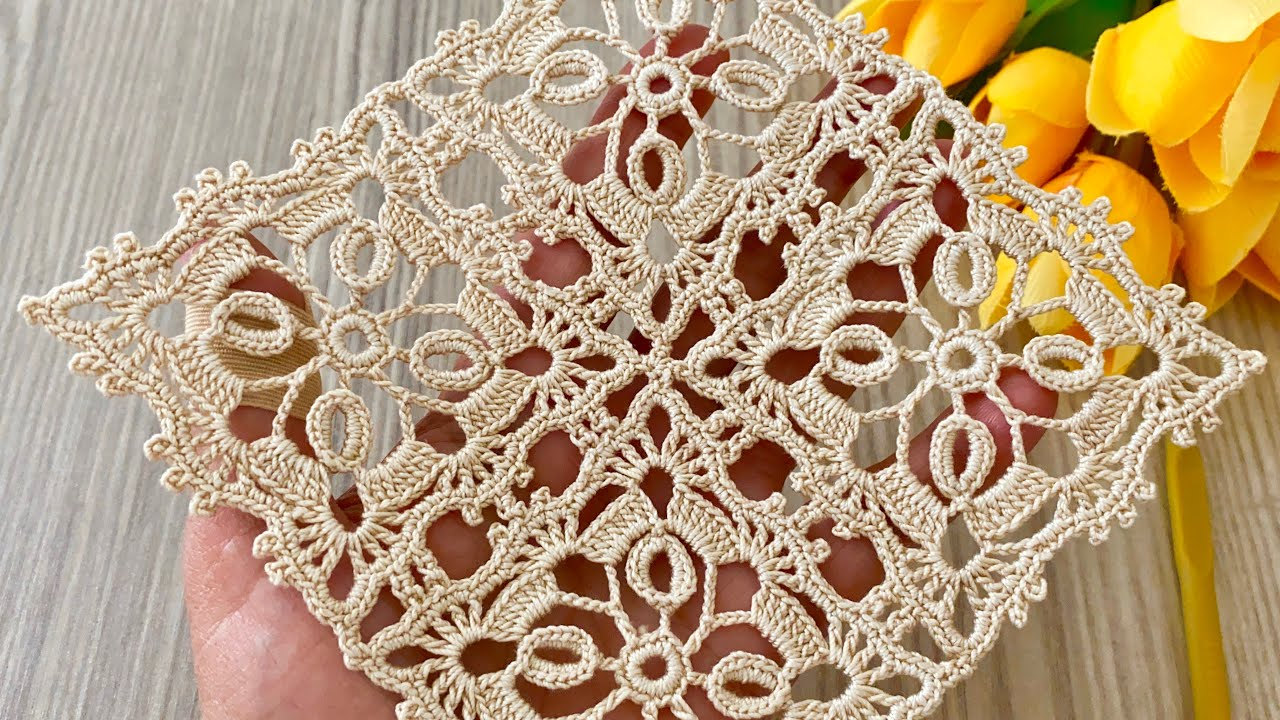
by To create a Wonderful Square Motif as a beginner, the goal is to find a balance between the simplicity of a traditional Granny Square and the elegance of a lacy floral design.
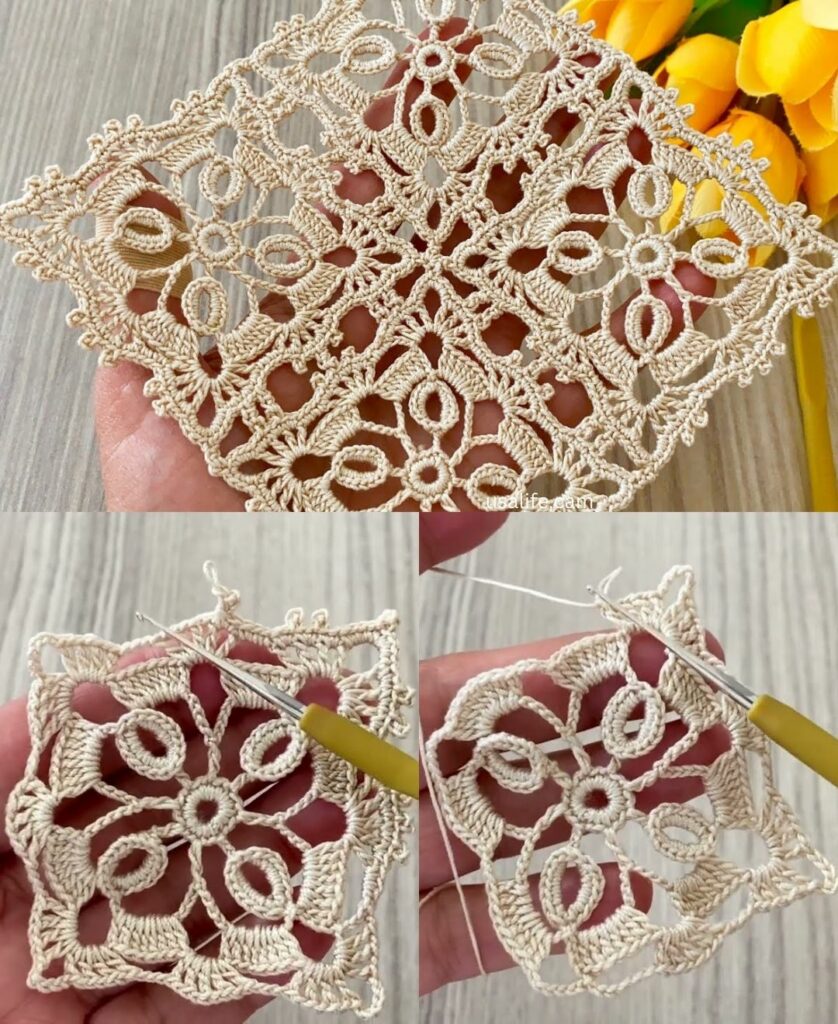
The “Star-Eye Square” is the perfect choice. It uses basic stitches—Chain (ch), Single Crochet (sc), and Double Crochet (dc)—but arranges them to create a beautiful “eye” at the center that blooms into a square.
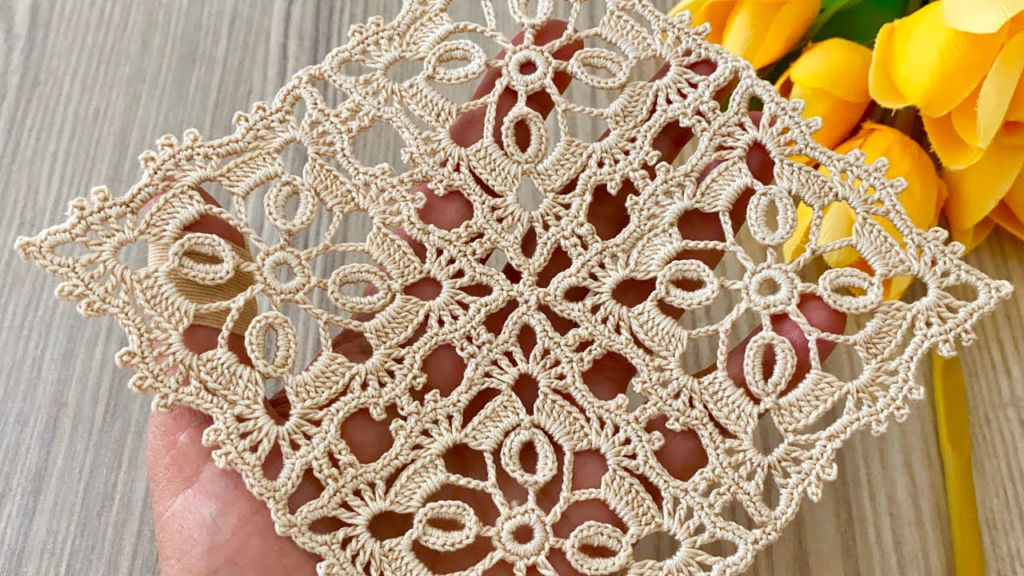
🌟 The “Star-Eye” Square Motif Tutorial
This motif is fast to make and creates a flat, clean fabric that looks professional even on your first try.
Materials You’ll Need
- Yarn: Medium-weight (Worsted/Size 4) yarn. A smooth cotton or acrylic in a light color will help you see your stitches best.
- Hook: 5.0 mm (H/8) hook.
- Extras: Scissors and a tapestry needle.
Stitch Key (US Terms)
- ch: Chain
- sl st: Slip stitch
- sc: Single crochet
- dc: Double crochet
- Corner Cluster: (3 dc, ch 2, 3 dc) in the same space.
Step-by-Step Instructions
Round 1: The Center “Eye”
- Start: Make a Magic Ring (or ch 4 and sl st to the first ch to form a ring).
- First Round: ch 3 (counts as your first dc). Work 15 more dc into the ring.
- Finish: Pull the tail to close the center hole. Join with a sl st to the top of the beginning ch 3.
Result: A solid circle of 16 double crochets.
Round 2: Creating the Star Loops
- ch 1, sc in the same stitch.
- Make a Loop: ch 3, skip 1 stitch, sc in the next stitch.
- Repeat: [ch 3, skip 1 st, sc in the next] 6 more times.
- Finish: ch 3, then join with a sl st to the very first sc you made.

Result: You now have a circle with 8 little “petals” or loops.
Round 3: Squaring the Circle
In this round, we turn the 8 loops into 4 corners and 4 sides.
- Move Hook: sl st into the first ch-3 loop.
- First Corner: ch 3 (counts as dc). In that same loop, work (2 dc, ch 2, 3 dc).
- First Side: ch 1. In the next ch-3 loop, work only 3 dc.
- Second Corner: ch 1. In the next ch-3 loop, work (3 dc, ch 2, 3 dc).
- Repeat: Continue this pattern around: [Side (3 dc in loop), Corner (3 dc, ch 2, 3 dc in loop)], always putting a ch 1 between every group.
- Finish: Join with a sl st to the top of the beginning ch 3.
Result: A clear square shape with 4 distinct corners.
Round 4: The Final Frame
- Move Hook: sl st across the next 2 dc until you reach the corner ch-2 space.
- Corner: ch 3, work (2 dc, ch 2, 3 dc) in the corner space. ch 1.
- Sides: Work 3 dc into the first ch-1 side space. ch 1. Work 3 dc into the next ch-1 side space. ch 1.
- Repeat: Work a Corner in every corner space and 3 dc in every side space, always separated by a ch 1.
- Finish: Join with a sl st to the top of the ch 3 and fasten off!

💡 Top Beginner Tips for Success
- Keep it Loose: Beginners often hold the yarn too tight. If your square is curling into a bowl, your stitches are likely too tight. Try to relax your hands.
- The “Sl St” Slide: Remember that at the start of every round, you usually need to “slide” your hook over to the next hole (chain space) using slip stitches. This keeps your seams invisible.
- Counting is Key: In Round 1, make sure you have exactly 16 dc. If you have 15 or 17, the square won’t “math” correctly in the later rounds!

❗️ Next Steps for Your Project
This “Wonderful Square” is modular, meaning you can keep going:
- For a Blanket: Make 20–30 of these and sew them together.
- For a Runner: Join them in a long single row (1×8).
- For a Blouse: Join them into two large squares (Front and Back) and leave a hole for your head!
Would you like me to show you how to change colors between Round 2 and Round 3 to make the “Star-Eye” pop?
Video tutorial: