 by
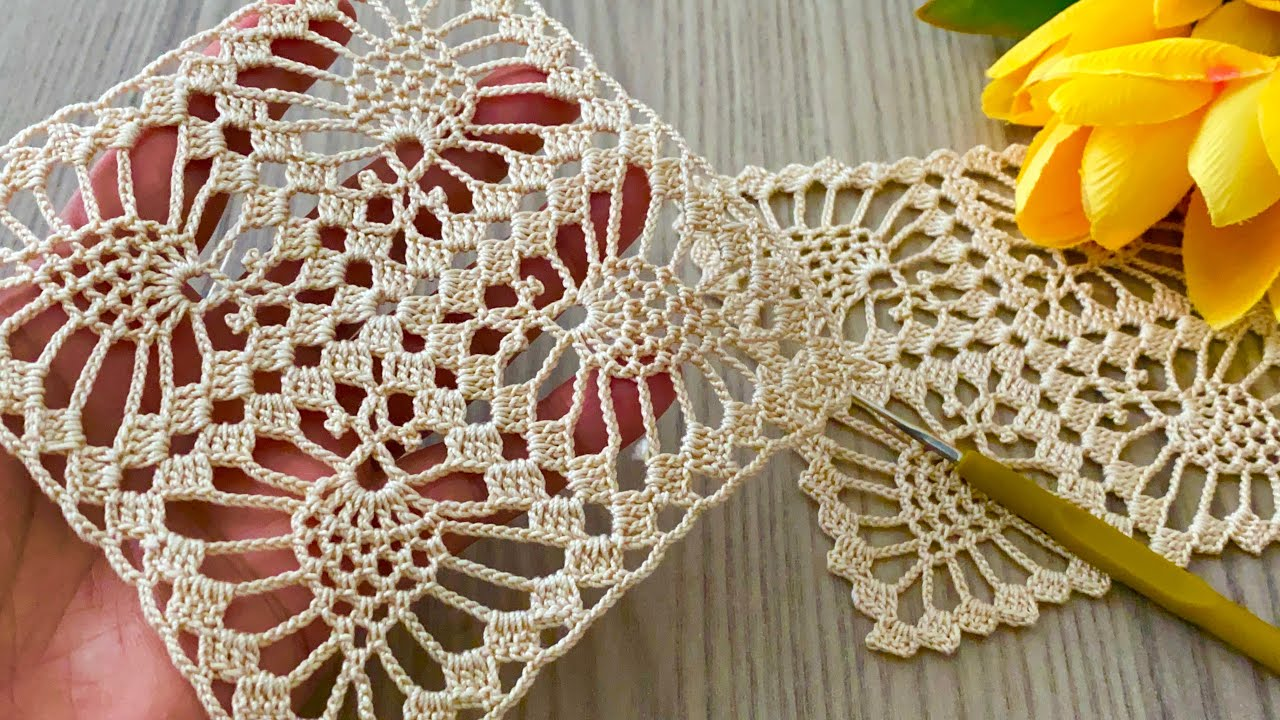
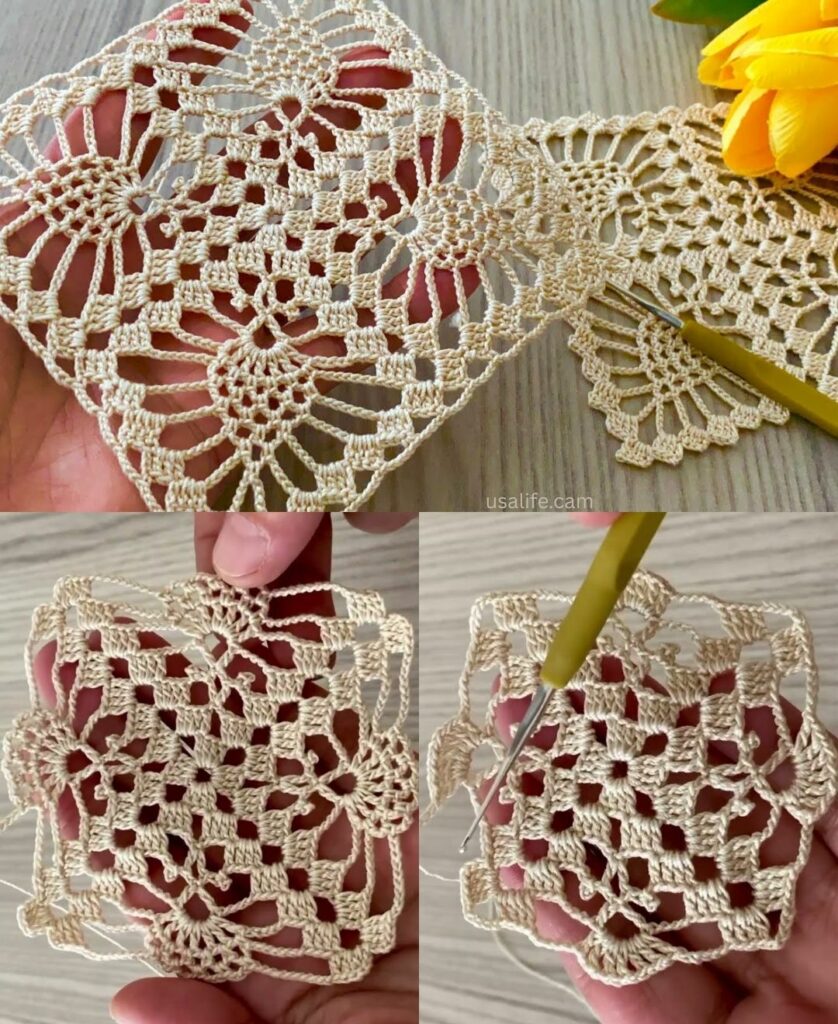
by This is a fantastic request because while the Pineapple Motif is traditionally circular or teardrop-shaped, converting it into a Square Motif makes it much more practical for joining into large projects like blankets, cardigans, or runners.
This “Pineapple Star Square” is stylish because it features four small pineapples pointing toward the corners, creating a beautiful geometric explosion from the center.

💎 The Stylish Pineapple Star Square
This motif uses fine cotton or DK weight yarn. It starts as a flower and “squares off” by growing the pineapple points into the four corners.
Materials You’ll Need
- Yarn: DK Weight (Size 3) cotton or bamboo for a “silky” stylish look.
- Hook: 3.5 mm or 4.0 mm.
- Notions: Scissors, tapestry needle, and blocking pins (essential for lace).
Special Stitches
- V-Stitch (V-st): (dc, ch 2, dc) in the same stitch/space.
- Shell: (2 dc, ch 2, 2 dc) in the same space.
- Pineapple Base: A group of 7 or 9 tr (treble crochet) in one space.

Step-by-Step Instructions
Round 1: The Flower Core
- Start: Make a Magic Ring. ch 3 (counts as dc), work 15 dc into the ring.
- Join: sl st to the top of ch 3. (16 dc total).
Round 2: Setting the 4 Corner Anchors
- ch 4 (counts as dc + ch 1). dc in the next stitch. (This is your first V-st base).
- ch 3, skip 1 stitch.
- Repeat: [dc, ch 1, dc in next stitch, ch 3, skip 1 stitch] 3 more times.
- Join: sl st to the 3rd chain of the starting ch 4. (You now have 4 small V-shapes and 4 ch-3 bridges).
Round 3: Building the Pineapple Bases
- sl st into the ch-1 space of the first V-shape. ch 4 (counts as tr).
- Work 8 tr into that same ch-1 space. (This is the 9-tr base of your first pineapple).
- ch 2, sc in the ch-3 bridge. ch 2.
- Repeat: Work 9 tr in the next V-shape ch-1 space, then ch 2, sc, ch 2 in the bridge. Repeat around.
- Join: sl st to the top of the ch 4.
Round 4: The Pineapple Grid (The Mesh)
- ch 4, sc in the next tr.
- Repeat across the 9 tr: [ch 3, sc in next tr] 7 more times. (You should have 8 small ch-3 loops over the pineapple).
- Transition: ch 3, skip the sc anchor, and move directly to the next pineapple.
- Repeat around. Join with sl st.
Round 5: Squaring the Motif (The Corners)
In this round, we decrease the pineapple loops while building the “frame” that makes it a square.
- sl st into the first ch-3 loop. ch 1, sc in same loop.
- Pineapple: [ch 3, sc in next loop] across the pineapple (now 7 loops).
- The Corner Frame: ch 5. In the ch-3 transition space between pineapples, work a Shell (2 dc, ch 2, 2 dc). This shell will become your square’s corner.
- ch 5, sc in the first loop of the next pineapple.
- Repeat around. ### Round 6: Finishing the Pineapple
- Repeat the Pineapple Grid: [ch 3, sc in next loop] until you have only 1 loop left at the peak of the pineapple.
- Expand the Frame: ch 5. Work a Shell into the ch-2 space of the previous shell. ch 5.
- Join: Continue until all four pineapples are capped with a single loop and the shells have created four distinct corners.

👗 How to Use This Motif
| Project | Layout Strategy |
| Elegant Runner | Join motifs in a 2×8 grid. Because this motif is very lacy, it looks best in a solid cream or white mercerized cotton. |
| Stylish Blouse | Join motifs to create two panels. Use the Join-As-You-Go method by connecting the ch-2 corner spaces and the ch-5 side chains. This creates a “spider-web” effect between the pineapples. |
❗️ Pro-Tip: The “Magic” of Blocking
Pineapple motifs usually look “scrunchy” and messy right off the hook. To make them Magnificent:
- Soak the finished square in lukewarm water with a bit of wool wash.
- Lay it on a foam mat.
- Pin the 4 corners first.
- Then pin the “peak” of each pineapple, pulling them outward to open up the lace.
- Let it dry completely. It will look 100% more professional!
Would you like me to explain the “Join-As-You-Go” method in more detail for your blouse project?
Video tutorial: