by
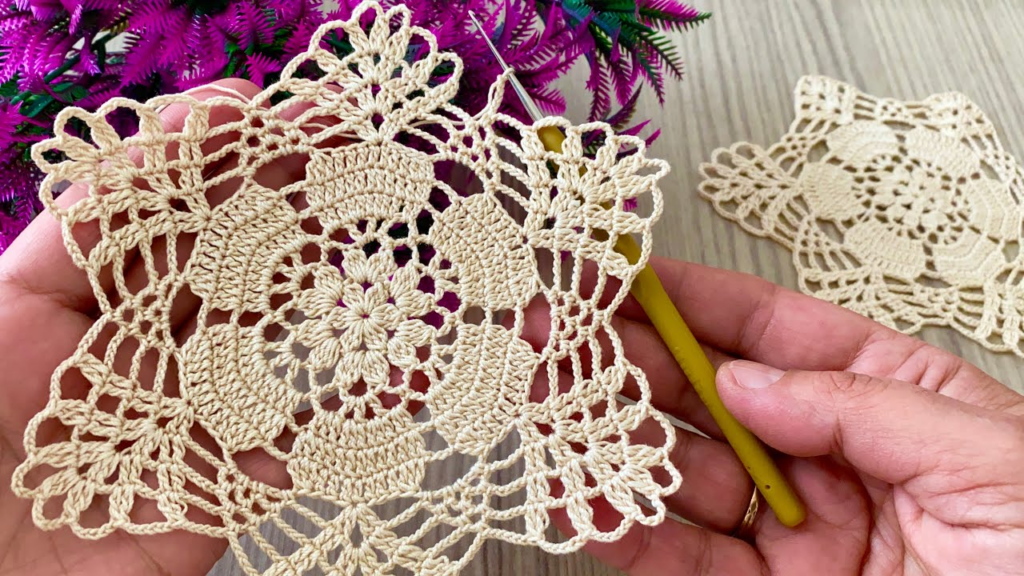
by To crochet a Square Motif, you are essentially learning how to “square the circle.” This is one of the most vital skills in crochet because it allows you to take any circular design (like a flower) and turn it into a building block for blankets, bags, or garments.
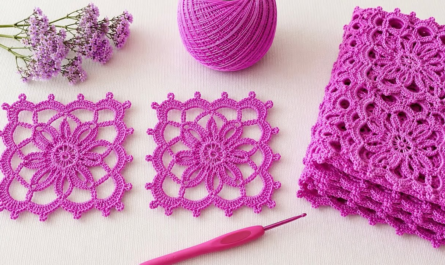
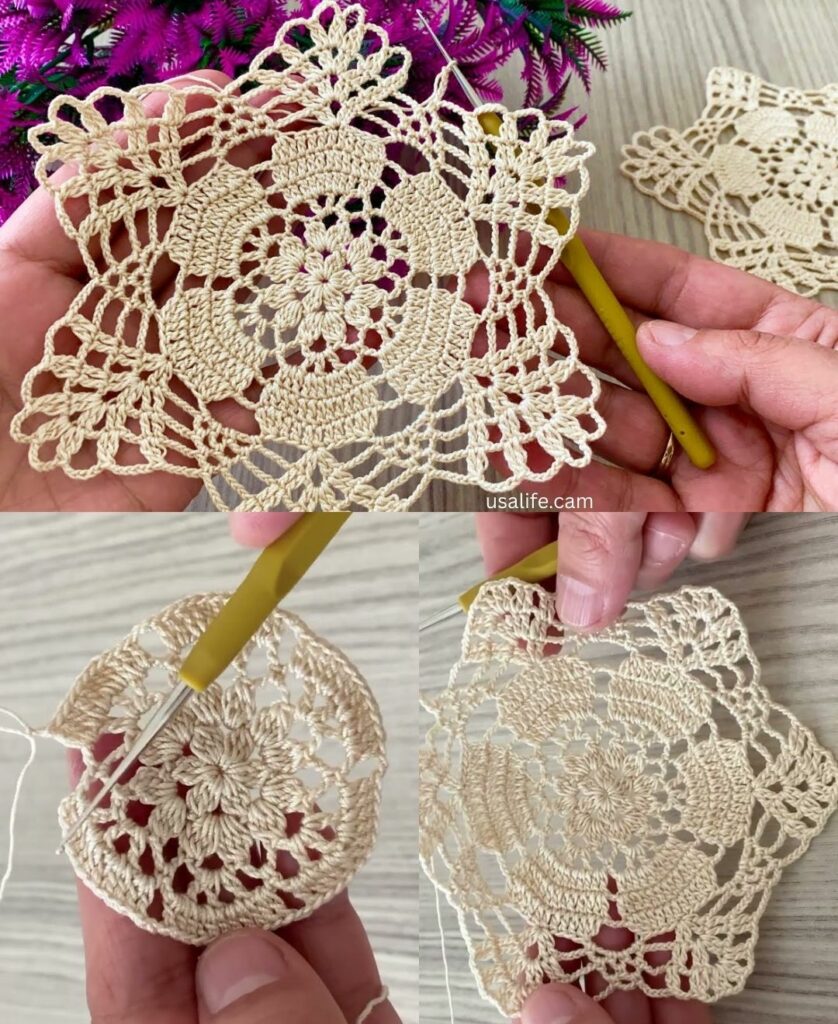
Below is a detailed tutorial for the “Garden Lace Square.” It is a modern, stylish motif that starts with a floral center and finishes with a clean, flat edge.
🌸 The Garden Lace Square Tutorial
This motif is worked in 4 rounds. It is open enough to be “lacy” but solid enough to be durable for a blanket or a bag.
Materials You’ll Need
- Yarn: Any medium-weight (Worsted/Size 4) yarn.
- Hook: 5.0 mm (H/8).
- Tools: Scissors and a tapestry needle for weaving in tails.
Key Stitch Abbreviations (US Terms)
| Abbreviation | Stitch Name | How to Do It |
| ch | Chain | Pull yarn through loop. |
| sc | Single Crochet | Insert hook, yarn over (YO), pull through, YO, pull through 2. |
| dc | Double Crochet | YO, insert hook, YO, pull through, YO, pull through 2, YO, pull through 2. |
| sl st | Slip Stitch | Insert hook, YO, pull through everything on hook. |
| Corner | Corner Cluster | (2 dc, ch 2, 2 dc) all in the same space. |
Step-by-Step Instructions
Round 1: The Foundation Ring
- Start: Make a Magic Ring (or ch 4 and sl st to the first chain to form a ring).
- Stitches: ch 3 (this counts as your first dc). Work 15 more dc into the ring.
- Close: Pull the yarn tail to close the center hole. Join with a sl st to the top of your starting ch 3.You should now have a solid circle of 16 double crochets.

Round 2: Creating the Flower Petals
- Initial Loop: ch 4 (this counts as 1 sc + ch 3). Skip the next dc stitch.
- Repeat: [sc in the next stitch, ch 3, skip the next stitch] repeat 7 more times.
- Close: sl st into the first chain of your starting ch 4.You should now have 8 small loops surrounding your center circle.
Round 3: Converting to a Square (The Magic Round)
In this round, we create the 4 corners.
- Move Hook: sl st into the first ch-3 loop.
- First Corner: ch 3 (counts as dc). In that same loop, work (1 dc, ch 2, 2 dc).
- First Side: ch 1. In the next ch-3 loop, work 3 dc.
- Second Corner: ch 1. In the next ch-3 loop, work a Corner (2 dc, ch 2, 2 dc).
- Repeat: Continue this sequence around: [ch 1, 3 dc in next loop, ch 1, Corner in next loop].
- Close: Join with a sl st to the top of the starting ch 3.You will now see a clear square shape with 4 corners and 1 cluster on each side.

Round 4: The Final Frame
- Move Hook: sl st over the next dc to reach the corner ch-2 space.
- Corners: ch 3, work (1 dc, ch 2, 2 dc) in the corner. ch 1.
- Sides: Work 3 dc into the first ch-1 side space. ch 1. Work 3 dc into the next ch-1 side space. ch 1.
- Repeat: Work a Corner in every corner space and 3 dc in every side space, always separated by a ch 1.
- Finish: Join with a sl st to the top of the ch 3. Fasten off and weave in your ends!

💡 3 Pro-Tips for Perfect Squares
- The Corner Check: If your square looks like a circle, check your corners. Every corner must have that ch-2 space. This creates the sharp 90-degree angle.
- Blocking is Everything: If your square is a bit “wobbly,” don’t worry! Pin it down to a foam board, spray it lightly with water, and let it dry. It will become perfectly straight.
- Changing Colors: For a “Magnificent” look, change your yarn color for Round 4. This creates a beautiful border that frames the inner “flower.”
What would you like to do next?
- Would you like me to show you how to join these squares together with an invisible seam?
- Or would you like a pattern for a “Half-Square” (Triangle) to help finish the edges of a shawl?
Video tutorial: