 by
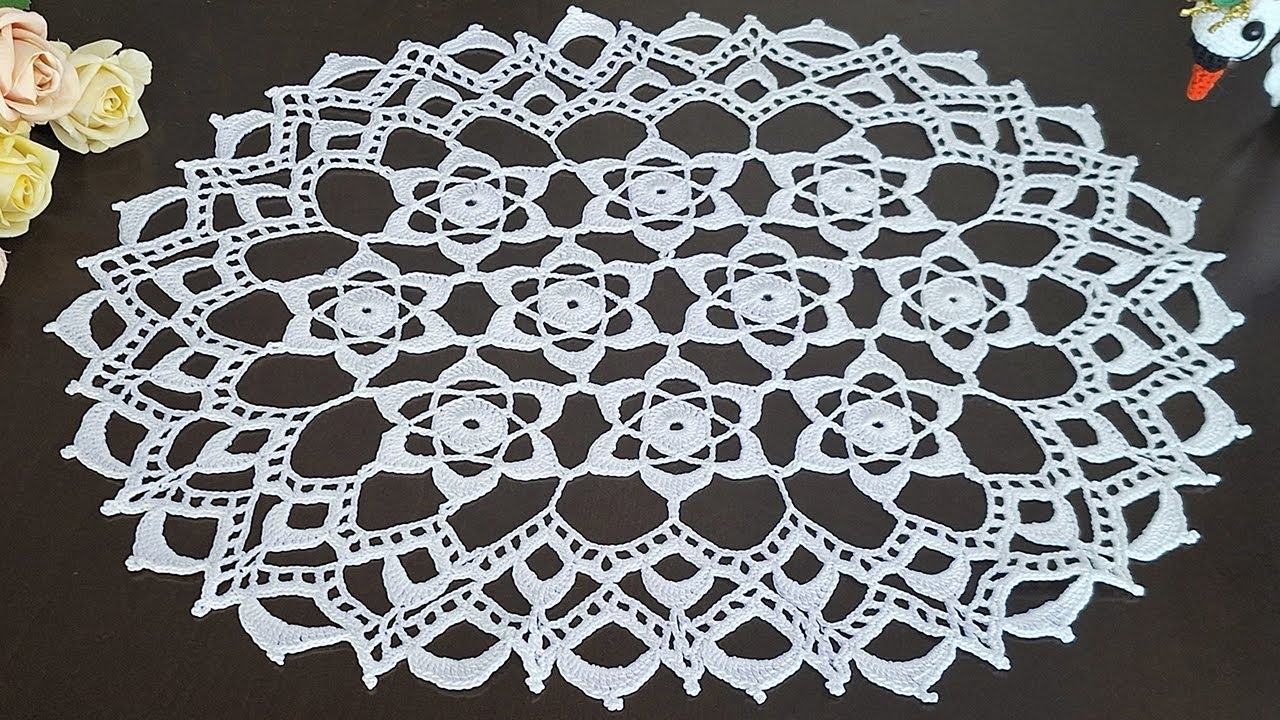
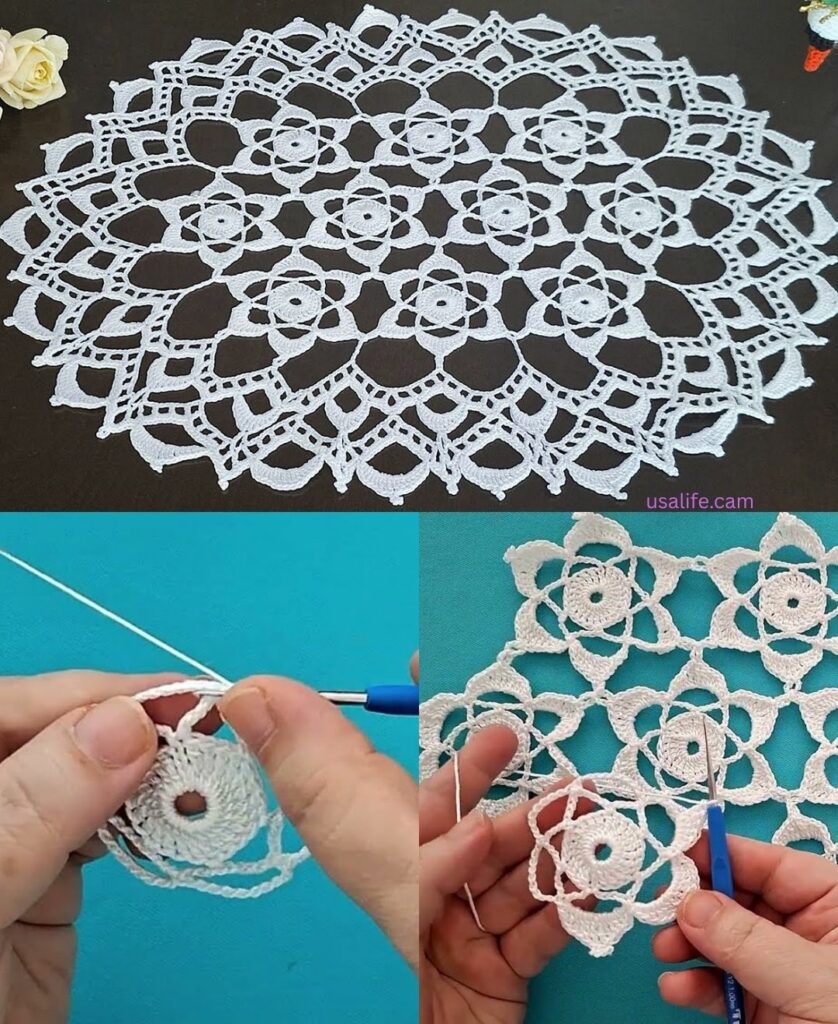
by That is a magnificent project! Crocheting a full tablecloth requires a scalable design, precision, and a beautiful repeating pattern. The most effective way to create a large, elegant tablecloth is by crocheting numerous motifs and joining them together, which is much more manageable than crocheting one giant circle.
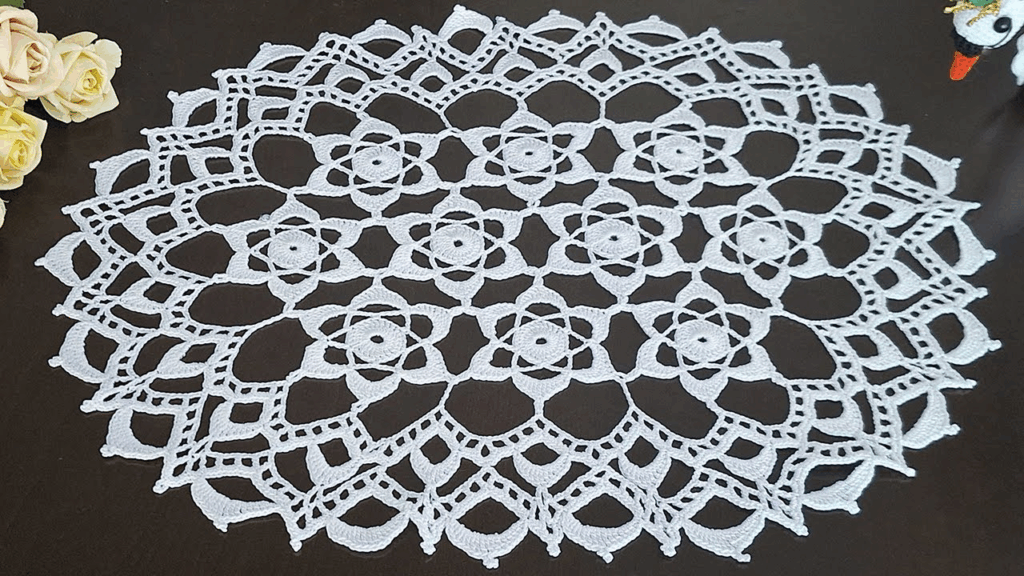
Here is a detailed tutorial for a Hexagonal Motif Tablecloth, including the motif pattern, joining technique, and a stunning border.
🍽️ Crochet Hexagon Motif Tablecloth Tutorial
This method creates a honeycomb pattern, which drapes beautifully and is a popular, modern choice for large covers.
Materials You’ll Need
- Thread/Yarn: Size 10 or 20 Cotton Thread (for a fine, delicate cloth) or Fingering/Sport Weight Cotton Yarn (for a larger, quicker result).
- Crochet Hook: The size appropriate for your material (e.g., 1.5 mm for thread, 3.5 mm for yarn).
- Scissors, Tapestry Needle, Stitch Markers.
Key Crochet Terms
| Abbreviation | Stitch Name |
| ch | Chain |
| sl st | Slip Stitch |
| sc | Single Crochet |
| dc | Double Crochet |
| Shell | (3 dc, ch 2, 3 dc) in one space |
Part 1: The Hexagon Motif Pattern
This is the repeating unit that will form the body of the tablecloth.
- Round 1 (Center): Make a Magic Ring. ch 3 (counts as dc). Work 17 dc into the ring. Join with a sl st to the top of the ch 3. (18 sts).
- Round 2 (6 Sides): ch 1. sc in the same st. ch 3. Skip 2 sts. Repeat [sc in the next st, ch 3, sk 2 sts] 5 more times. Join with a sl st to the first sc. (6 ch-3 loops).
- Round 3 (First Shells): sl st into the first ch-3 loop. ch 3. Work (2 dc, ch 2, 3 dc) in the same ch-3 loop (Shell). ch 1 (side space). Repeat [Shell in the next ch-3 loop, ch 1] 5 more times. Join with a sl st to the top of the ch 3. (6 Shells).
- Round 4 (Expansion): sl st to the ch-2 corner sp. ch 3. Work (2 dc, ch 2, 3 dc) into the corner sp (Corner Shell). ch 1. Work 3 dc into the ch-1 side sp. ch 1. Repeat the sequence [Corner Shell in ch-2 sp, ch 1, 3 dc in ch-1 sp, ch 1] 5 more times. Join with a sl st to the top of the ch 3.
- Round 5 (Joining Round): Repeat Round 4, but STOP when you reach the desired motif size (Round 5 is a good size for joining). The next round will be the joining round.

Part 2: Joining the Motifs (Join-as-You-Go)
The Join-as-You-Go method creates an invisible seam as you crochet the final round.
Step-by-Step Joining (Joining Motif 2 to Motif 1)
- Start Motif 2 and crochet the pattern until the final round (Round 5).
- When you reach the first corner where you want to join:
- Work 3 dc into the corner space.
- Drop the hook. Insert the hook into the ch-2 corner space of the corresponding finished motif (Motif 1).
- Hook the dropped loop and pull it through (this creates a sl st join).
- ch 1. Work 3 dc back into the same corner space on Motif 2. (The corner is now joined).
- For the side joins (ch-1 spaces):
- Instead of
ch 1on Motif 2, work a sl st into the corresponding ch-1 space on Motif 1. - Continue the next cluster (e.g., 3 dc) on Motif 2.
- Instead of
- Repeat the join at the corner and along the sides until Motif 2 is attached to all adjacent motifs.
- Finish Motif 2’s final round and fasten off.
Continue crocheting and joining motifs until the overall size of the joined fabric exceeds the dimensions of your table.

Part 3: The Finishing Border
Once all motifs are joined, a substantial border is needed to provide weight and a finished look.
- Round 1 (Leveling): Work a round of single crochet (sc) evenly around the entire perimeter of the tablecloth. In the dips between motifs, work 3 sc together (sc3tog) to level the edge. At the points, work 3 sc in one stitch for a slight increase.
- Round 2 (Shell Edge): ch 3 (counts as dc). Work 2 dc in the same st. Skip 2 sts. Repeat [sc in the next st, skip 2 sts, Shell (5 dc) in the next st, skip 2 sts] around the entire perimeter. Join with a sl st.
- Round 3 (Picot Trim): sl st to the center (3rd dc) of the 5-dc shell. Work sc in the same st. ch 5. Work a Picot (ch 3, sl st in 1st ch). ch 5. Repeat [sc in the center of the next 5-dc shell, ch 5, Picot, ch 5] around the entire perimeter.
Part 4: Final Step—Blocking (MANDATORY)
Blocking is essential for a lace tablecloth to ensure it lies flat, the seams are straight, and the motifs are uniform.
- Soak: Soak the finished tablecloth in lukewarm water or a mild starch solution.
- Pin: Lay the wet tablecloth on a large, flat, padded surface (e.g., foam floor mats). Meticulously pin every corner and point of the outer border, stretching the fabric gently but firmly to its final, intended size and shape.
- Dry: Allow the tablecloth to dry completely (this may take 24–48 hours for a large piece) before removing the pins.
Your elegant crocheted tablecloth is complete!
Video tutorial: