 by
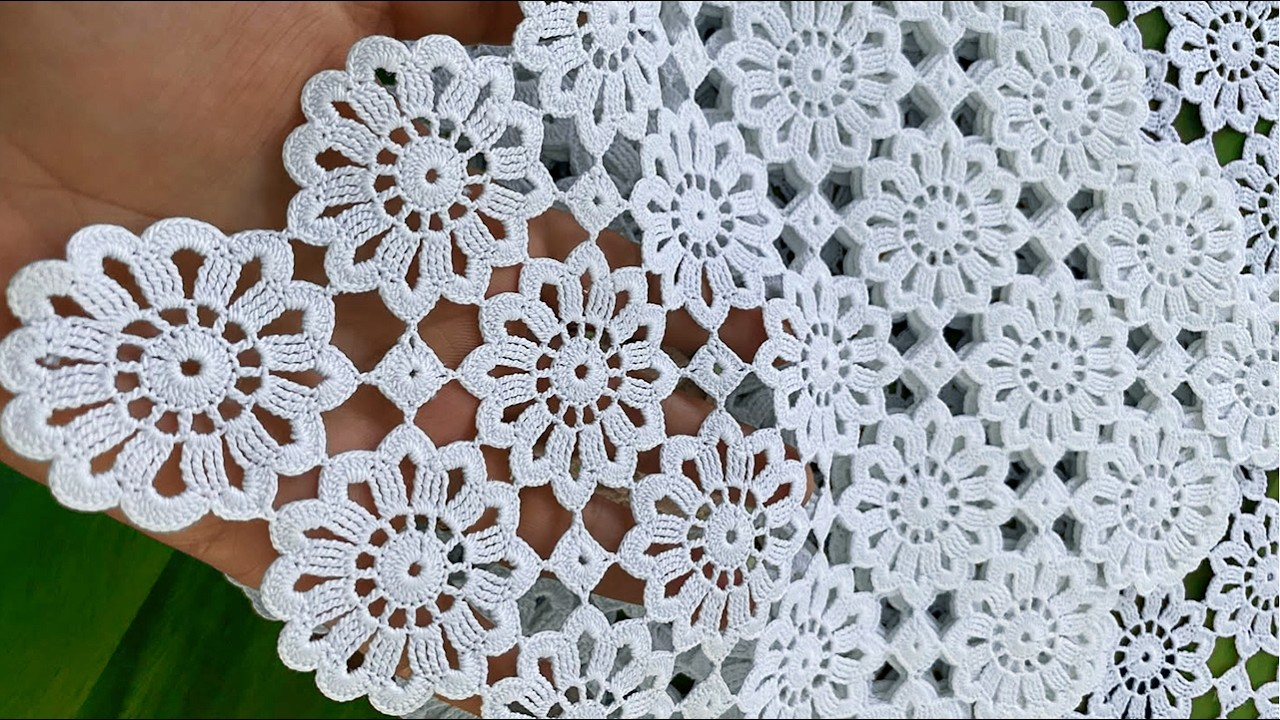
by That is a fantastic request! An Elegant Lace Crochet Motif is incredibly versatile, forming the basis for everything from shawls and blouses to table runners and bedspreads. The key to elegance lies in precise, intricate stitch work and good expansion.
I will detail a pattern for the Pineapple Lace Motif, which is one of the most classic and elegant lace patterns, and then explain how to adapt its core elements to create Square, Circular, and Border Shapes.

🍍 Elegant Pineapple Lace Motif Pattern
The Pineapple Lace is created by building up a fan/shell structure, and then surrounding it with decreasing chain loops to form the characteristic teardrop or pineapple shape.
Materials You’ll Need
- Thread/Yarn: Use Size 10 Cotton Thread or Fingering/Lace Weight Yarn for maximum drape and delicacy.
- Crochet Hook: A small size appropriate for your thread (e.g., 1.5 mm – 2.5 mm).
- Scissors, Tapestry Needle.
Key Crochet Terms
| Abbreviation | Stitch Name |
| ch | Chain |
| sl st | Slip Stitch |
| sc | Single Crochet |
| dc | Double Crochet |
| tr | Treble Crochet |
| Shell | A group of multiple DC stitches in one space |
| Picot | Ch 3, sl st into the first ch |
Export to Sheets
Part 1: Pineapple Lace Center (Foundation)
This sequence establishes the core shell structure that will define the lace pattern.
- Foundation: Ch 8, sl st to first ch to form a ring.
- Round 1: ch 3 (counts as dc). Work 15 dc into the ring. Sl st to top of ch 3. (16 dc)
- Round 2: ch 4 (counts as tr). tr in the same st. ch 3. Skip 3 sts. Work [2 tr in the next st, ch 3, sk 3 sts] 3 more times. Sl st to top of ch 4. (4 sets of double tr posts).
- Round 3 (First Shell): sl st into the ch-3 sp. ch 3. Work (2 dc, ch 3, 3 dc) in the same ch-3 sp (this is your first Shell). ch 4. Repeat [Shell in the next ch-3 sp, ch 4] 3 more times. Sl st to top of ch 3.

Part 2: Forming the Pineapple Body
This is the central process where the design becomes defined. The shell stays constant while the chain loops decrease.
- Round 4 (Anchor): sl st to the ch-3 peak of the shell. ch 1. sc in the peak. ch 3. sc in the first ch of the ch-4 sp. ch 3. sc in the last ch of the ch-4 sp. ch 3. Repeat [sc in ch-3 peak, ch 3, sc in next ch of ch-4 sp, ch 3, sc in next ch of ch-4 sp, ch 3] 3 more times. Sl st to first sc.
- Round 5 (Netting): sl st into the first ch-3 sp. ch 3. sc in the next ch-3 sp. ch 3. Repeat [sc in next ch-3 sp, ch 3] across the side until you reach the next shell peak. Continue sequence around. (The goal is to increase chain loops that are decreasing in length).
- Rounds 6-10 (Filling the Pineapple): Continue repeating the ch 3, sc in the next ch-3 sp netting sequence across the body of the ‘pineapple’. As you work, the number of ch-3 loops between the main shell anchor points will grow.
- (The shape naturally forms as the chain loops get pulled tighter towards the center anchor points).
Part 3: Adapting the Motif to Shape
The final shape is determined by how you construct the border around the core motif.
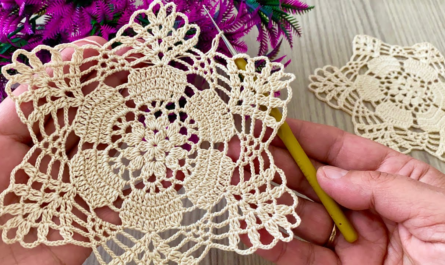
A. Circular Motif (Doily/Cover)
- Adaptation: The pattern above, working in continuous rounds, is inherently circular.
- Expansion: To make it larger, after completing a pineapple row (Rounds 4-10), you work a new Shell Round into the mesh between the completed pineapples and start a new, larger set of pineapples.
- Finishing: Use a final round of Picot edging for a beautiful scalloped edge.

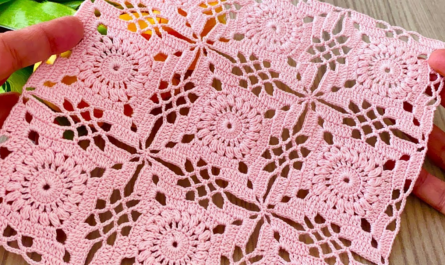
B. Square Motif (Blouse/Bedspread)
- Adaptation: You must introduce four defined corners in the round immediately following the Pineapple Body (e.g., after R10).
- Corner Round:ch 1. Work a sequence that alternates Corner Cluster and Side Mesh.
- Corner: (4 tr, ch 3, 4 tr) in the peak of the next pineapple.
- Side Mesh: Use a repeating pattern of (ch 5, sc in mesh sp) across the side of the pineapple until the next pineapple peak.
- Continue: Alternate Corner and Side Mesh until a square shape is maintained.
- Usage: Join these squares using the final ch-3 corner loops for bedspreads or use them as lacy panels for a blouse.
C. Runner/Border (Rectangular)
- Adaptation: Work the motif in a linear row. Instead of joining to form a circle, turn and work back.
- Construction: Start with a foundation chain. Work the Shell/Fan base (similar to R3) at even intervals along the chain. Work the Pineapple body rows back and forth. This creates a repeating border along a straight edge.
- Usage: Perfect as a border for fabric table runners or as a decorative edge for towels.

Final Step: Blocking
For all lace patterns, blocking is essential. Wet the motif, gently pin the edges and points into the desired shape (circle, square, or straight line), and let it dry completely to set the elegant structure.
Which shape or project are you most interested in starting with?
Video tutorial: