 by
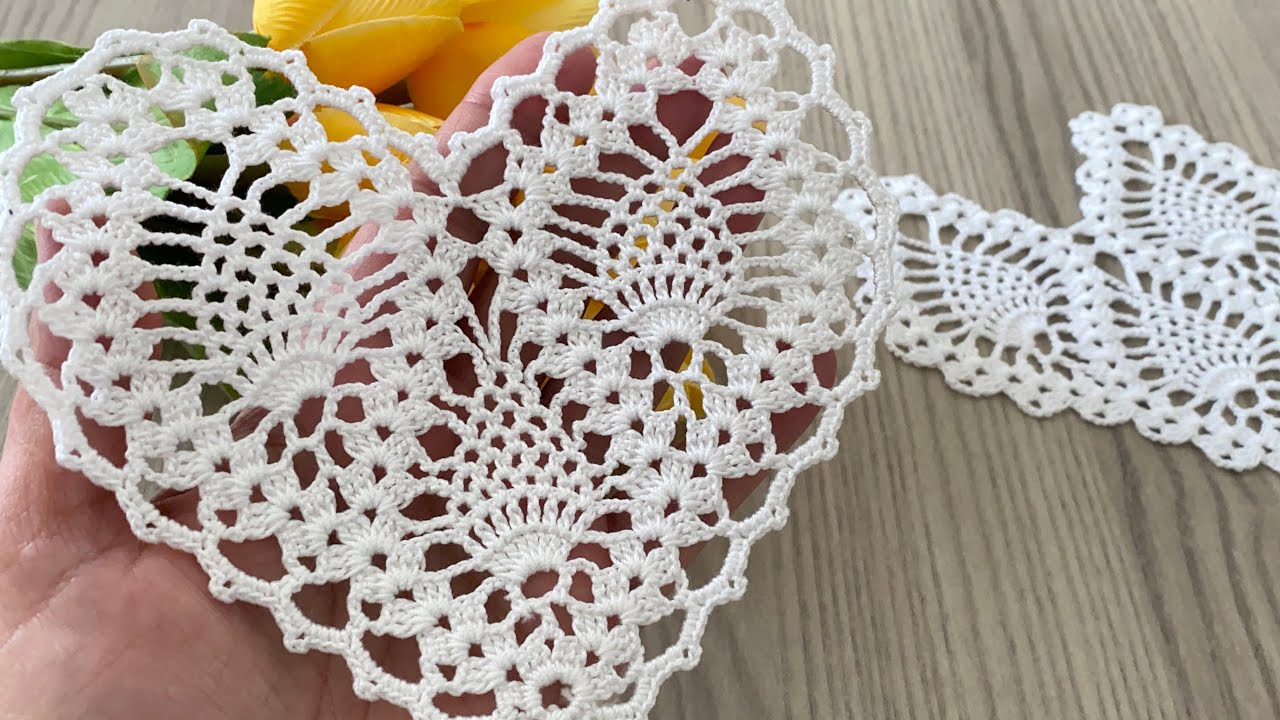
by That is a truly magnificent and creative design! Combining the elegant, classic structure of the Pineapple Lace Motif with the charming shape of a Heart results in a stunning piece, perfect for advanced doilies, elaborate motifs, or delicate garment yokes.
This pattern requires precise stitch counting to transition smoothly between the curved, decreasing chains of the pineapple and the solid, expanding blocks of the heart.

Here is a detailed tutorial for a Heart-Centered Pineapple Lace Motif.
❤️🍍 Magnificent Heart-Centered Pineapple Motif
This motif starts with the heart shape and then uses the heart’s curve to anchor the cascading pineapple lace.
Materials You’ll Need
- Thread/Yarn: Size 10 Cotton Thread is highly recommended for the best lace definition, or Fingering/Lace Weight Yarn for a larger motif.
- Crochet Hook: A small size appropriate for your material (e.g., 1.5 mm – 2.5 mm).
- Scissors, Tapestry Needle.
Key Crochet Terms
| Abbreviation | Stitch Name | Purpose in this Pattern |
| ch | Chain | Creates lace mesh |
| sl st | Slip Stitch | Joining and movement |
| sc | Single Crochet | Anchoring the mesh |
| dc | Double Crochet | Forming the solid heart blocks |
| tr | Treble Crochet | Used for tall shell stitches |
| Picot | Ch 3, sl st into the first ch | Decorative point |
Part 1: Constructing the Heart Center
We begin with a simple, closed circle that immediately transitions into the curves of the heart.
- Round 1 (Foundation): Make a Magic Ring. ch 3 (counts as dc). Work 15 dc into the ring. Join with a sl st to the top of the ch 3. (16 dc)
- Round 2 (Dividing Points): ch 1. sc in the same st. ch 3. Skip 1 st. dc in the next st. ch 3. Skip 1 st. sc in the next st. ch 3. Repeat [sc, ch 3, sk 1, dc, ch 3, sk 1, sc, ch 3] one more time. (Creates two solid dc anchors, two sc anchor points, and 6 ch-3 spaces). Join with a sl st to the first sc.
- Round 3 (Heart Curve): sl st into the first ch-3 sp. ch 3. Work 3 dc in the same sp. 3 dc in the next sp. ch 1 (dividing space). Work Shell (2 tr, ch 2, 2 tr) into the top of the center dc from R2. ch 1. Work 3 dc in the next ch-3 sp. 3 dc in the next ch-3 sp. sc in the next sc anchor. (This creates the top curves and the point). Join with a sl st.

Part 2: Anchoring the Pineapples
The curves of the heart are used to launch four separate, radiating pineapple motifs.
- Round 4 (Pineapple Base):ch 1. Work sc into the first 3 dc stitches. Work sc into the ch-1 sp. sc in the next 3 dc sts. (This covers the first heart curve).
- First Pineapple: ch 5. Work (dc, ch 3, dc) into the ch-2 corner of the Heart Shell. ch 5.
- Second Pineapple: sc in the next 3 dc sts. sc in the ch-1 sp. sc in the next 3 dc sts. (This covers the second heart curve).
- Heart Point: ch 3. Work sc into the point (the R3 sc anchor). ch 3.
- Repeat: Repeat the Pineapple and Heart Point sequence once more. Join with a sl st.
- Round 5 (Pineapple Netting):ch 1. sc in the first 7 sc sts.
- First Pineapple Side: Work sc in the ch-5 sp. ch 3. sc into the ch-3 sp V-stitch. ch 3. sc in the ch-5 sp.
- Continue: sc across the next 7 sc sts of the heart curve. sc in the ch-3 sp. sc in the next sc anchor. sc in the ch-3 sp.
- Repeat the sequence for the second half of the motif. Join with a sl st.

Part 3: Developing the Pineapple Body
Continue working back and forth across the heart curves, allowing the pineapple netting to grow outwards.
- Round 6 (Expanding Net):sl st over 3 sc sts. ch 1. sc in the next 4 sc sts.
- First Pineapple Side: sc in the ch-3 sp. ch 3. sc in the next ch-3 sp. ch 3. sc in the next ch-3 sp.
- Continue: sc across the next set of sc stitches on the heart curve. ch 3. Work sc into the heart point ch-3 loop. ch 3.
- Repeat the sequence around, continually decreasing the number of sc stitches worked across the heart curves and increasing the chain count in the pineapple netting.
- Continue: Repeat the process for several more rounds (usually 3–5 rounds) until the pineapple netting forms the characteristic curved shape.
Final Step: Edging and Blocking
Once the pineapples are complete, finish with a neat picot edge, especially around the outer perimeter of the design.
Blocking is essential. Wet the motif thoroughly and pin every heart curve, every anchor point, and every final picot into shape to make the lace flat and the heart clearly defined.
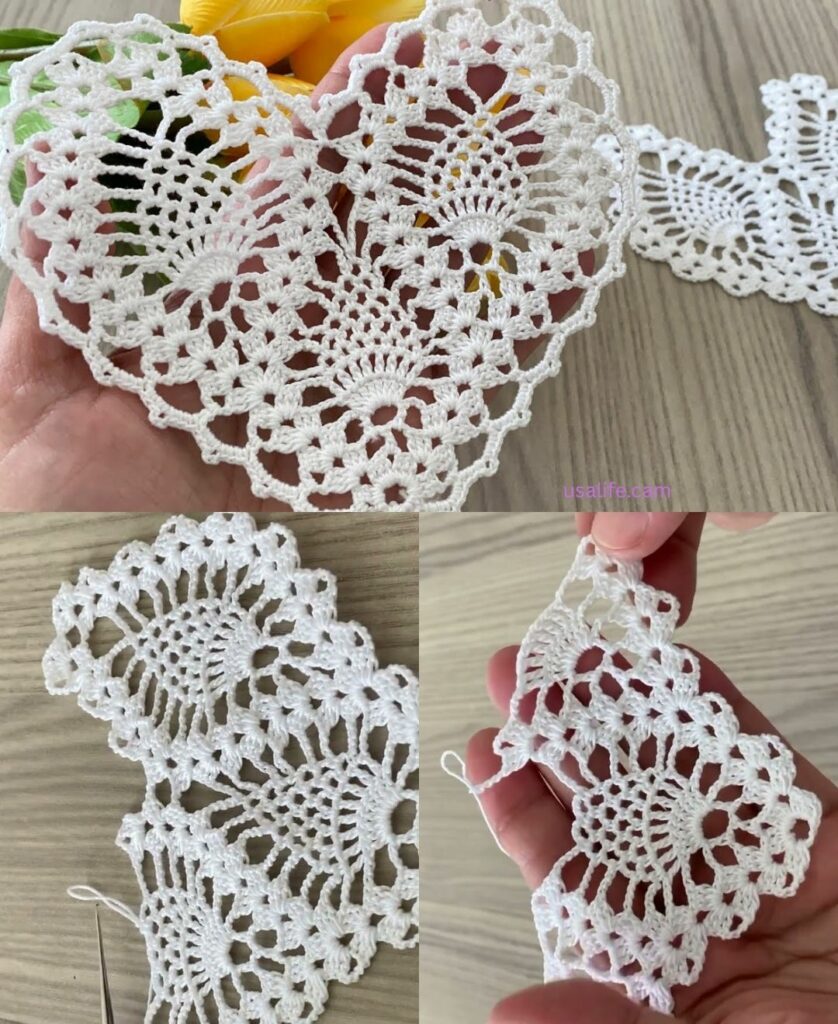
This motif creates a magnificent, heirloom-quality piece!
Video tutorial: