by
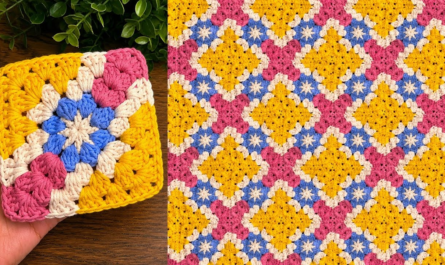
by That’s a fantastic idea! A motif-look multi-purpose runner and blouse is a great project because it allows a beginner to master a simple repeating unit (the motif) and then assemble it into two different, useful items.
Since a “motif-look” can mean various things, I’ll provide a detailed pattern for a Simple Square Motif and then give instructions on how to assemble that motif into both a Table Runner and a Blouse (specifically, a simple top or vest).
Simple Square Motif for Beginner Crochet
This motif uses basic stitches and is worked in the round.
Skill Level: Beginner
Yarn Recommendation: Lightweight Cotton (DK/Sport weight) for a nice drape, or Worsted Weight Acrylic for a more substantial feel.
Hook Recommendation: Appropriate size for your yarn (e.g., 4.0 mm [G/6] for DK or 5.0 mm [H/8] for worsted).
Abbreviations:
- ch: chain
- st(s): stitch(es)
- sl st: slip stitch
- sc: single crochet
- dc: double crochet
- sp: space
- MR: Magic Ring (or you can ch 4 and sl st to 1st ch to form a ring)

The Motif Pattern (Make Multiple)
Foundation: Start with a MR or Ch 4, sl st to first ch to join.
Round 1:
- Ch 3 (counts as 1st dc).
- Dc 11 times into the ring. (Total of 12 dc, including the starting ch 3).
- Sl st to the top of the starting ch 3 to join. (12 sts)
Round 2: Creating the Square Corners
- Ch 3 (counts as 1st dc). Dc in the next st.
- Corner 1: Ch 3, (dc in next st, dc in next st).
- Repeat the following sequence 3 more times: Corner: Ch 3, (dc in next st, dc in next st).
- Sl st to the top of the starting ch 3 to join. (8 sets of 2 dc, and 4 ch-3 corners)

Round 3: Expanding the Sides
- Ch 3 (counts as 1st dc). Dc in the next st.
- Dc in the next 2 dc (from the previous round). (Total of 4 dc on this side.)
- Corner: In the ch-3 space, work (2 dc, ch 3, 2 dc).
- Repeat the following sequence 3 more times:
- Dc in the next 4 dc.
- Corner: In the ch-3 sp, work (2 dc, ch 3, 2 dc).
- Sl st to the top of the starting ch 3 to join.
Round 4 (Optional): Finishing Edge & Joining
If you want a solid edge for easier joining:
- Ch 1 (does not count as a st). Sc in each dc around.
- Corners: In the ch-3 space, work (sc, ch 1, sc).
- Sl st to the starting sc to join. Fasten off and weave in ends.
Project 1: Motif Table Runner Assembly
A table runner is the easiest project to start with as it requires only joining the motifs in a straight line.
Motif Requirements & Arrangement:
- Length: Decide on the length you want. A standard runner is often 4 to 6 motifs long. (e.g., Make 5 Motifs).
- Width: A single row of motifs is common for a runner.
| Motif 1 | Motif 2 | Motif 3 | Motif 4 | Motif 5 |

Joining Technique (Join-As-You-Go Method):
The easiest way for beginners is to join the motifs while you are crocheting the final round (Round 4).
- Motif 1: Complete all 4 rounds. Fasten off.
- Motif 2: Complete Rounds 1-3. Start Round 4.
- Crochet the first three sides of Motif 2 as usual (sc in each st, (sc, ch 1, sc) in corners).
- Joining Side: When you reach the side that joins Motif 1:
- Corner: Work (sc, sl st into the corner ch-1 sp of Motif 1, sc) in the corner ch-3 sp of Motif 2.
- Side: Sc in the next st of Motif 2, sl st into the corresponding sc of Motif 1.
- Repeat this sequence (sc in Motif 2, sl st in Motif 1) across the entire joining side.
- Next Corner: Work (sc, sl st into the corner ch-1 sp of Motif 1, sc) in the next corner ch-3 sp of Motif 2.
- Finish Round 4 of Motif 2.
- Motif 3, 4, etc.: Repeat the joining process for each subsequent motif, connecting them edge-to-edge.
Finishing the Runner:
- Border (Optional): Once all motifs are joined, work 2-3 rows of single crochet or moss stitch around the entire perimeter of the runner to tidy the edges and give it a finished look. Use a decorative border like a simple shell stitch for the final row.
Project 2: Motif Blouse/Simple Top Assembly
This project requires careful planning for sizing, especially for beginners. We will create a simple, boxy top/vest.
Motif Requirements & Sizing:
- Measure: Measure your shoulder-to-shoulder width and your desired top length.
- Calculate: Determine how many motifs you need across the front and back.
- Example (Small/Medium): A good size might be 3 motifs wide by 4 motifs long for the front, and the same for the back. (Total: $3 \times 4 = 12$ motifs for the front, 12 for the back = 24 Motifs total).
- Pattern Layout:
- Front Panel: $3 \times 4$ rectangle
- Back Panel: $3 \times 4$ rectangle
Assembly Steps:
- Join the Front Panel: Join all $3 \times 4$ motifs together to form a large rectangle using the Join-As-You-Go method described above, joining both the vertical and horizontal sides.
- Join the Back Panel: Repeat for the back panel.
- Shoulder Seams:
- Lay the front and back panels on top of each other, right sides facing out.
- Decide on your neck opening width.
- Seam: Use a slip stitch seam or sc seam to join the top edges (shoulders). Example: Join the first full motif on the left shoulder and the first full motif on the right shoulder, leaving the center motif width un-seamed for the neck.
- Side Seams:
- Decide on your armhole depth.
- Starting from the bottom edge, use a sl st or sc seam to join the side edges (waist to armpit). Example: Join the bottom 2 or 3 motifs, leaving the top motif un-seamed for the armhole.
Finishing the Blouse:
- Neckline Trim: Work 1-2 rounds of single crochet (sc) or slip stitch (sl st) evenly around the entire neck opening to stabilize and clean up the edge. Fasten off.
- Armhole Trim: Work 1-2 rounds of sc evenly around both armhole openings. Fasten off.
- Bottom Hem: Work 1-2 rounds of sc around the bottom edge of the top. You may choose to add a decorative trim like a simple scalloped edge here.
- Weave in all ends securely.
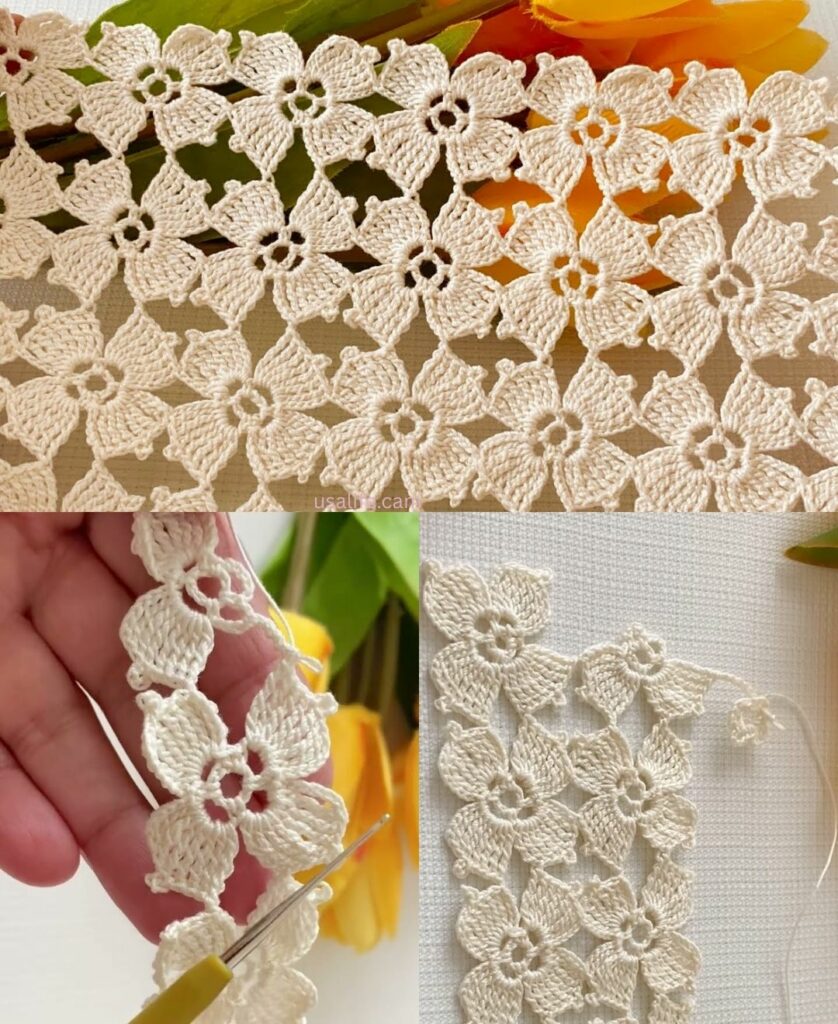
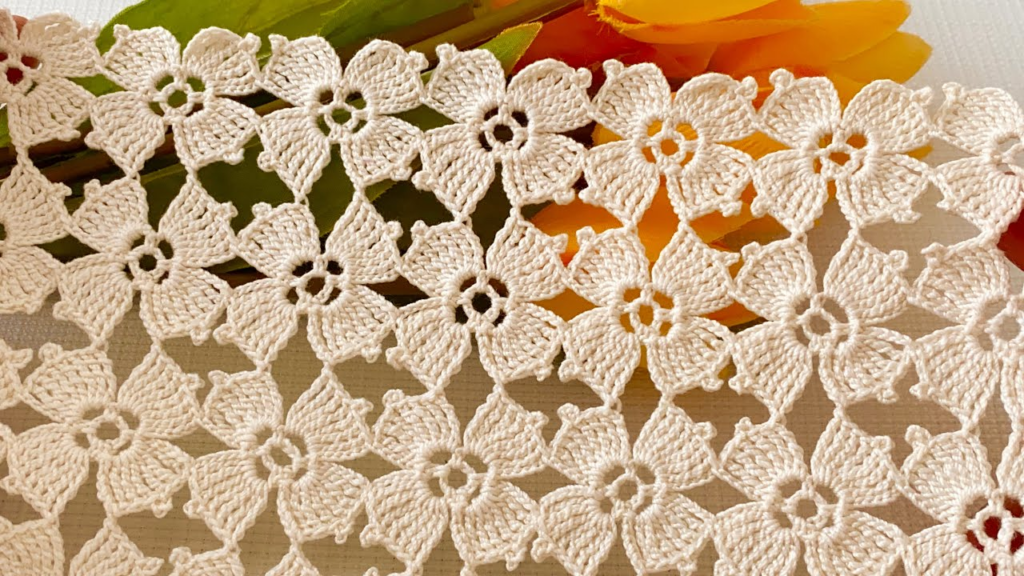
Advanced Motif Variation: Corner Cluster Motif
For a more intricate, lace-like look, try this variation:
Round 2: Ch 3. Work 2 dc in the first st. Corner: Ch 3, 3 dc in next st. Side: Ch 1, sk 1 st, 3 dc in next st. Repeat for sides.
This creates open spaces on the sides and denser corners, giving the motif a more traditional, intricate lace look suitable for a blouse.
Video tutorial: