by
by That sounds like an exciting project! To write about an INCREDIBLE CROCHET SQUARE MOTIF, I will focus on a design that offers significant visual impact, often involving texture and geometric complexity while still being manageable for an intermediate crocheter: the Textured Starburst Motif.
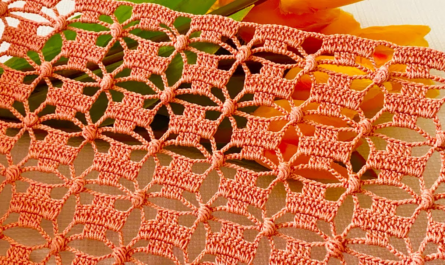
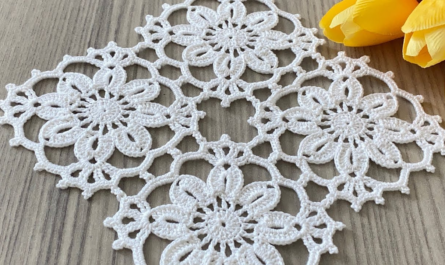
This motif features a raised, sculptural center and sharp, defined corners, making it ideal for high-impact blankets, pillows, or stunning join-as-you-go projects.

✨ Incredible Textured Starburst Square Motif Tutorial
This pattern is built on layers, using front post stitches and puff stitches to create a sculptural, high-relief center before squaring off the edges.
Materials You’ll Need
- Yarn: Medium-weight yarn (worsted/size 4) or DK yarn. Using a single color highlights the texture, while two contrasting colors (A for the center, B for the background) enhance the visual pop.
- Crochet Hook: The size appropriate for your yarn (e.g., 5.0 mm).
- Scissors, Tapestry Needle.
Key Crochet Terms
| Abbreviation | Stitch Name |
| ch | Chain |
| sl st | Slip Stitch |
| dc | Double Crochet |
| FPdc | Front Post Double Crochet |
| PS | Puff Stitch (Special Stitch) |
| Shell | (3 dc, ch 2, 3 dc) |
Special Stitches
- Puff Stitch (PS): (YO, insert hook, YO, pull up loop) 4 times into the same stitch/space (9 loops on hook). YO, pull through all 9 loops. Ch 1 to close.
- Front Post Double Crochet (FPdc): YO, insert hook from the front to the back, then out to the front again around the post of the specified stitch, YO and complete the dc as usual.
Part 1: Creating the Textured Starburst Center
Round 1: Foundation (Color A)
- Start: Make a Magic Ring (or ch 4, sl st to join).
- Base: ch 2 (does not count as st). Work 12 dc into the Magic Ring.
- Finish: Pull the tail tight. Join with a sl st to the top of the first dc. (12 sts).

Round 2: Defining the Starburst Points (Color A)
This round introduces texture using the Puff Stitch (PS).
- ch 1. Work sc in the same stitch.
- First Puff: ch 2, work PS in the next stitch. ch 2.
- Repeat: [sc in the next stitch, ch 2, PS in the next stitch, ch 2] 5 more times. (6 PS petals and 6 sc anchors).
- Finish: Join with a sl st to the first sc. Fasten off Color A.
Round 3: Raising the Starburst (Color B)
This round uses the Front Post stitch to make the “starburst” (the Puff Stitches) pop forward.
- Join: Join Color B into any sc anchor from Round 2 with a sl st.
- Base: ch 3 (counts as dc). Work dc in the same sc anchor.
- Post Stitch: Work FPdc around the post of the next Puff Stitch (the one from R2).
- Side: Work 2 dc into the next sc anchor.
- Repeat: [FPdc around the next PS post, 2 dc into the next sc anchor] 5 more times.
- Finish: Join with a sl st to the top of the beginning ch 3. (18 dc, 6 FPdc total).

Part 2: Squaring the Motif
Round 4: Establishing Corners (Color B)
We define the four corners necessary to turn the circular structure into a square.
- ch 3 (counts as dc). Work dc in the next 2 sts.
- Corner: Work [2 tr, ch 2, 2 tr] into the next FPdc (this corner uses taller stitches for a sharp angle).
- Side Cluster: dc in the next 3 sts. ch 1, skip 1 st. dc in the next 3 sts.
- Repeat: Continue the sequence: [Corner (2 tr, ch 2, 2 tr) in FPdc, dc 3, ch 1, sk 1, dc 3] three more times.
- Finish: Join with a sl st to the top of the beginning ch 3.
Round 5: Final Edging (Color B)
This round cleans up the edges and prepares the square for joining.
- Move to Corner: sl st over to the ch-2 corner space.
- Corner: ch 3. Work (2 dc, ch 2, 3 dc) into the corner space (Traditional Granny Shell).
- Side: ch 1. Work 3 dc into the next ch-1 space (the gap created in R4). ch 1. Work 3 dc into the next open space. ch 1.
- Repeat: Continue the sequence [Corner Shell, ch 1, 3 dc cluster in every side space, ch 1] around the square.
- Finish: Join with a sl st to the top of the beginning ch 3. Fasten off.

Finishing the Motif
- Weave in Ends: Use your tapestry needle to securely weave in all tails.
- Blocking: For an “incredible” result, blocking is essential. The combination of post stitches and the heavy corner definition means the square will be slightly warped before blocking. Wet the square, pin the corners firmly, and allow it to dry completely to define the sharp geometry and make the starburst texture truly pop.
This motif creates a stunning, high-relief pattern perfect for blankets, pillows, or any project where you want a truly magnificent square.
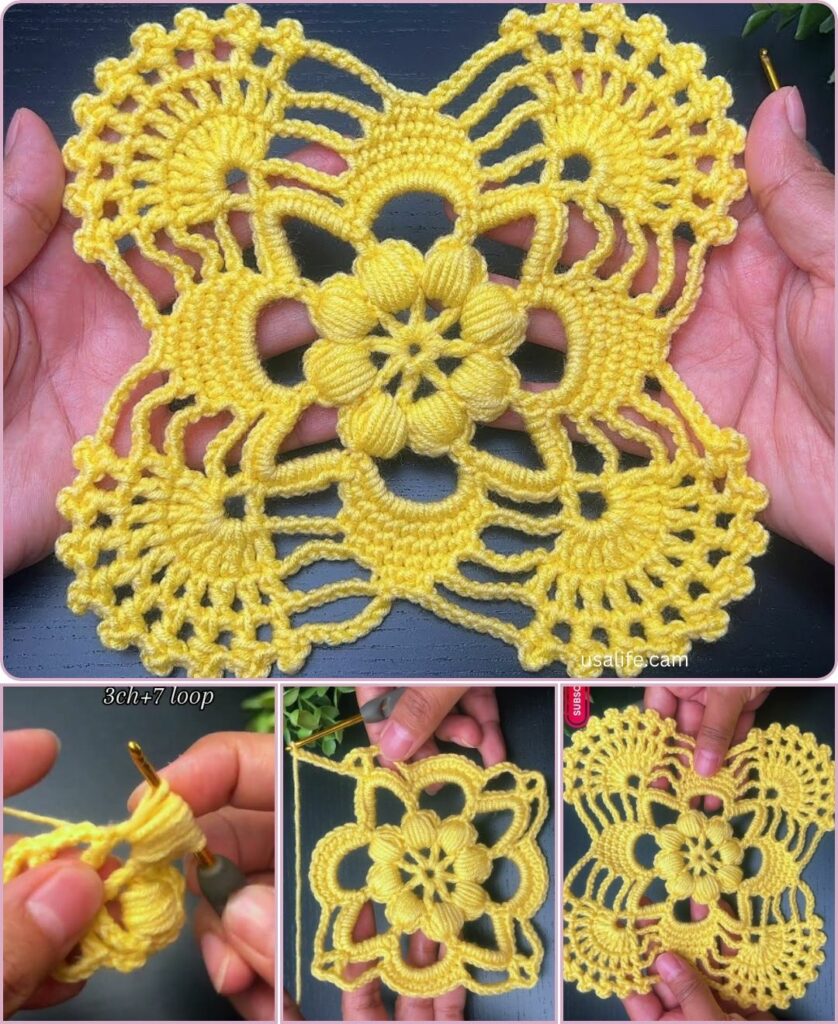
Video tutorial: