 by
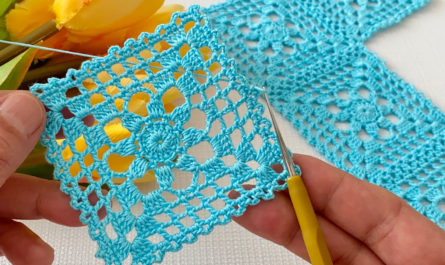
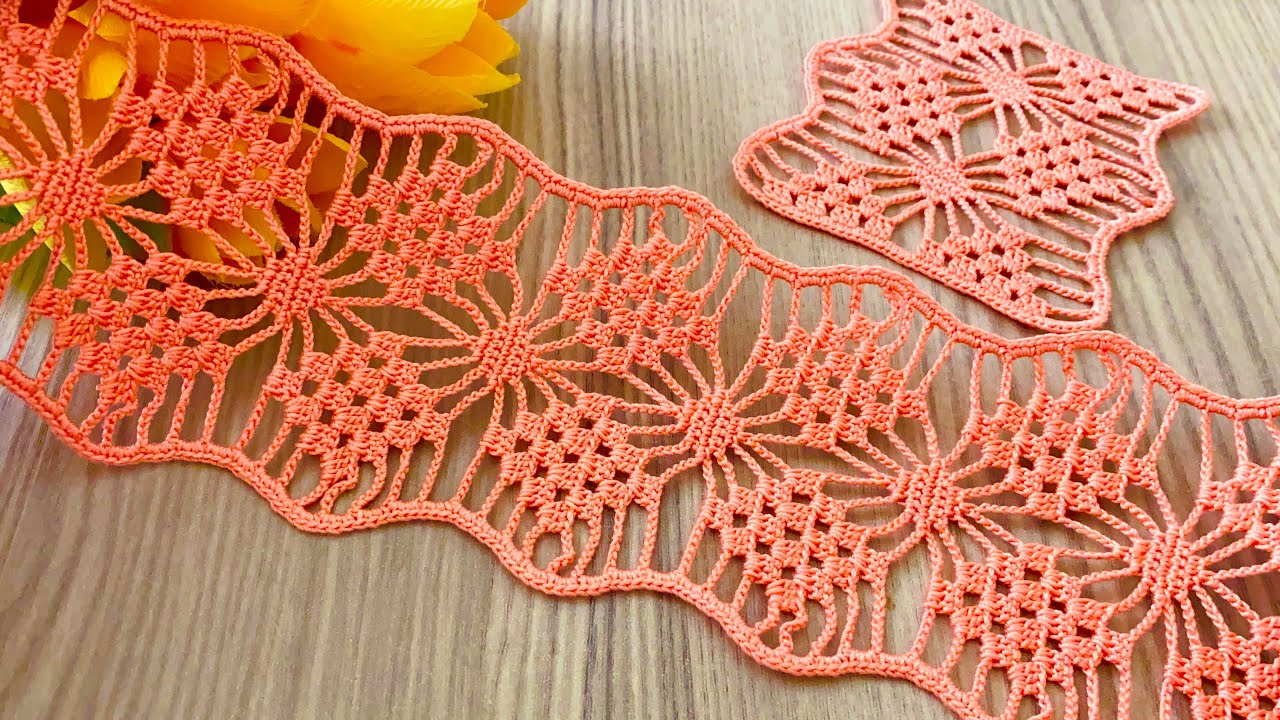
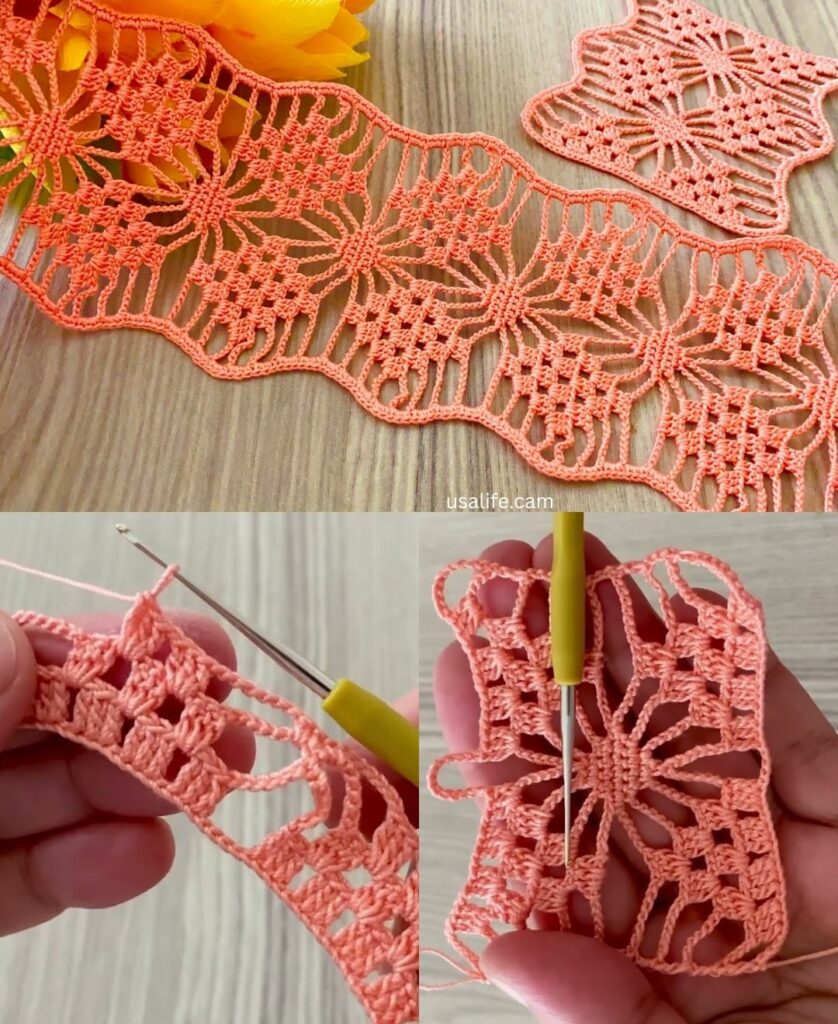
by That sounds like a beautiful and versatile project! A Crochet Tile Patterned Multipurpose Lace typically refers to a design composed of small, identical squares or geometric motifs joined together to create a continuous, lightweight, and often sheer fabric. This lace can be used for runners, curtains, shawls, or garment panels.
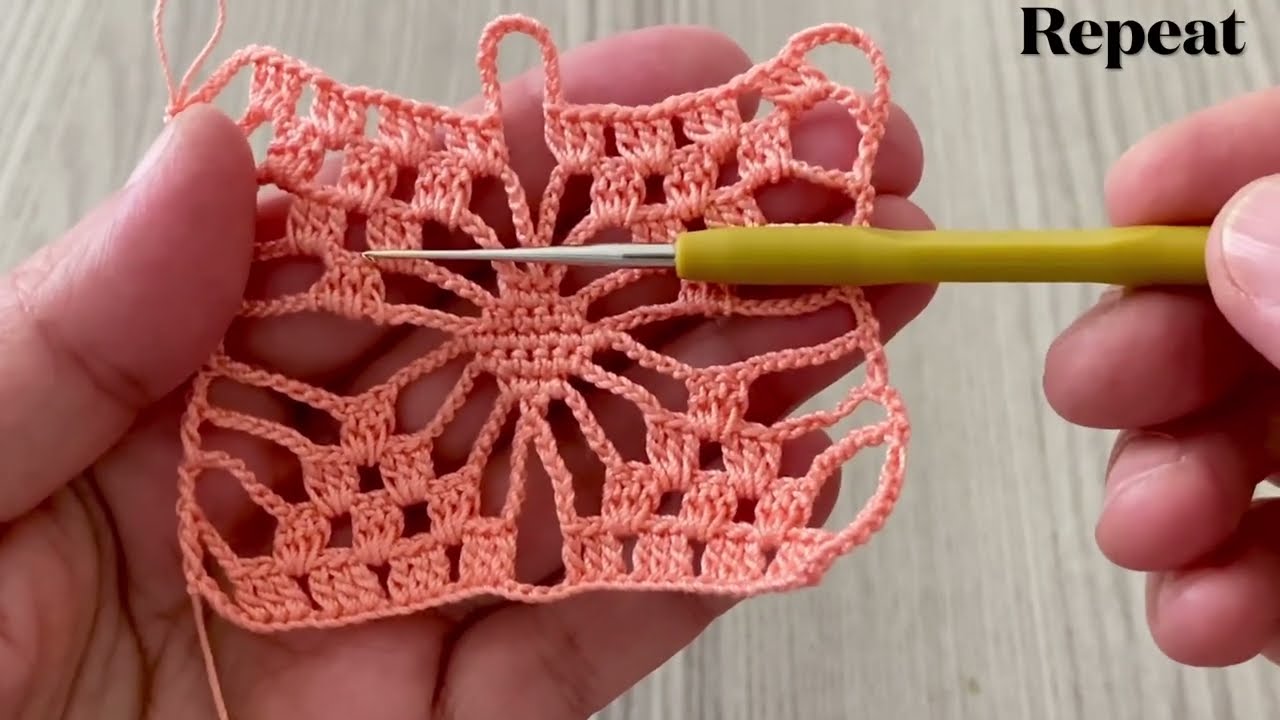
The easiest way to achieve a high-impact, tiled look is using the Filet Mesh Square Motif, as the open squares themselves resemble tiles.
Here is a detailed tutorial on the Filet Mesh Tile Motif and instructions for assembly.
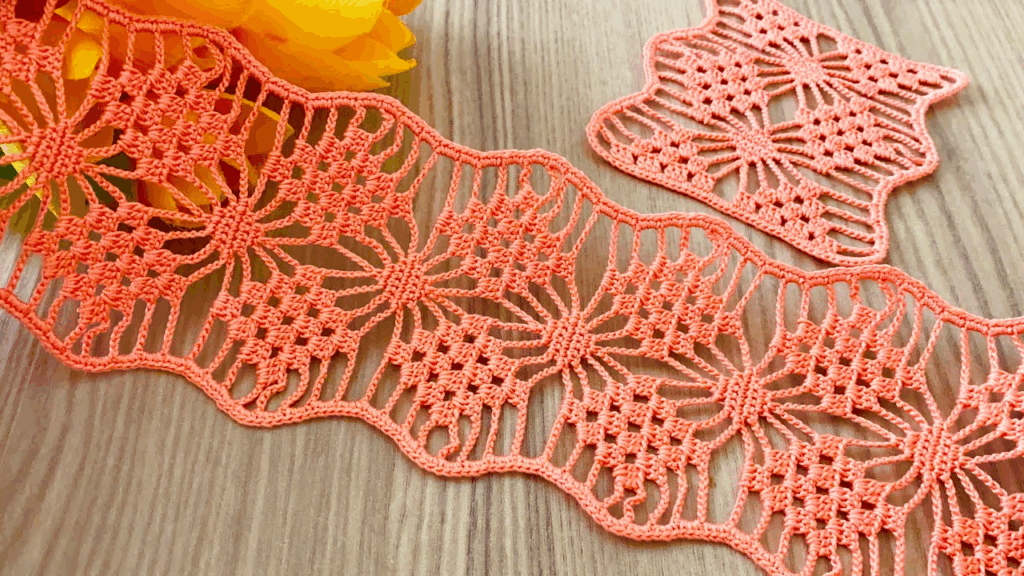
🖼️ Filet Mesh Tile Motif Tutorial
This motif uses double crochet (dc) and chain spaces to create an open grid—the classic “tile” look—that is easily joinable.
Materials You’ll Need
- Thread: Fine cotton thread (Size 10 or 20) for delicate lace or Fingering Weight yarn for a heavier textile.
- Crochet Hook: The size appropriate for your thread (e.g., 1.5 mm – 3.0 mm).
- Scissors, Tapestry Needle.
Key Crochet Terms
| Abbreviation | Stitch Name |
| ch | Chain |
| sl st | Slip Stitch |
| sc | Single Crochet |
| dc | Double Crochet |
| Open Mesh | dc, ch 1, skip 1 st, dc |
| Corner | (dc, ch 3, dc) |
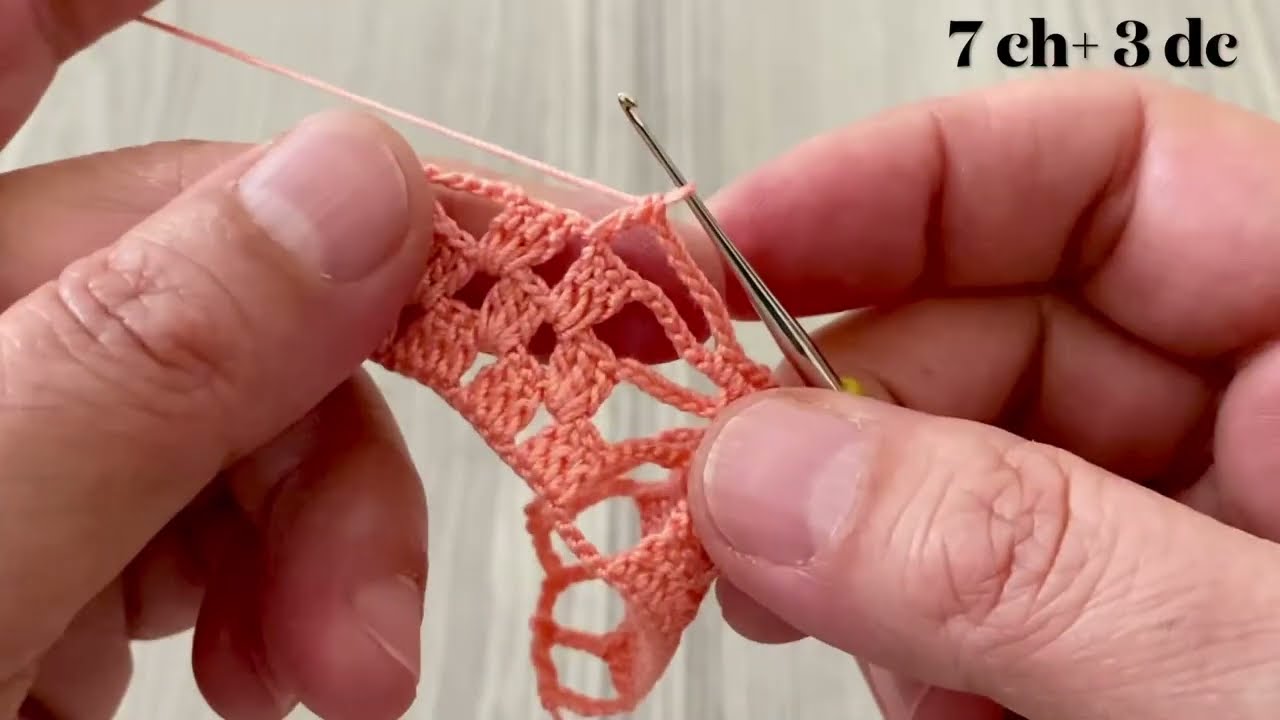
Part 1: Crocheting the Filet Mesh Tile
Round 1: Foundation (Center)
- Start: Make a Magic Ring. ch 4 (counts as dc + ch 1). Work [dc, ch 1] 7 more times into the ring. (8 dc, 8 ch-1 spaces).
- Finish: Pull the tail tight. Join with a sl st to the 3rd ch of the beginning ch 4.
Round 2: Defining the Square Corners
We introduce the long corner chains to pull the circle into a square.
- ch 3 (counts as dc). Work dc in the ch-1 space.
- Side: Work dc in the next dc.
- Corner: Work [dc, ch 3, dc] in the next ch-1 space.
- Repeat: Continue the sequence [dc in next dc, dc in ch-1 sp, dc in next dc, Corner (dc, ch 3, dc) in next ch-1 sp] 3 more times.
- Finish: Join with a sl st to the top of the beginning ch 3. (4 corners established).
Round 3: Building the Mesh Grid
We now work the open mesh structure across the sides.
- sl st over to the next dc stitch. ch 4 (counts as dc + ch 1).
- Open Mesh: Skip 1 st. Work dc in the next st. ch 1.
- Repeat: [Skip 1 st, dc in the next st, ch 1] across the side until you reach the corner.
- Corner: Work [dc, ch 3, dc] into the ch-3 corner space. ch 1.
- Repeat: Continue the sequence [Open Mesh (dc, ch 1, skip 1) across the side, Corner (dc, ch 3, dc), ch 1] 3 more times.
- Finish: Join with a sl st to the 3rd ch of the beginning ch 4.
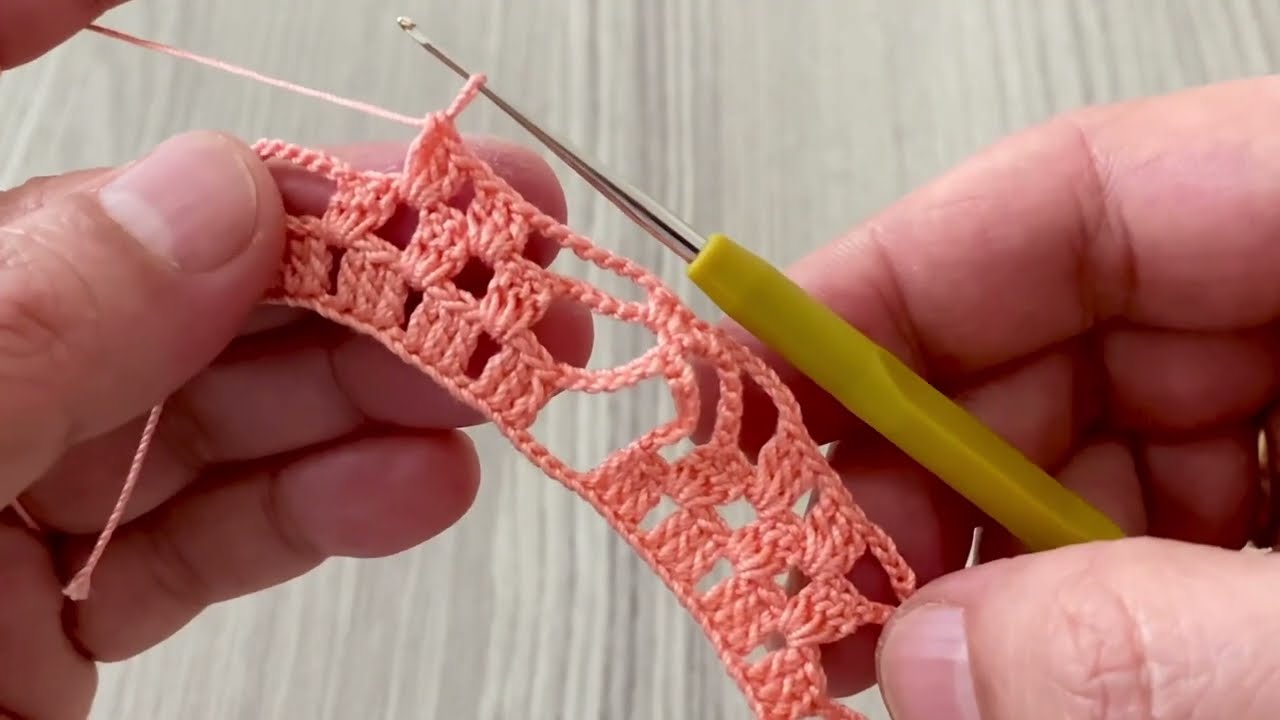
Continuing to Grow
Repeat Round 3 until the square reaches the desired size. In each subsequent round, the number of Open Mesh sections across each side will increase by one.
Part 2: Multipurpose Assembly
The clean edges of the Filet Mesh Tile make joining simple and the resulting fabric versatile.
1. Joining the Motifs (The Easiest Method)
Use the Join-as-You-Go (JAYG) method on the final round for a seamless tile effect.
- When you reach a corner of the new motif, replace the
ch 3with:ch 1, sl st into the finished motif's ch-3 corner space, ch 1. - When you reach a side Open Mesh section, replace the
ch 1with asl stinto the finished motif’s correspondingch-1space.
2. Applications
| Project | Shape/Layout | Finishing Edging |
| Table Runner | A single strip of motifs (e.g., 3 tiles wide x 10 tiles long). | 2-3 rows of simple dc or a small scalloped edge (sc in 1, 5 dc in 1, sc in 1, repeat). |
| Curtain Panel | A large rectangle (e.g., 15 tiles wide x 30 tiles long). | Top Edge: Work 5 rows of solid dc for a curtain rod casing. Bottom/Sides: Simple sc border for weight. |
| Garment Panel (Shawl/Tunic Insert) | Rectangles sized to fit the garment (e.g., back panel of a tunic). | 1-2 rows of sc or Moss Stitch (sc, ch 1) to stabilize the garment opening/seam allowance. |
Final Step: Blocking
Blocking is critical for all lace and tiled patterns. It squares up the corners, ensures all the “tiles” are exactly the same size, and opens up the mesh for maximum drape and visual effect. Wet the finished piece, pin the edges tautly and squarely, and allow it to dry completely.
Video tutorial: