 by
by That is a magnificent and exciting request! To create a UNIQUE and DAZZLING Crochet Square Motif suitable for a runner or a blouse, we need a pattern that combines high texture, geometric complexity, and the classic ease of joining.
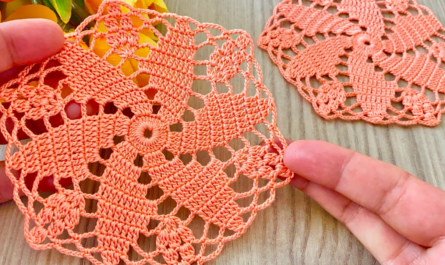
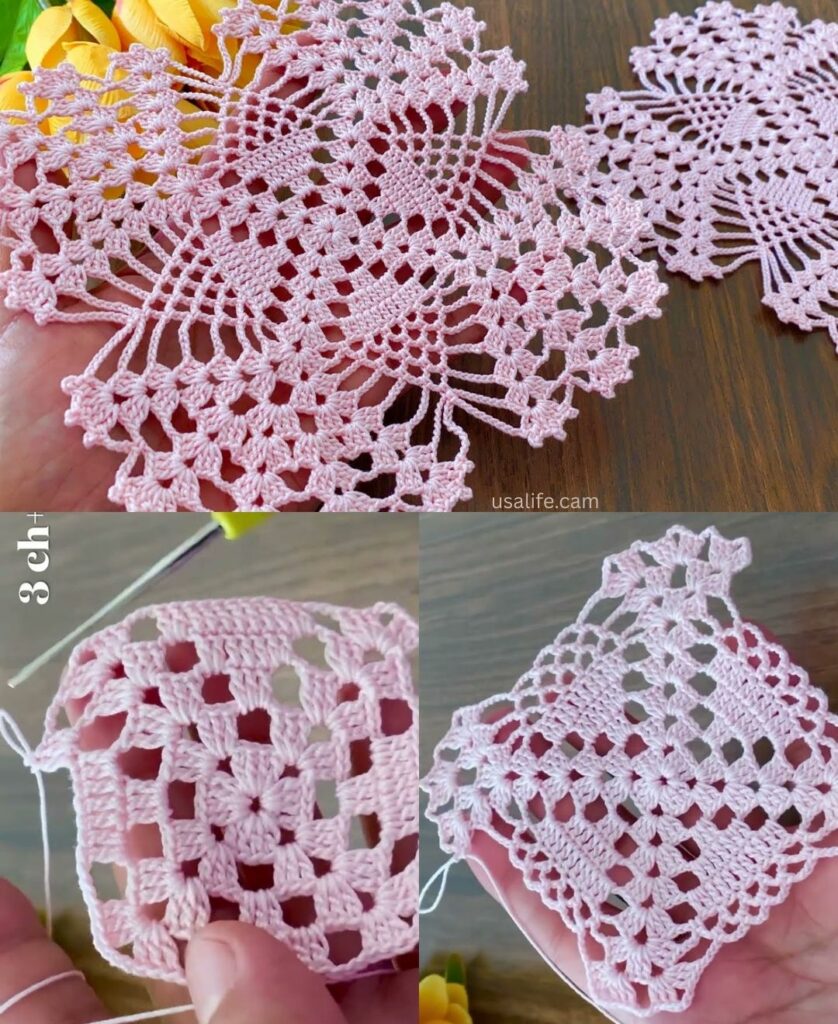
I will detail a tutorial for the “Dimensional Pinwheel Starburst Square,” which uses layers of texture and height variation to achieve a dazzling, three-dimensional look.

🌟 Dimensional Pinwheel Starburst Square Tutorial
This unique motif starts with a textured circular center, adds a layer of pinwheel dimension using post stitches, and is finally squared off using V-stitches and lace to maintain a lovely drape, perfect for garments or runners.
Materials You’ll Need
- Yarn: DK (Size 3) or Sport Weight yarn. A soft cotton or cotton blend is recommended for drape.
- Tip: Use a bright, contrasting color for the center (Rounds 1-3) to maximize the dazzling effect.
- Crochet Hook: The size appropriate for your yarn (e.g., 4.0 mm).
- Scissors, Tapestry Needle.
Key Crochet Terms
| Abbreviation | Stitch Name |
| ch | Chain |
| sl st | Slip Stitch |
| dc | Double Crochet |
| tr | Treble Crochet |
| FPdc | Front Post Double Crochet (Special Stitch) |
| V-st | V-Stitch (dc, ch 1, dc) |
Part 1: The Dazzling Dimensional Center
Round 1: Foundation
- Start: Make a Magic Ring. ch 3 (counts as dc). Work 15 dc into the ring.
- Finish: Pull tail tight. Join with a sl st to the top of the ch 3. (16 sts).

Round 2: Creating the Starburst Points
- ch 1. Work sc in the same st.
- Point: ch 3. Skip 1 st.
- Repeat: [sc in the next st, ch 3, skip 1 st] 7 more times. (8 ch-3 loops).
- Finish: Join with a sl st to the first sc.
Round 3: Dimensional Pinwheel (Layer 1)
This round introduces the pinwheel texture using the Back Loop Only (BLO).
- sl st into the first ch-3 loop. ch 3 (counts as dc). Work 3 dc into the same loop. ch 1.
- Pinwheel: Work 4 dc into the BLO of the next sc anchor. ch 1.
- Repeat: [4 dc into the next ch-3 loop, ch 1, 4 dc into the BLO of the next sc anchor, ch 1] 3 more times.
- Finish: Work 4 dc into the last ch-3 loop, ch 1. Join with a sl st to the top of the ch 3. (8 groups of 4 dc).

Part 2: Squaring the Unique Shape
Round 4: Pinwheel Texture (Layer 2)
We use FPdc stitches to create the pinwheel illusion and start defining the corners.
- sl st into the next 2 dc. ch 3 (counts as dc).
- Texture: Work FPdc around the post of the last dc of the previous 4-dc group.
- Side: Work dc in the next 3 sts.
- Corner Anchor: Work (tr, ch 3, tr) into the next ch-1 space.
- Repeat: Work [dc 3, FPdc around the 4th dc of the next group, dc 3, Corner Anchor (tr, ch 3, tr)] 3 more times.
- Finish: Join with a sl st to the top of the ch 3. (4 corners established).
Round 5: Lace Edge and Final Corner Structure
This round uses V-stitches to maintain the drape and fully establish the final square shape.
- sl st to the ch-3 corner space. ch 5 (counts as dc + ch 2). Work dc in the same space (First V-st).
- Side: ch 1. Work V-st (dc, ch 1, dc) in the next FPdc. ch 1.
- Work V-st in the next dc st. ch 1.
- Corner: Work [V-st (dc, ch 1, dc), ch 3, V-st (dc, ch 1, dc)] into the ch-3 corner space. ch 1.
- Repeat: Continue the V-stitch side pattern and Corner formula around the square.
- Finish: Join with a sl st to the 3rd ch of the beginning ch 5. Fasten off.

Part 3: Blouse & Runner Assembly Guide
1. Joining the Motifs
The open spaces created by the V-stitches make the Join-as-You-Go (JAYG) method highly effective.
- During the final round (Round 5): When working a V-stitch, replace the
ch 1with asl stinto the corresponding ch-1 space of the finished motif. - When working a corner, replace the
ch 3withch 1, sl st into the finished motif's ch-3 corner, ch 1.
2. Project Layouts
| Project | Shape/Layout | Customization Tips |
| Blouse | Construction: Two rectangular panels (Front/Back) joined at the shoulders and sides. | Armhole: Leave 1-2 motif widths unjoined on the side seam for the armhole. Drape: Use a soft, breathable fiber (like bamboo or cotton) and block aggressively for maximum flow. |
| Runner | Shape: A long, narrow strip (e.g., 3 tiles wide by 8-12 tiles long). | Edging: Add a final row of Picot (ch 3, sl st) edging or small tassels to the short ends for a finished, decorative look. |
3. Final Blocking (Essential)
Blocking is absolutely necessary for this motif to define the pinwheel texture and ensure the square’s sharp edges and the V-stitch lace lie flat. Wet the finished project, pin every corner and point sharply, and allow it to dry completely.
Video tutorial: