by
by The beauty of a Multi-Purpose Motif lies in its versatility. By changing your yarn and hook size, the same pattern can transition from a delicate, antique-style table runner to a modern, draped summer blouse.
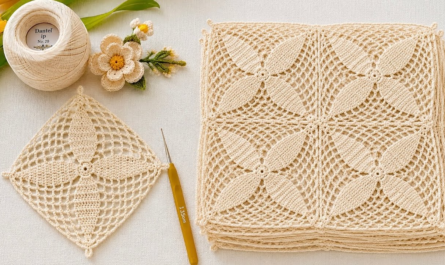
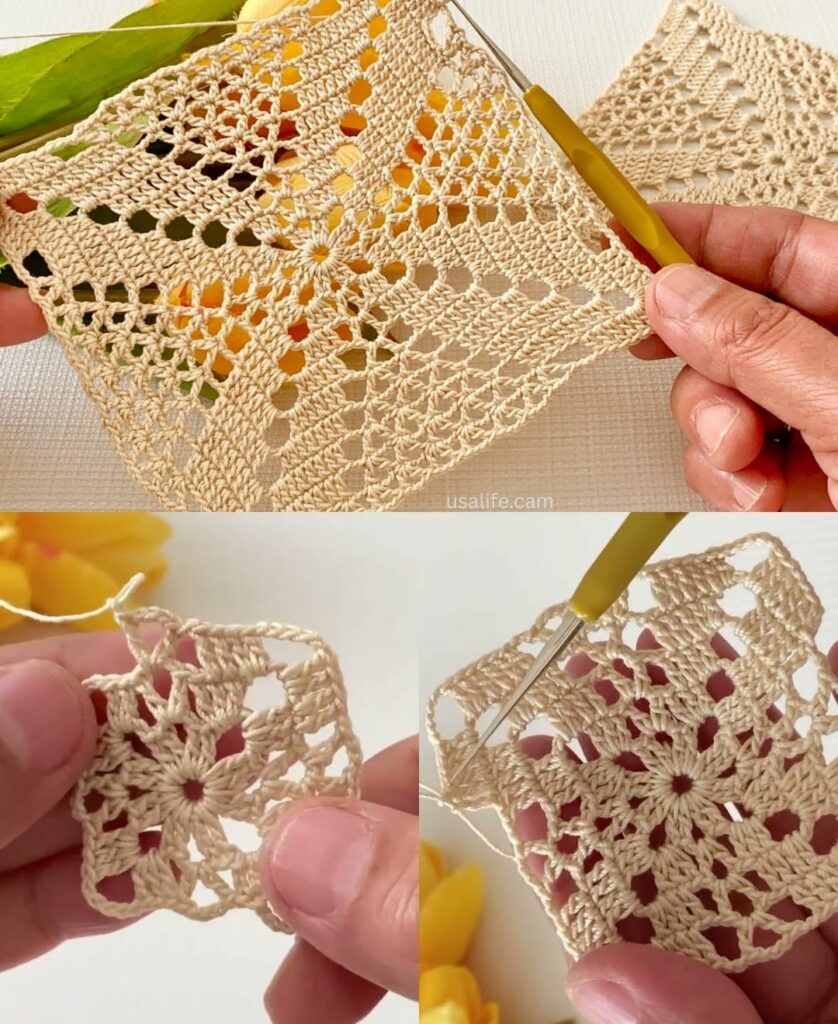
I recommend the “Lattice Flower Square.” It features a dense central bloom (providing coverage for a blouse) and a lacy mesh border (offering the elegance required for home decor).
🧶 Choosing Your Materials
The “Multi-Purpose” aspect is entirely dependent on your fiber choice:
| Purpose | Recommended Yarn | Hook Size | Resulting Vibe |
| Table Runner | Size 10 Mercerized Cotton Thread | 1.75 mm – 2.25 mm | Crisp, heirloom lace. |
| Summer Blouse | Bamboo, Linen, or Silk blend (DK weight) | 3.5 mm – 4.0 mm | Soft drape and breathable. |
| Winter Sweater | Soft Merino Wool (Worsted weight) | 5.0 mm – 5.5 mm | Chunky, structural, and warm. |
🛠 The Lattice Flower Square Pattern (US Terms)
Special Stitches
- Cluster (cl): [Yarn over, insert hook, pull up a loop, yarn over, pull through 2] 3 times in the same stitch. Yarn over, pull through all 4 loops on hook.
Step-by-Step Instructions
Round 1: The Core
- Make a Magic Ring.
- ch 3 (counts as dc), work 15 dc into the ring.
- sl st to top of ch 3 to join. (16 dc total).

Round 2: The Petals
- ch 2, work a Cluster in the first stitch. ch 2.
- Repeat: [Cluster in next stitch, ch 2] in every stitch around.
- sl st to the top of the first cluster. (16 petals).
Round 3: Squaring the Flower
- sl st into the first ch-2 space.
- First Corner: ch 4 (counts as tr), (2 tr, ch 3, 3 tr) in the same space.
- The Side: * ch 1, skip next space.
- 3 dc in the next space.
- ch 1, skip next space.
- 3 dc in the next space.
- ch 1, skip next space.
- Repeat: Work a Corner (3 tr, ch 3, 3 tr) and then the Side instructions around.
- sl st to top of ch 4.
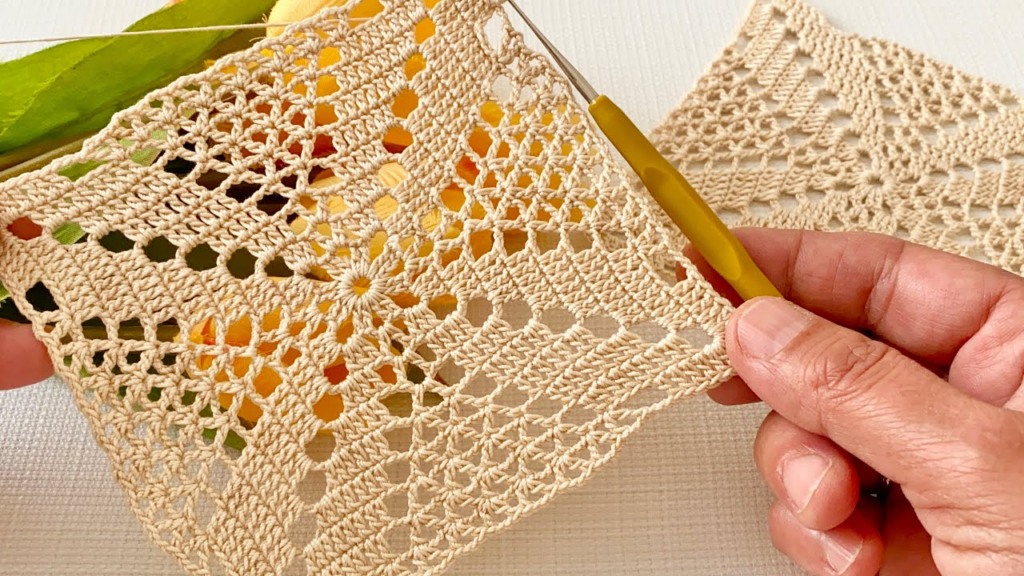
Round 4: The Lattice Border
- sl st to the ch-3 corner space.
- Corner: (3 dc, ch 2, 3 dc) in the corner. ch 1.
- Side: Work 3 dc in every ch-1 space along the side, with a ch 1 between them.
- sl st to join. Fasten off.

🏛 How to Build Your Models
1. The Magnificent Table Runner
To create a runner, you want a repeating geometric look.
- Layout: Join motifs in a long rectangle, typically 2 motifs wide by 10 motifs long.
- Joining: Use a Whip Stitch through the back loops only. This makes the runner lay perfectly flat so centerpieces won’t wobble on the seams.
- Edge: Add a simple shell border (5 dc in one stitch, skip 2, sc in next) around the entire finished piece to give it a “bridal” finish.
2. The Stylish Motif Blouse
Because this motif has a lacy edge, it creates a “mesh” effect that is very trendy.
- Layout: Create two large panels (Front and Back). A standard size medium usually requires a grid of 4 x 4 motifs per panel.
- Neckline: For a “V-neck,” leave the top center motifs unjoined and fold them back, or simply omit them.
- Assembly: Join the shoulders and sides. Leave the top 1.5 motifs open at the sides for armholes.
- Insight: If the blouse feels too “holy,” the dense Round 1 and 2 will sit perfectly over the bust area for modesty.

✨ Professional Tips for Success
Blocking is Mandatory: Motifs often look “crunchy” and uneven when they first come off the hook. Pin each square to a foam board, spray with water, and let dry. This “sets” the stitches and ensures every square is the exact same size before you join them.
The “Join-As-You-Go” (JAYG) Method: If you hate sewing, you can join the motifs during Round 4. When you reach a corner or a ch-1 space, instead of chaining, do a slip stitch into the corresponding space of a finished square. It creates a much stronger, seamless garment.
Would you like me to calculate the exact number of motifs you would need for a specific blouse size (Small to XXL)?
Video tutorial: