by
by That is a wonderful and highly versatile set of projects! A single, well-designed square motif can serve as the building block for all three: a runner, a blouse, and a curtain.
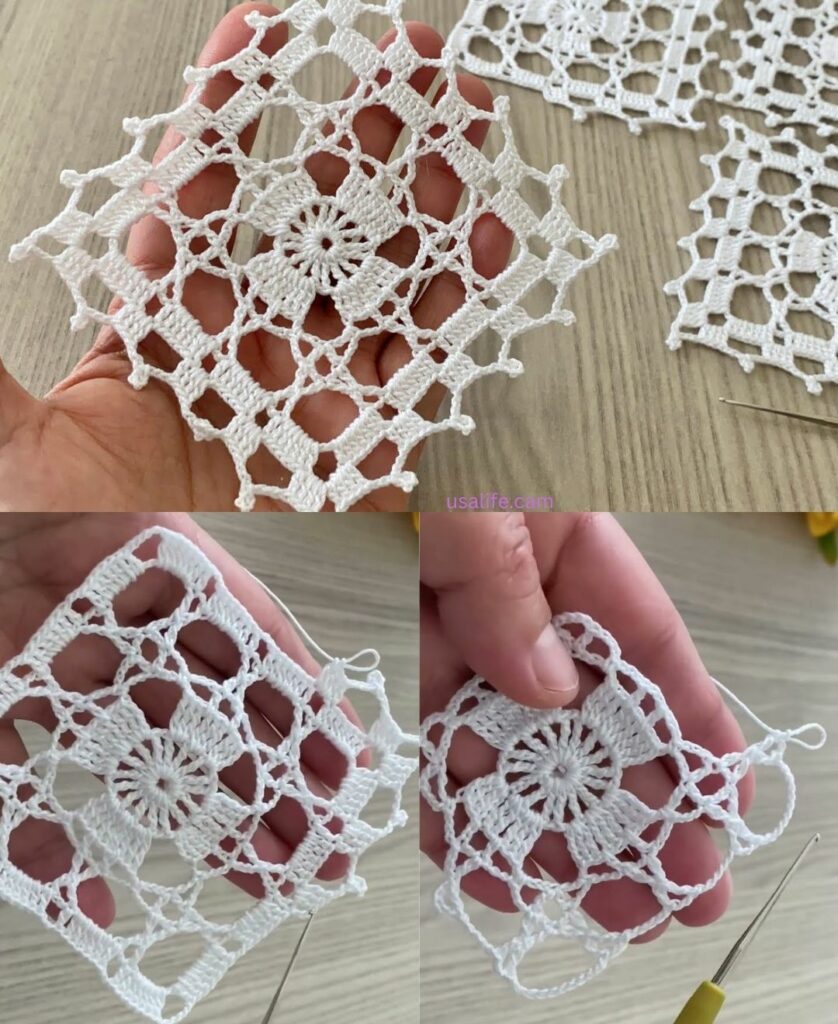
I will detail a tutorial for the Lacy Diamond Square Motif, which is elegant, easily repeatable, and has clean edges suitable for joining into continuous fabric.

💎 Lacy Diamond Square Motif Tutorial
This pattern uses V-stitches and chain spaces to create a delicate, geometric pattern, offering the ideal balance of structure (for runners/curtains) and drape (for blouses).
Materials You’ll Need
- Yarn/Thread:
- For a Curtain/Runner: Use size 10 cotton thread for fine lace, or Fingering Weight yarn.
- For a Blouse: Use soft DK (Size 3) or Sport Weight yarn for drape.
- Crochet Hook: The size appropriate for your material (e.g., 3.5 mm – 4.0 mm).
- Scissors, Tapestry Needle.
Key Crochet Terms
| Abbreviation | Stitch Name |
| ch | Chain |
| sl st | Slip Stitch |
| sc | Single Crochet |
| dc | Double Crochet |
| V-st | V-Stitch (dc, ch 1, dc) |
| Corner | (2 dc, ch 3, 2 dc) |
Part 1: Crocheting the Lacy Diamond Motif
Round 1: Foundation (Center)
- Start: Make a Magic Ring. ch 3 (counts as dc). Work 11 dc into the ring.
- Finish: Pull the tail tight. Join with a sl st to the top of the ch 3. (12 sts).

Round 2: Beginning the Diamond Grid
- ch 1. sc in the same st. ch 3. Skip 1 st.
- Repeat: [sc in the next st, ch 3, skip 1 st] 5 more times.
- Finish: Join with a sl st to the first sc. (6 ch-3 loops).
Round 3: Defining the Corners
This round transforms the circle into a square using taller V-stitches.
- sl st into the first ch-3 loop. ch 3 (counts as dc). Work V-st (ch 1, dc) into the same loop.
- Corner Setup: Work V-st (dc, ch 1, dc) into the next ch-3 loop.
- Corner: Work Corner (2 dc, ch 3, 2 dc) into the next ch-3 loop.
- Repeat: Continue the sequence [V-st in next loop, V-st in next loop, Corner (2 dc, ch 3, 2 dc) in next loop] two more times.
- Finish: You should have one V-st and one Corner left. Work the V-st. Join with a sl st to the top of the beginning ch 3.
Round 4: Expanding the Lacy Diamond
- sl st over to the first ch-1 V-st space. ch 3. Work ch 1, dc into the same V-st space.
- Side: Work V-st into the next V-st space.
- Corner: Work [2 dc, ch 3, 2 dc] into the ch-3 corner space.
- Repeat: Continue the sequence [V-st in every V-st space along the side, Corner (2 dc, ch 3, 2 dc)] around the square.
- Finish: Join with a sl st to the top of the beginning ch 3.
Continuing to Grow
Repeat Round 4 until the square reaches the desired size. In each subsequent round, you simply work one V-st into every V-st space on the side, and a Corner Shell in the ch-3 corner space.

Part 2: Project Assembly
A. Tiled Runner
- Sizing: Determine the number of motifs needed for your runner’s length.
- Joining: Join the motifs in a straight line, connecting one full side to the next. The easiest join is the Join-as-You-Go (JAYG) method in the final round of the motif, replacing the
ch 1of the V-stitches with asl stinto the corresponding V-st of the finished motif. - Edging: Add a clean edge by working 2-3 rounds of single crochet (sc) around the entire perimeter of the strip.
B. Lace Blouse
- Sizing: Determine your motifs-wide count based on your bust circumference. Assemble the motifs into two large rectangles (Front and Back).
- Assembly: Join the Front and Back panels at the shoulders and down the sides, leaving openings for the Neckline and Armholes.
- Finishing: Use a round of single crochet (sc) or Moss Stitch (sc, ch 1) around the Armholes and Neckline to stabilize the edges and prevent stretching.
C. Lace Curtain Panel
- Sizing: Determine the total width and drop length needed. Assemble motifs into the required large rectangle.
- Top Edge (Rod Casing): Once the panel is assembled, work 4-5 rows of solid double crochet (dc) along the top edge. Fold this section in half and sl st it closed to create a tube for the curtain rod.
- Side/Bottom Edging: Finish the remaining three edges with a simple, decorative border (e.g., a Picot or Scallop edge) to give weight and stability to the bottom.
Final Step: Blocking
Blocking is essential for this project, especially for lace. It locks in the sharp geometry, opens up the V-stitches, and ensures the finished fabric drapes elegantly.
Video tutorial: