by
by That is a perfect project for a beginner! Crocheting a coaster is quick, satisfying, and teaches you essential skills like working in the round and increasing stitches correctly.
I will detail a step-by-step tutorial for the Simple Solid Round Coaster, which is very easy, sturdy, and uses only single crochet (sc) and double crochet (dc) stitches.
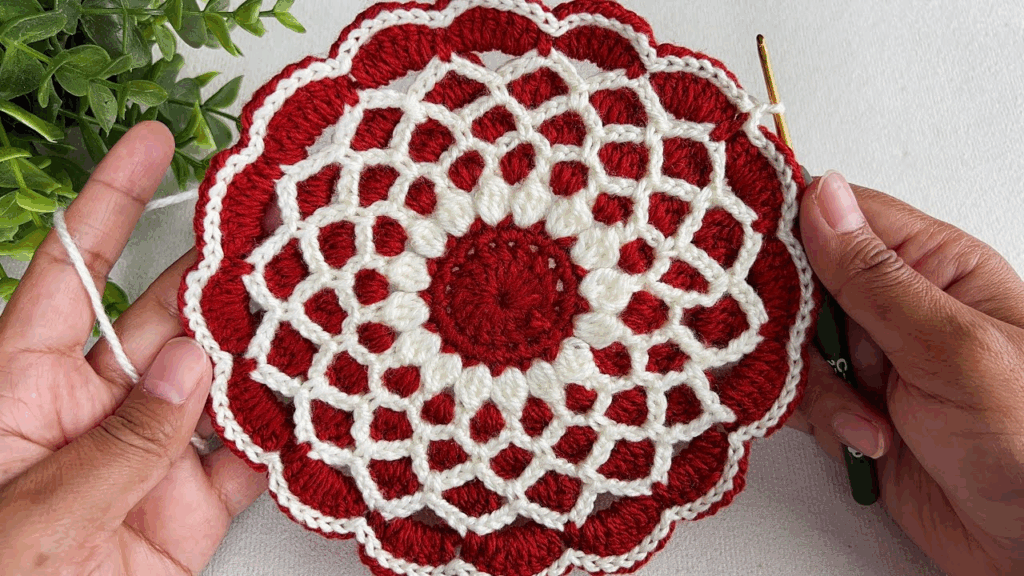
☕ Simple Solid Round Coaster Tutorial
This pattern creates a dense, flat, and sturdy coaster that works up quickly, perfect for learning the fundamentals of circular crochet.
Materials You’ll Need
- Yarn: Medium-weight yarn (worsted/size 4) or Cotton Yarn (cotton is best for coasters as it absorbs condensation better).
- Crochet Hook: The size appropriate for your yarn (e.g., 5.0 mm or H/8).
- Scissors
- Tapestry Needle (for weaving in ends).
Key Crochet Terms
| Abbreviation | Stitch Name | Purpose in this Pattern |
| ch | Chain | Starting the round/adding height |
| sl st | Slip Stitch | Joining rounds |
| sc | Single Crochet | Creating a dense, flat fabric |
| dc | Double Crochet | Creating a taller stitch/adding height |
| st(s) | Stitch(es) | Refers to the loops from the previous round |
Export to Sheets
Step-by-Step Instructions
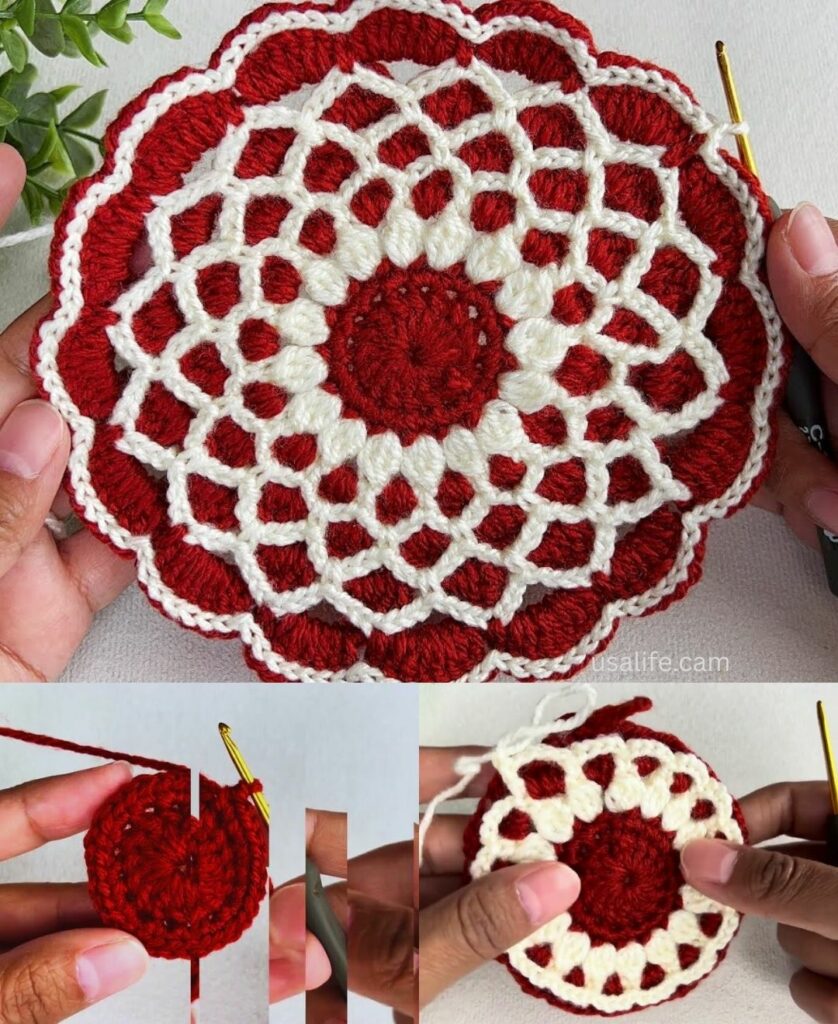
Round 1: Foundation (The Center)
We start with a tight ring to anchor the coaster.
- Start the Ring: Make a Magic Ring (or ch 4, sl st to join).
- Base: ch 3 (This counts as your first dc). Work 11 dc into the center ring.
- Finish: Pull the yarn tail tight to close the center hole. Join the round with a sl st to the top of the beginning ch 3. (12 stitches total).

Round 2: Increasing for Flatness
To make the circle lie flat, you must increase the number of stitches evenly around the circumference.
- ch 3 (counts as dc). Work 1 dc into the same stitch (This is your first increase: 2 dc in one st).
- Work 2 dc in every stitch around the circle. (You are doubling the stitches).
- Finish: Join the round with a sl st to the top of the beginning ch 3. (24 stitches total).

Round 3: Continued Expansion
We continue to increase, but less frequently, to keep the circle flat.
- ch 3 (counts as dc). Work 1 dc in the same stitch. (First increase).
- Work [1 dc in the next stitch, 2 dc in the following stitch (increase)] around the circle.
- Finish: Join the round with a sl st to the top of the beginning ch 3. (36 stitches total).
Round 4: Final Expansion and Density
To create a slightly denser edge, we switch to single crochet (sc).
- ch 1 (does not count as st). Work sc in the same stitch.
- Work sc in the next 5 stitches.
- Increase: Work 2 sc into the next stitch.
- Repeat: Work [sc in the next 5 stitches, 2 sc in the following stitch] around the circle.
- Finish: Join the round with a sl st to the first sc.

Finishing the Edge (Optional Decorative Touch)
For a simple scalloped edge:
- ch 1. Work sc in the same st.
- Skip 1 st. Work [5 dc] into the next stitch (Shell).
- Skip 1 st. Work sc into the next stitch (Anchor).
- Repeat the sequence [Skip 1, Shell (5 dc), Skip 1, sc] around the edge. Adjust the skipping in the last few stitches if needed to make the pattern meet evenly.
- Join with a sl st to the first sc.
Final Steps
- Fasten Off: Cut the yarn, leaving a 6-inch tail. Pull the tail completely through the last loop on your hook to knot it.
- Weave in Ends: Thread the tails onto a tapestry needle and weave them securely into the back of the corresponding stitches.
- Blocking (Recommended): If the coaster is slightly wavy or not perfectly flat, mist it lightly with water, lay it flat on a surface, and press it gently to shape before letting it dry completely.
Your simple, sturdy, and perfectly round coaster is complete!
Video tutorial: