by
by To create “The Most Beautiful Square Motif,” we often look for a design that balances texture, symmetry, and transparency.
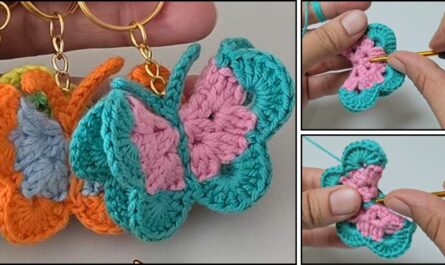
The Victorian Garden Rose Square is widely considered one of the most stunning motifs. It features a 3D floral “puff” center that looks like a blooming rose, surrounded by delicate lace “bridges” that square off into a classic frame. It looks like fiber jewelry, yet it uses stitches you likely already know.
🌹 The Victorian Garden Rose Square Tutorial
This motif is best worked in a mercerized cotton or a soft bamboo blend to give the “petals” a slight sheen.
Materials You’ll Need
- Yarn: DK or Sport weight (Size 3). I recommend a cream, dusty rose, or sage green.
- Hook: 3.5 mm or 4.0 mm.
- Notions: Scissors, tapestry needle, and blocking pins (essential for this lace).
Special Stitches
- Puff Stitch ($Puff$): [Yarn over, insert hook, pull up a loop] 3 times in the same stitch (7 loops on hook). Yarn over, pull through all 7 loops, ch 1 to close the puff.
- V-Stitch: (dc, ch 2, dc) in the same space.
Step-by-Step Instructions
Round 1: The Heart of the Rose
- Start: Make a Magic Ring.
- Stitches: ch 1, work 8 sc into the ring.
- Join: sl st to the first sc. (8 stitches).

Round 2: Blooming Petals (The Texture)
- First Puff: ch 2. In the first stitch, work a Puff Stitch.
- Repeat: ch 2. Work a Puff Stitch in every sc around.
- Join: ch 2, sl st to the top of the first puff.
Result: You now have 8 puffy “petals” forming a small flower.
Round 3: The Lace Bridges
- sl st into the first ch-2 space. ch 1, sc in the same space.
- Bridges: ch 5. sc in the next ch-2 space.
- Repeat: [ch 5, sc in next space] around.
- Join: On the last bridge, ch 2 and work a dc into the first sc. (This keeps your hook in the center of the loop for the next round).
Result: 8 large, floppy loops surrounding the flower.

Round 4: Squaring the Rose
This is the “Magic Round” where we turn the 8 loops into 4 corners and 4 sides.
- First Corner: ch 4 (counts as tr). In the same loop, work (2 tr, ch 3, 3 tr).
- Side Bridge: ch 3. sc in the next ch-5 loop. ch 3.
- Second Corner: In the next ch-5 loop, work (3 tr, ch 3, 3 tr).
- Repeat: Continue the sequence [Side Bridge, Corner] around.
- Join: sl st to the top of the ch 4.
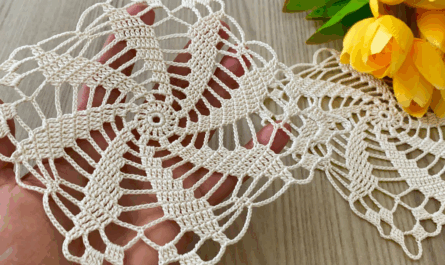
Result: You will see a clear square frame around your 3D rose.
Round 5: The Finishing Frame
- sl st over to the ch-3 corner space.
- Corner: ch 3, work (2 dc, ch 2, 3 dc) in the corner.
- The Side: * ch 1. Work 3 dc in the first ch-3 space.
- ch 1. Work 3 dc in the next ch-3 space.
- Repeat: Work the Corner and the side clusters around.
- Join: sl st to the top of the ch 3 and fasten off.
💎 Why This Pattern is “The Most Beautiful”
| Feature | Aesthetic Impact |
| 3D Center | The Puff Stitches create shadows and depth, making the center “pop” off the fabric. |
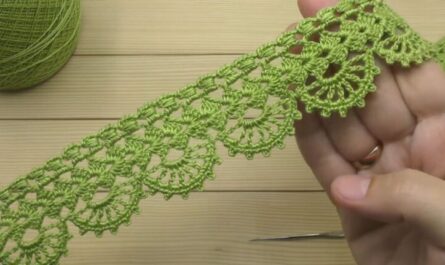
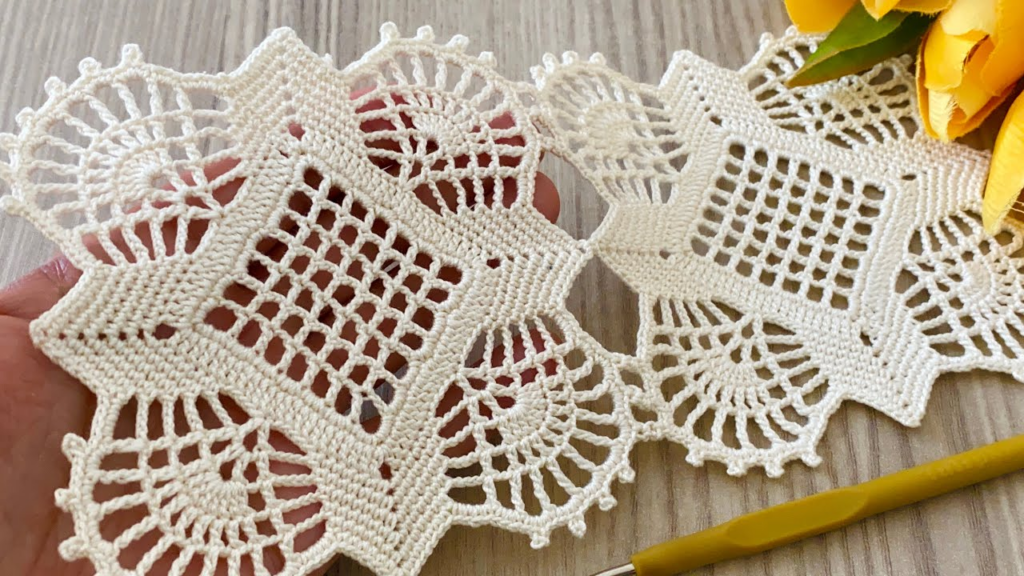
| Negative Space | The ch-5 bridges in Round 3 create “windows” that allow light to pass through, perfect for curtains or shawls. |
| Stitch Contrast | The transition from tiny sc stitches to tall treble crochets (tr) creates a dramatic geometric silhouette. |

🎨 Professional Finishing: The “Glow” Tip
To make this motif truly magnificent, use Two-Tone Color Work:
- Work Rounds 1 and 2 in a vibrant color (like Deep Red).
- Work Rounds 3, 4, and 5 in a contrasting neutral (like Parchment or Linen).This makes the central rose appear as if it is framed in a vintage window.
One Last Step: Blocking
Because of the puff stitches and long chain loops, this motif will look “scrunched” when you finish. Do not skip blocking.
- Soak the square in lukewarm water.
- Pin it to a foam board, pulling the ch-3 corners out firmly to create a sharp square.
- Once dry, the lace will be crisp and the rose will sit perfectly flat in the center.

Would you like me to help you calculate how many of these “Rose Squares” you would need to create a standard-sized decorative throw pillow?
Video tutorial: