 by
by That is a wonderful goal! To create a motif that is both stylish and elegant while remaining super easy for beginners, we should choose a pattern that uses basic stitches (DC, chain) but arranges them in a repetitive, lacy way.
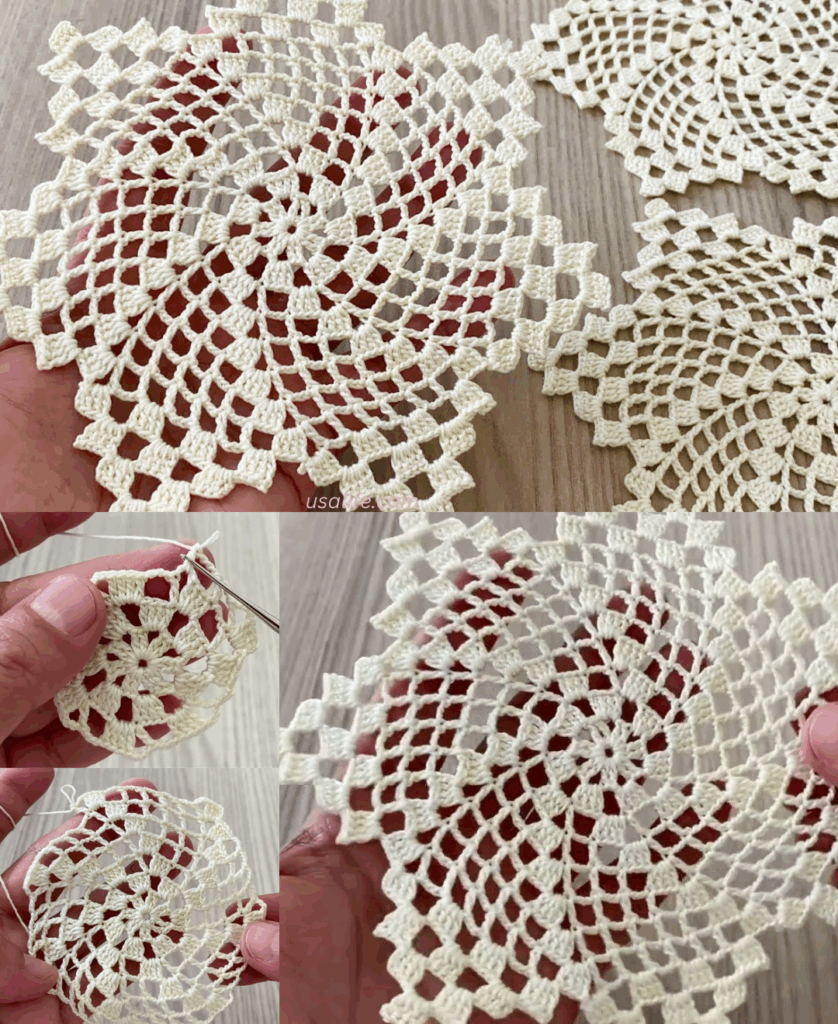
I will detail a tutorial for the “Open Mesh Lace Motif,” a square that uses strategic chains to create a delicate windowpane effect, giving it a modern and elegant look without complex stitches.
💎 Stylish Open Mesh Lace Motif Tutorial
This pattern starts with a solid center and gradually transitions to an open lace design, making it lightweight and visually appealing.
Materials You’ll Need
- Yarn: DK (Size 3) or Sport Weight (Size 2) yarn in a soft fiber (cotton or acrylic blend) is best for elegance and drape.
- Crochet Hook: The size appropriate for your yarn (e.g., 3.5 mm – 4.0 mm).
- Scissors
- Tapestry Needle (for weaving in ends).
Key Crochet Terms
| Abbreviation | Stitch Name |
| ch | Chain |
| sl st | Slip Stitch |
| dc | Double Crochet |
| st(s) | Stitch(es) |
| V-st | V-Stitch (dc, ch 1, dc) |
| Corner | (dc, ch 3, dc) |
Part 1: Solid Center Foundation
We create a tight, solid center disk to anchor the open lace work.
Round 1: Foundation
- Start: Make a Magic Ring. ch 3 (counts as dc). Work 15 dc into the ring.
- Finish: Pull the tail tight. Join with a sl st to the top of the ch 3. (16 sts).

Round 2: Setting up the Corners
We transition from a circle to a square by defining the four corner spaces.
- ch 3 (counts as dc). dc in the next 3 stitches.
- First Corner: ch 3.
- Repeat: Work [dc in the next 4 stitches, ch 3] 3 more times. (You will have 4 groups of 4 dc and 4 corner spaces).
- Finish: Join with a sl st to the top of the beginning ch 3.
Part 2: Building the Open Mesh Lace
We introduce open spaces by using chain stitches between the anchor stitches.
Round 3: First Lace Round
- sl st over to the next ch-3 corner space.
- First Corner: ch 3 (counts as dc). Work (ch 3, dc) into the same corner space. (This is a simplified corner).
- Side: ch 1. Skip 1 st. Work dc in the next st.
- Repeat: [ch 1, skip 1 st, dc in the next st] 2 more times across the side. (You should end with a dc placed right before the next corner space).
- Next Corner: Work (dc, ch 3, dc) into the ch-3 corner space.
- Repeat: Continue the sequence [Corner (dc, ch 3, dc), then (ch 1, skip 1, dc) three times across the side] 3 more times.
- Finish: Join with a sl st to the top of the beginning ch 3.

Round 4: Expanding the Mesh
This round expands the lattice pattern and defines the sides more clearly.
- sl st into the next ch-3 corner space.
- First Corner: ch 3. Work (ch 3, dc) into the same corner space.
- Side: ch 1. Work dc into the next ch-1 space (the gap).
- Repeat: [ch 1, dc into the next ch-1 space] across the side. (You are now working dc into the spaces, not the stitches).
- Next Corner: Work (dc, ch 3, dc) into the ch-3 corner space.
- Repeat: Continue the sequence [Corner (dc, ch 3, dc), then (ch 1, dc into space) across the side] 3 more times.
- Finish: Join with a sl st to the top of the beginning ch 3.

Continuing to Grow
To make the motif larger, simply repeat Round 4. In each subsequent round, you will increase the number of V-stitches and ch-1 spaces along the sides, expanding the elegant windowpane effect.
Finishing the Motif
- Fasten Off: Secure the final stitch.
- Weave in Ends: Use a tapestry needle to weave tails into the back of the solid stitches (R1/R2).
- Blocking (Highly Recommended): Blocking is crucial for lace motifs. Wet the finished square, pin the corners firmly, and allow it to dry completely. This will open up the mesh and ensure the edges are sharp and straight, giving your motif that final, professional elegance.
Video tutorial: