 by
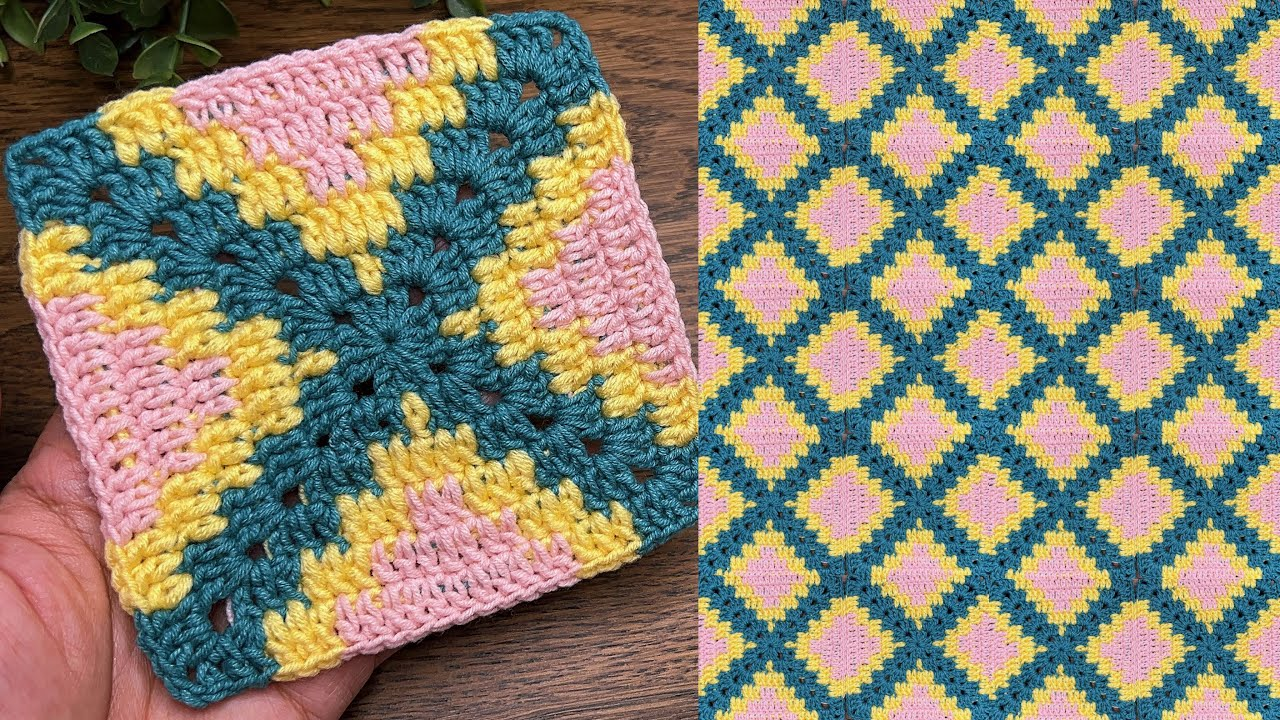
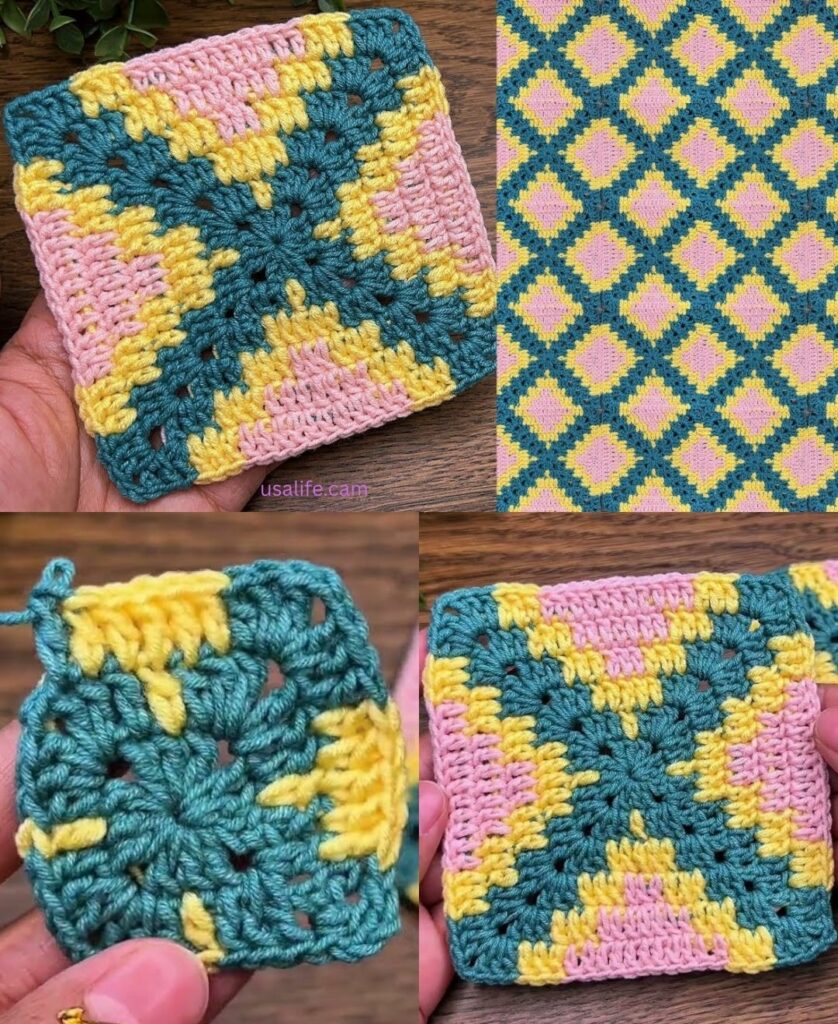
by That’s a perfect request! Learning to crochet a square motif is the essential first step in building larger projects. I will give you a detailed, step-by-step tutorial for the Solid Granny Square, which is incredibly easy for beginners, uses only basic stitches, and creates a dense, sturdy fabric.

🟥 Super Easy Solid Square Motif Tutorial
This pattern teaches you how to work in the round, increase stitches, and establish sharp corners—the foundation of almost all crochet motifs.
Materials You’ll Need
- Yarn: Medium-weight yarn (worsted/size 4) is easiest to see and handle.
- Crochet Hook: The size recommended for your yarn (e.g., 5.0 mm or H/8).
- Scissors
- Tapestry Needle (for weaving in ends).
Key Crochet Terms
| Abbreviation | Stitch Name |
| ch | Chain |
| sl st | Slip Stitch |
| dc | Double Crochet |
| st(s) | Stitch(es) |
| Corner | (dc, ch 2, dc) |
Step-by-Step Instructions
Round 1: Creating the Center
We establish the center disk and the four corner spaces.
- Start the Ring: Make a Magic Ring (or chain 4 and sl st into the first chain to form a ring).
- First Side: ch 3 (This counts as your first dc). Work 2 dc into the center ring.
- First Corner: ch 2.
- Repeat: Work [3 dc into the ring, ch 2] 3 more times. (You will have 4 groups of 3 dc and 4 corner spaces).
- Finish: Pull the yarn tail tight to close the center hole. Join the round with a sl st to the top of the beginning ch 3.

Round 2: Expanding the Square
Now we work a solid double crochet into every stitch and establish the corner increases.
- ch 3 (counts as dc). Work dc in the next 2 stitches (1 dc into each dc from R1).
- Corner: Work (dc, ch 2, dc) into the ch-2 corner space.
- Repeat: Work [dc in the next 3 stitches, Corner (dc, ch 2, dc) in the next ch-2 space] 3 more times.
- Finish: Join with a sl st to the top of the beginning ch 3.
Round 3: Defining the Shape
The side stitches between the corners increase in every round.
- ch 3 (counts as dc). Work dc in every stitch along the first side (you should have 4 dc total before the corner space).
- Corner: Work (dc, ch 2, dc) into the ch-2 corner space.
- Side: Work dc in every stitch along the side until you reach the next corner space.
- Repeat: Continue the sequence [dc in every stitch across the side, Corner (dc, ch 2, dc)] around the square.
- Finish: Join with a sl st to the top of the beginning ch 3.

Continuing to Grow
To make the square larger:
- Repeat Round 3.
- The Corners are always (dc, ch 2, dc) in the ch-2 space.
- The Sides are always 1 dc in every stitch between the corners.
Your square will grow by 8 stitches (two on each side) in every round, keeping it perfectly flat and square.
Finishing the Motif
- Fasten Off: Cut the yarn, leaving a 6-inch tail, and pull the loop through the last stitch to knot it.
- Weave in Ends: Thread the tails onto a tapestry needle and weave them securely into the back of the corresponding stitches to hide them.
Congratulations! You have successfully crocheted a super easy solid square motif. Would you like to know how to join these squares together?
Video tutorial: