 by
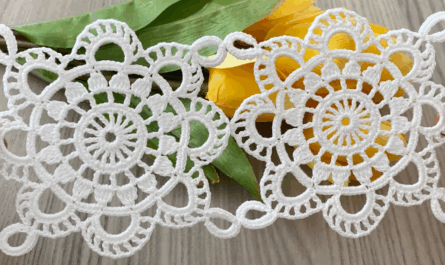
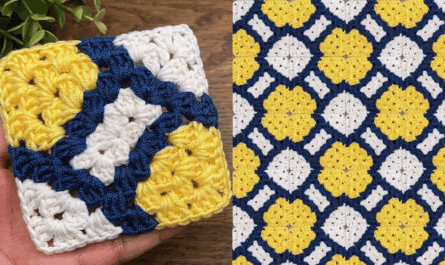
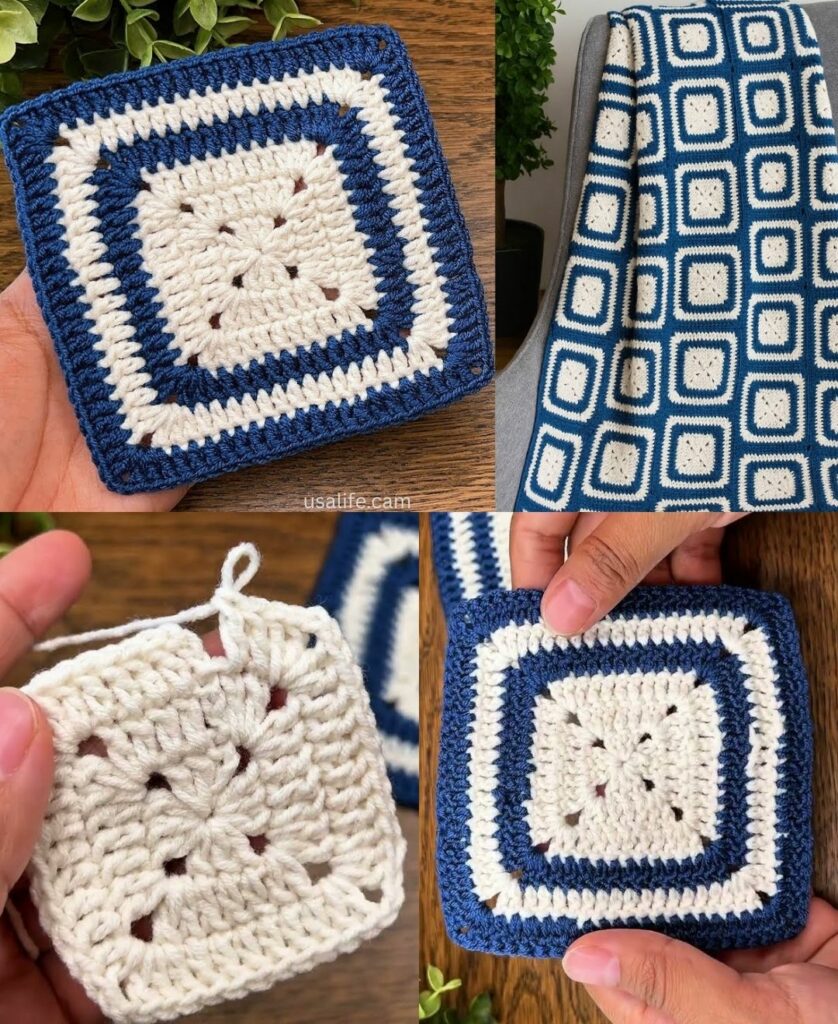
by The Classic Granny Square is the quintessential project for any new crocheter. It is modular, portable, and incredibly forgiving. Once you learn the rhythm of the “granny cluster,” you can make anything from a simple coaster to a magnificent heirloom blanket.
This guide will walk you through the process step-by-step, even if you’ve never held a hook before.
🧶 The Beginner’s Toolkit
To make your learning process smooth, I recommend using a light-colored yarn. It makes it much easier to see exactly where your hook needs to go.
| Item | Recommendation | Why? |
| Yarn | Medium-weight (Worsted / Size 4) Acrylic or Cotton | Stable, doesn’t split easily, and stitches are clear. |
| Hook | 5.0 mm (H/8) | A comfortable size that fits well in the hand for beginners. |
| Notions | Scissors & Tapestry Needle | To cut and hide your yarn tails at the end. |
Essential Abbreviations
- ch: Chain
- sl st: Slip Stitch
- dc: Double Crochet
- sp: Space (the hole created by chains)
- Cluster: A group of 3 dc stitches worked into the same space.

🛠 Step 1: The Foundation Ring
There are several ways to start, but for a true beginner, the Chain 4 method is the most reliable.
- Make a slip knot and place it on your hook.
- ch 4.
- Insert your hook into the very first chain you made.
- Yarn over and pull through both loops on the hook (sl st).
- Result: You now have a tiny circle. You will be crocheting into the center hole of this circle, not into the individual chains.

🟩 Step 2: Round 1 (The Core)
In this round, we create the four corners of your square.
- ch 3 (This counts as your first dc).
- Work 2 dc into the center of the ring. (You now have your first “cluster”).
- ch 2 (This creates your first corner space).
- Work 3 dc into the center of the ring, then ch 2.
- Repeat Step 4 two more times.
- Finish: Join with a sl st to the top of your starting ch 3.
- Result: You should have 4 clusters and 4 “ch-2” corner spaces. It will look like a tiny, bumpy square.
🟩 Step 3: Round 2 (Expansion)
Now we grow the square by working into the corner spaces.
- Move the hook: You need to get to the first corner. sl st into the next two dc stitches, then sl st into the corner space.
- First Corner: ch 3 (counts as dc). In that same corner space, work 2 dc, ch 2, 3 dc. (This is your first completed corner).
- ch 1 (This “side chain” creates a space for the next round).
- Next Corners: In each of the remaining 3 corner spaces, work: (3 dc, ch 2, 3 dc) followed by a ch 1.
- Finish: Join with a sl st to the top of the starting ch 3.

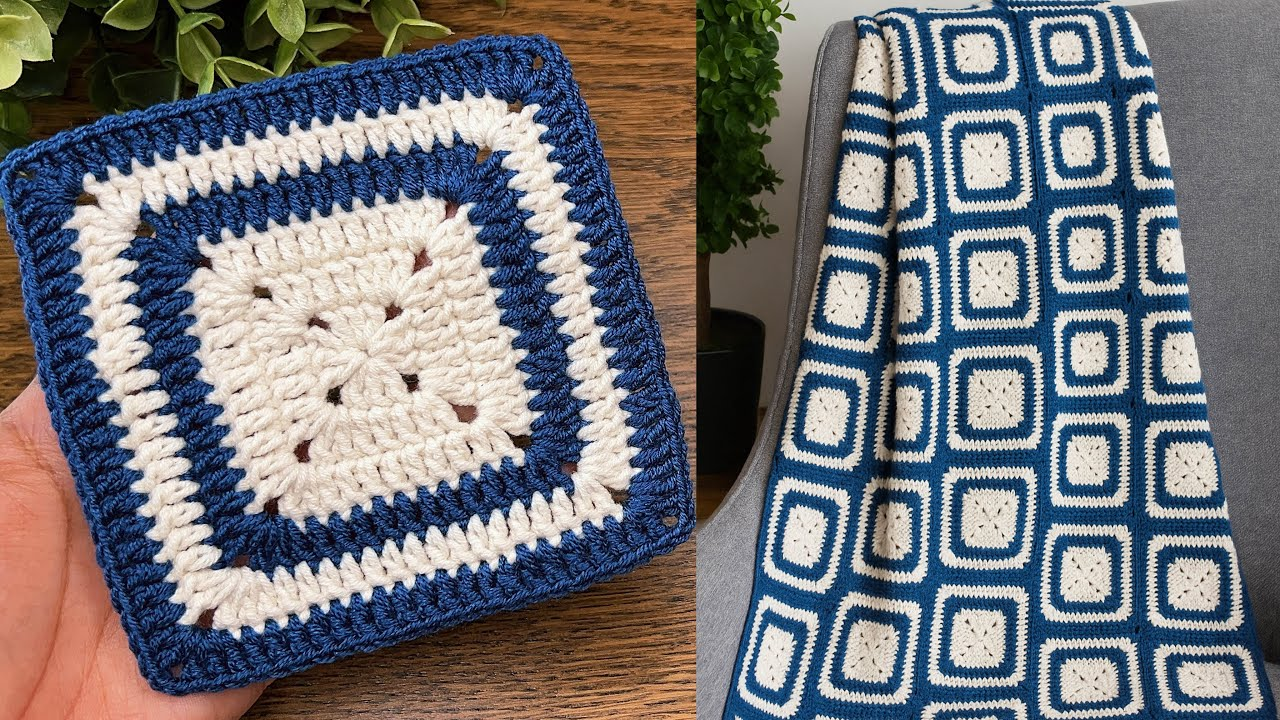
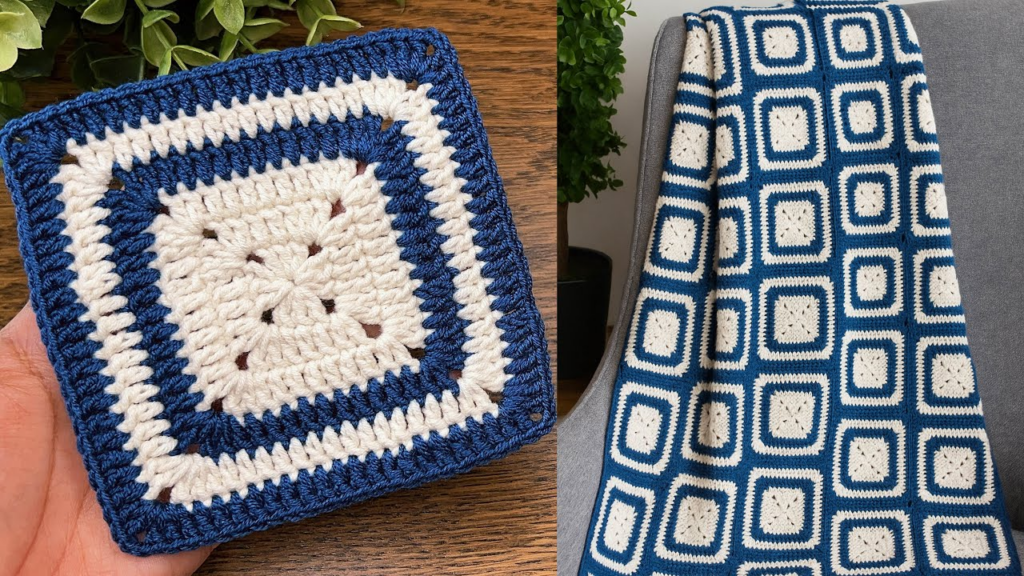
🟩 Step 4: Round 3 (Building the Sides)
This round introduces “side clusters,” which sit between the corners.
- Move the hook: sl st over to the first corner space.
- Corner: Work a full corner (ch 3, 2 dc, ch 2, 3 dc). ch 1.
- Side: Look at the space on the side between corners. Work 3 dc into that ch-1 space. ch 1.
- Repeat: Follow this pattern around: Work a Corner in every corner space and a 3-dc cluster in every side space. Always put a ch 1 between clusters.
- Finish: Join with a sl st to the top of the starting ch 3.
💡 3 Secrets for a Perfect Square
- Corner vs. Side: Always remember: Corners get two clusters separated by 2 chains. Sides only get one cluster.
- Don’t skip the “Hidden Stitch”: After you finish a corner, the very first dc stitch on the next side often gets covered by the corner you just made. Pull your stitches back slightly to make sure you see the next hole!
- Relax Your Hands: If your square is curling up like a bowl, your stitches are likely too tight. Try to loosen your grip or use a slightly larger hook.
🏁 Finishing Off
Once your square is the size you want:
- Cut the yarn, leaving about 6 inches (15 cm) of tail.
- Pull the loop on your hook all the way through to knot it.
- Use your tapestry needle to weave the tail back and forth through the back of the stitches to hide it.
Would you like me to explain how to change yarn colors so you can make a multi-colored “rainbow” square?
Video tutorial: