 by
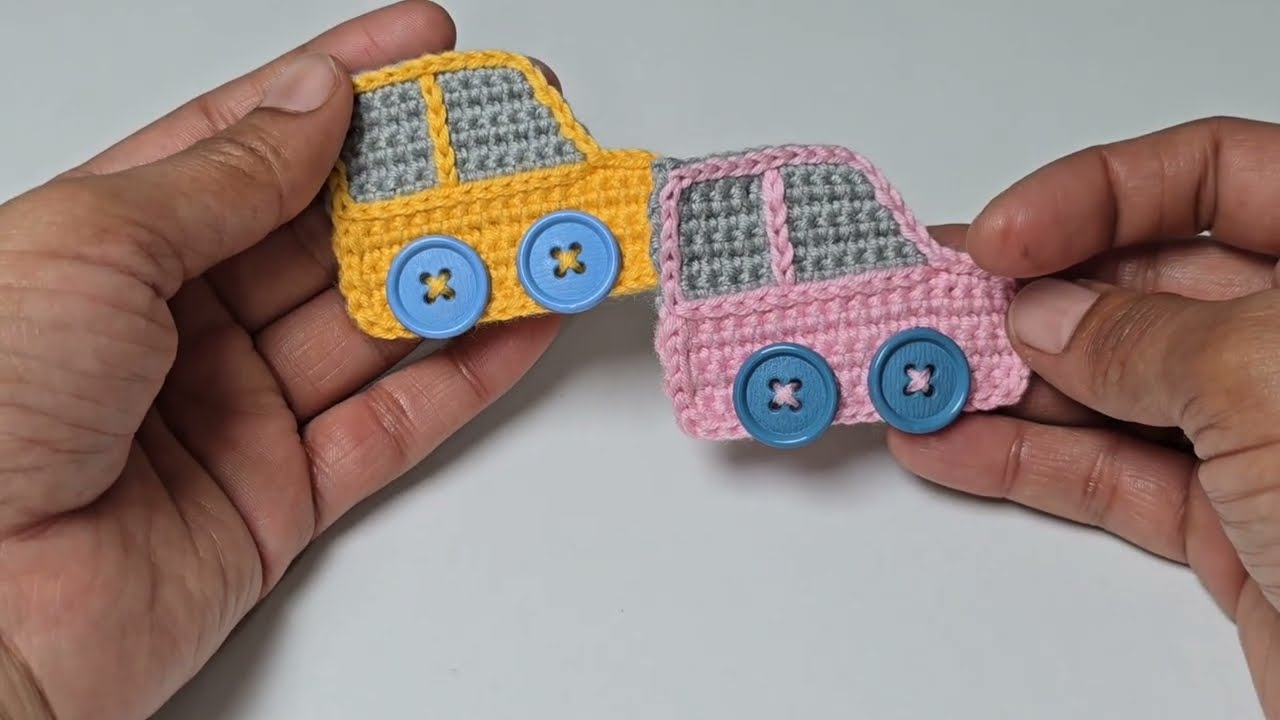
by That’s a fun idea! Crocheting a tiny car is a delightful amigurumi project, perfect for a keychain, a toy for a little one, or just a cute desk ornament. Since you’re in Phnom Penh, where it’s warm, 100% cotton yarn is an excellent choice. It holds its shape well for amigurumi, has good stitch definition, and is durable.
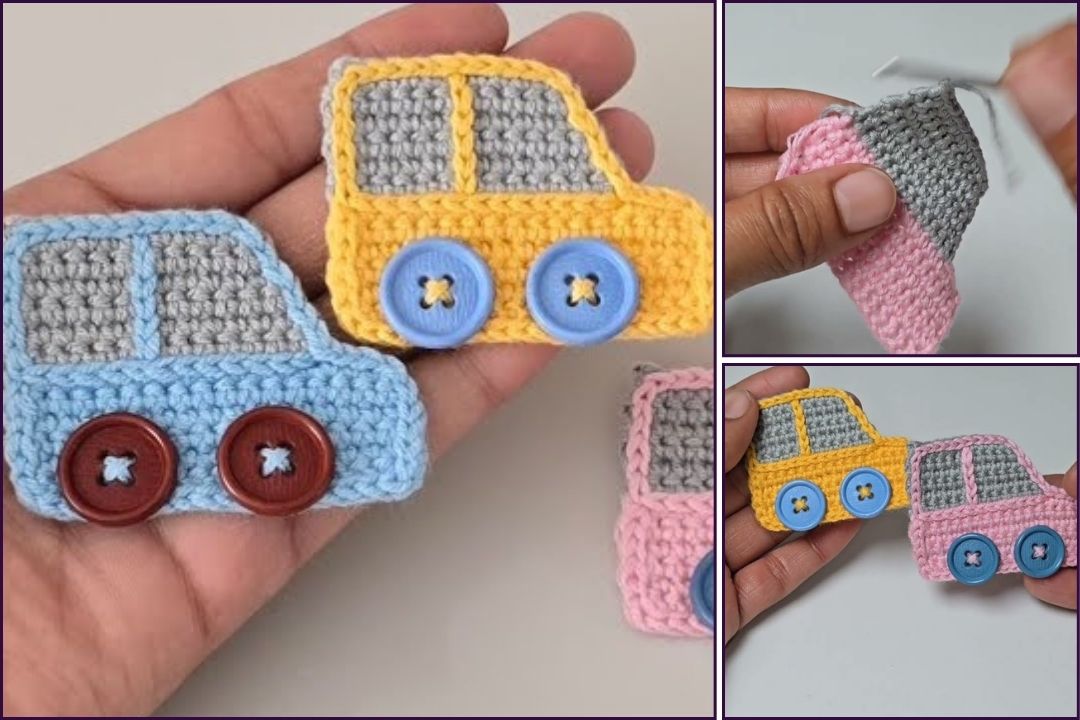
This tutorial will guide you through creating a simple, blocky little car using basic crochet stitches.

How to Crochet a Tiny Car (Amigurumi Style)
This pattern creates a small, cute, and sturdy car. It involves working in continuous rounds and flat rows, and then assembling the pieces.
1. Essential Materials You’ll Need
- Yarn:
- Main Car Body Color (MC): Your chosen color for the car’s body (e.g., red, blue, green, yellow, grey). Worsted Weight (Aran / Medium / Category 4) 100% cotton or a durable acrylic. You’ll need about 20-30g.
- Window Color (WC): For the car windows (e.g., light blue, white, or light grey). Small scrap.
- Wheel Color (WHL): For the wheels (e.g., black or dark grey). Small scrap.
- Optional Accent Color (AC): For headlights, taillights, or trim (e.g., yellow, red, white). Tiny scraps.
- Crochet Hook:
- A 3.0mm (US C/2) or 3.5mm (US E/4) hook. For amigurumi, always use a hook size slightly smaller than recommended for your yarn. This creates a tight fabric, preventing stuffing from showing through.
- Scissors: For cutting yarn.
- Yarn Needle (Tapestry Needle): Absolutely essential for weaving in ends and assembling the car parts.
- Stuffing: Polyester fiberfill (Poly-fil) or even small yarn scraps. You’ll need just a little.
- Stitch Marker (Highly Recommended!): Crucial for keeping track of rounds when working in a spiral.
2. Basic Crochet Stitches & Techniques You’ll Use
This pattern uses fundamental amigurumi stitches and techniques:
- Magic Ring (MR): (Also Magic Circle/Adjustable Ring). Essential for a tight, hole-free start. If you’re new to this, watch a video tutorial!
- Chain (ch): For foundation and small elements.
- Slip Stitch (sl st): For joining and neatening.
- Single Crochet (sc): The primary stitch for amigurumi, creating a dense fabric.
- Increase (inc): Work 2 sc into the same stitch.
- Decrease (dec / sc2tog): Single Crochet 2 Together.
- Invisible Decrease (Recommended for Amigurumi): Insert hook into front loop only of first stitch, then into front loop only of second stitch, YO, pull through both front loops (2 loops on hook), YO, pull through both loops on hook.
- Working in Continuous Rounds: You typically do not join with a sl st at the end of each round unless specified. Use a stitch marker to keep track of the first stitch of each round.
- Working in Rows: For flat pieces like windows.
- Fasten Off: Securely ending your work.
- Weaving in Ends: Hiding tails for a neat finish.
Crochet Tiny Car Pattern
Let’s get this little car on the road!
Abbreviations (US Crochet Terms):
- MC: Main Car Body Color
- WC: Window Color
- WHL: Wheel Color
- AC: Accent Color
- Rnd: Round
- Row: Row
- ch: chain
- sl st: slip stitch
- sc: single crochet
- inc: increase (2 sc in next st)
- dec: decrease (sc2tog)
- MR: magic ring
- st(s): stitch(es)
(...): work stitches into the same stitch/space[...]: repeat instructions in brackets
Part 1: Car Body (Main Car Body Color – MC)
We’ll start with the base of the car and work our way up. This will be a rectangular shape worked in rounds.
- Ch 9.
- Rnd 1: Sc in the 2nd ch from hook. Sc in the next 6 ch. (3 sc) in the last ch (this forms the first turn).
- Now, working down the opposite side of the foundation chain: Sc in the next 6 ch. (2 sc) in the last ch (completing the turn). (18 sts)
- Place a stitch marker in the first sc of this round. Continue working in a spiral.
- Rnd 2: Inc in the first st. Sc in the next 6 sts. [Inc] 3 times. Sc in the next 6 sts. [Inc] 2 times. (24 sts)
- Rnd 3: Sc in the next 2 sts. Inc. Sc in the next 6 sts. [Sc 1, inc] 3 times. Sc in the next 6 sts. [Sc 1, inc] 2 times. (30 sts)
- Rnd 4: Sc in the next 3 sts. Inc. Sc in the next 6 sts. [Sc 2, inc] 3 times. Sc in the next 6 sts. [Sc 2, inc] 2 times. (36 sts)
- You should now have a relatively flat, ovalish base that will be the bottom of your car.
- Rnd 5: Working in the back loop only (BLO), sc in each st around. (36 sts)
- This creates a crisp edge, making the sides of the car turn upwards.
- Rnd 6-9: Sc in each st around (working through both loops now). (36 sts for 4 rounds)
- At this point, you’ll have a small car-shaped box. Start lightly stuffing the car body.
- Rnd 10: Sc in the next 3 sts. Dec. Sc in the next 6 sts. [Sc 2, dec] 3 times. Sc in the next 6 sts. [Sc 2, dec] 2 times. (30 sts)
- Rnd 11: Sc in the next 2 sts. Dec. Sc in the next 6 sts. [Sc 1, dec] 3 times. Sc in the next 6 sts. [Sc 1, dec] 2 times. (24 sts)
- Rnd 12: Sc in the next 1 st. Dec. Sc in the next 6 sts. [Dec] 3 times. Sc in the next 6 sts. [Dec] 2 times. (18 sts)
- Stuff firmly: Make sure the car body is well-stuffed now.
- Rnd 13: [Sc 1, dec] 6 times. (12 sts)
- Rnd 14: [Dec] 6 times. (6 sts)
- Fasten off, leaving a long tail. Thread the tail onto your yarn needle. Weave the needle through the front loop of each of the remaining 6 stitches. Pull tight to cinch the hole closed. Secure with a knot and weave in the tail.
Part 2: Wheels (Wheel Color – WHL, Make 4)
Small black or dark grey circles for the wheels.
- Start with a MR.
- Work 6 sc into MR. (6 sts)
- Pull tail to close.
- Fasten off, leaving a tail for sewing.
- You’ll have a tiny flat circle.
Part 3: Windows (Window Color – WC, Make 2 – Front & Back)
Flat rectangular pieces for the windshield and back window.
- Ch 7.
- Row 1: Sc in the 2nd ch from hook and in each ch across. (6 sc)
- Row 2: Ch 1, turn. Sc in each sc across. (6 sc)
- Fasten off, leaving a tail for sewing.

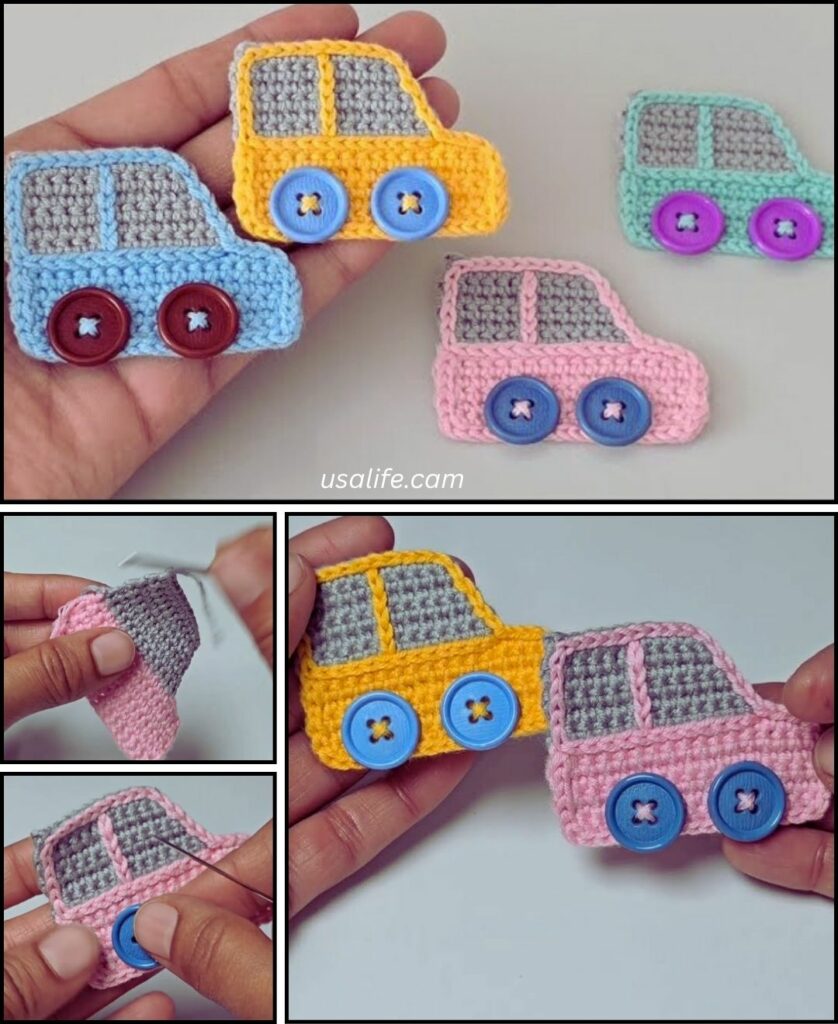
Part 4: Assembly and Detailing
Now the fun part: bringing your car to life!
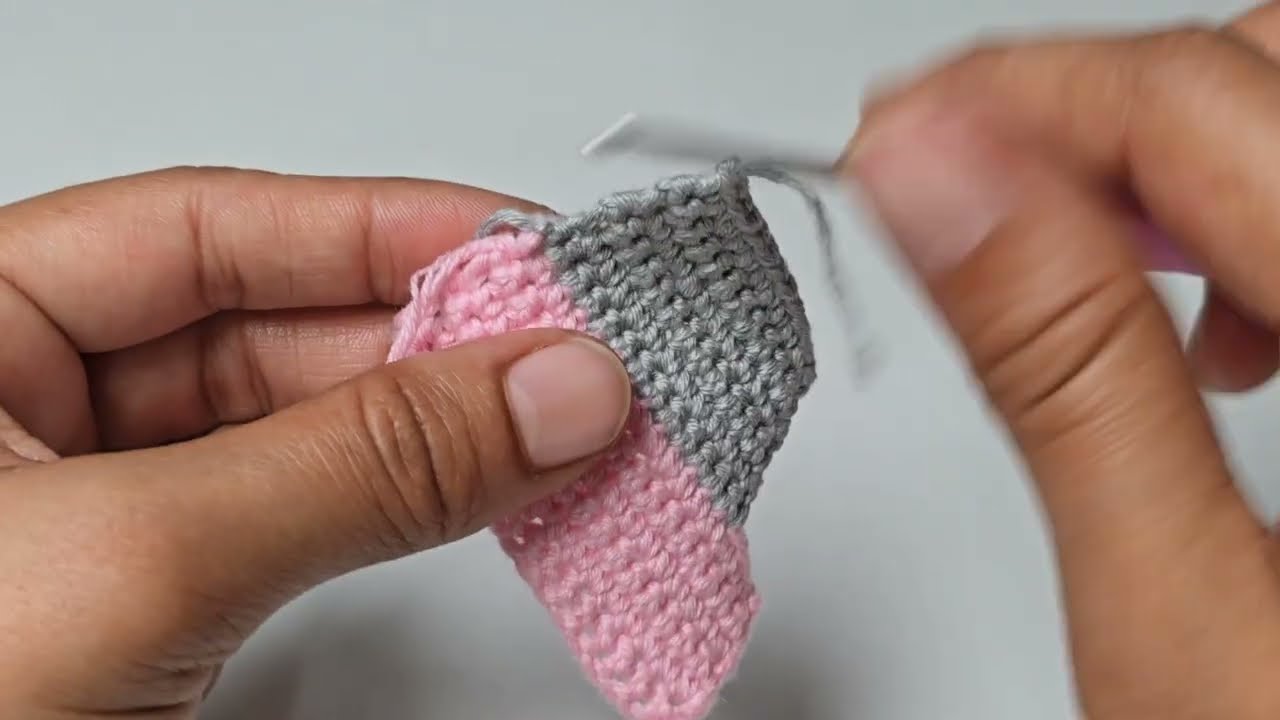
- Weave in All Initial Ends: Before assembly, weave in all starting and ending tails from your car body, wheels, and windows (except for the sewing tails you left).
- Attach Windows:
- Position one window on the front (narrower) end of the car body.
- Position the second window on the back (other narrower) end of the car body.
- Using the sewing tail from each window and your yarn needle, neatly stitch the windows onto the car body. Try to make your stitches as invisible as possible.
- Attach Wheels:
- Position the four wheels evenly along the bottom sides of the car. Two on each long side.
- Using the sewing tail from each wheel, stitch them firmly onto the car body. Stitch around the perimeter of the wheel.
- Add Details (Optional but Recommended!):
- Headlights (AC – yellow or white): With a tiny bit of accent yarn and your yarn needle, embroider two small circles or straight lines on the very front of the car, below the windshield.
- Taillights (AC – red): Similarly, embroider two small red stitches on the very back of the car, below the back window.
- Grill/Bumper (AC – grey or black): You can embroider a horizontal line or two on the front and back for a grill/bumper.
- Side Mirrors (MC or AC): You can crochet two tiny
ch 2, sc in 2nd ch from hookpieces and sew them to the sides of the car’s body.
- Final Weaving: Double-check that all tails are securely woven in and trimmed.
5. Tips for a Cool Tiny Car
- Yarn & Hook: A smaller hook ensures a tight fabric, which is key for amigurumi to prevent stuffing from showing and to give the car a good shape.
- Stuffing: Stuff firmly but evenly. Don’t overstuff to the point of distorting the shape, but ensure it’s not squishy and floppy.
- Invisible Decrease: If you are comfortable, use the invisible decrease (sc2tog through front loops only) when shaping the car body. It makes the decreases much less noticeable.
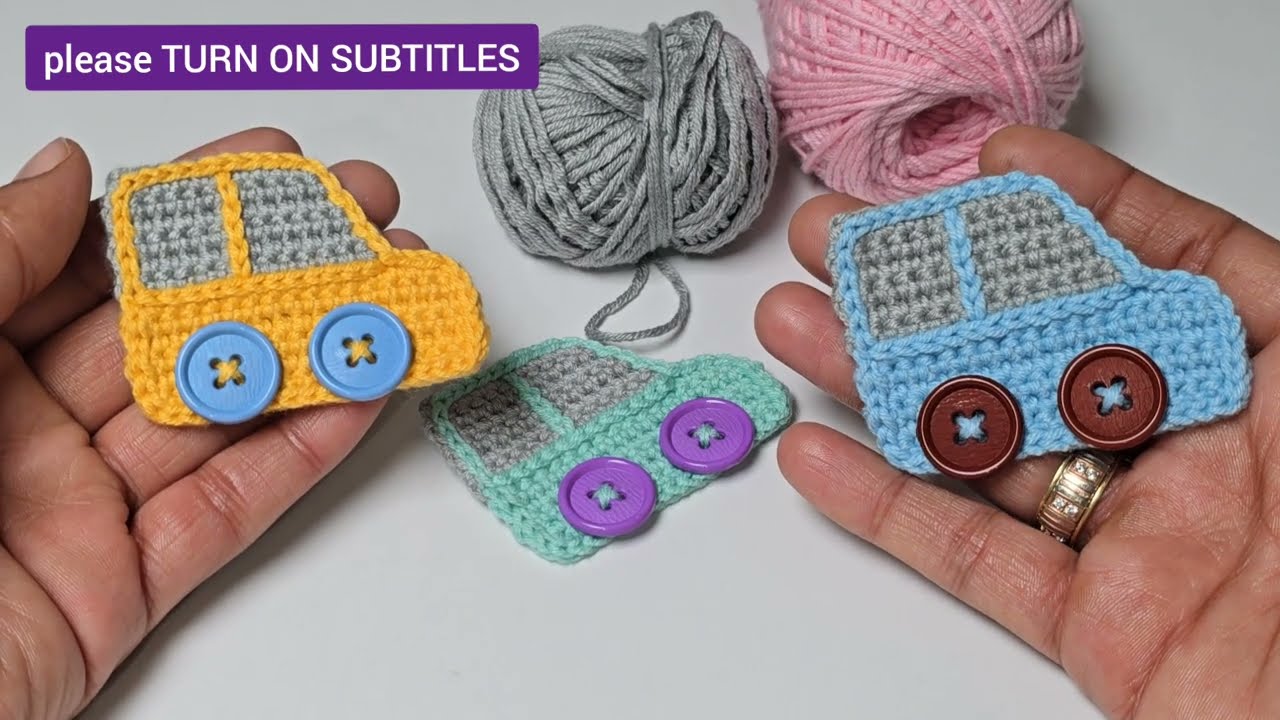
- Color Choices: Get creative! A vintage car might be a muted green or blue, while a race car could be bright red with yellow accents.
- Details Make the Difference: Even simple embroidered lines for headlights or a tiny red stitch for taillights can greatly enhance the character of your car.
- Consistency: Try to maintain consistent tension throughout the project for a uniform look.
- Keychain Option: If you want to make it a keychain, sew a sturdy loop of chains (ch 5-7, sl st back into the same point) onto the very top center of the car before you weave in the final tail. Then attach your keychain hardware to this loop.
You now have a detailed tutorial on how to crochet an adorable tiny car! Enjoy watching your little vehicle take shape.