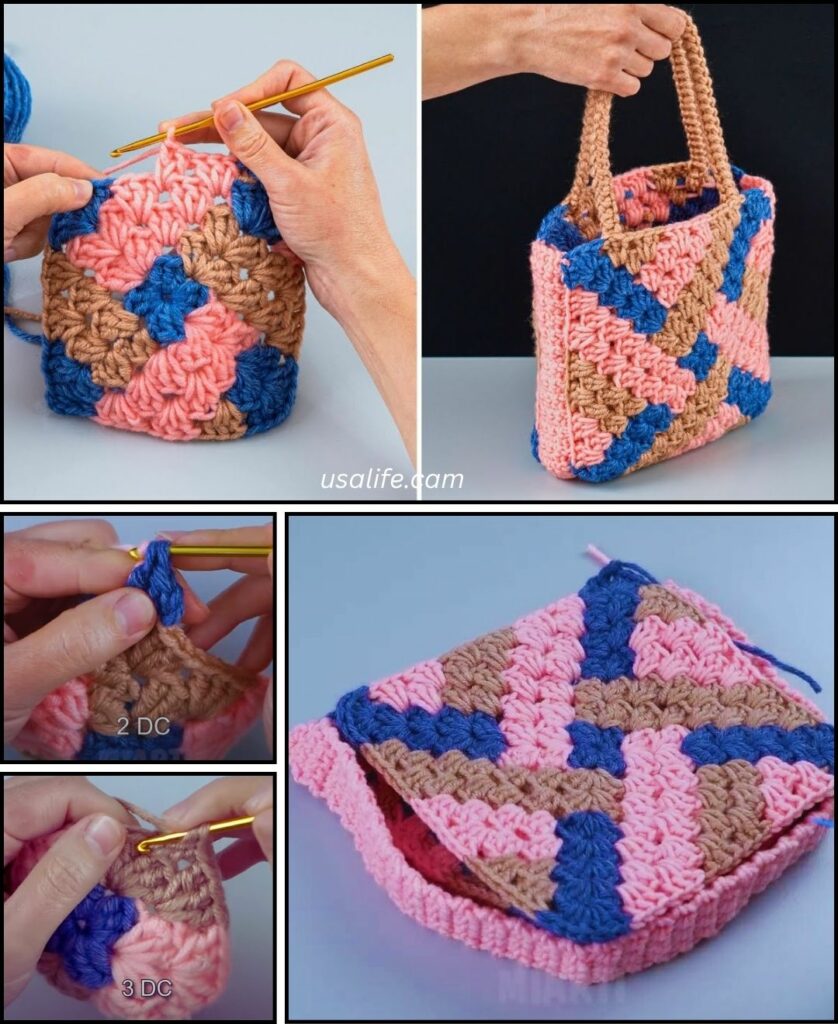
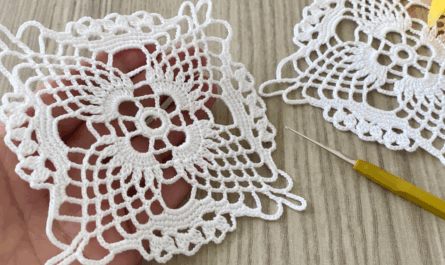
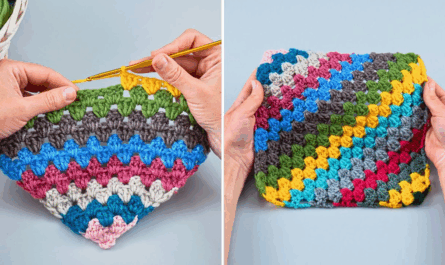
That’s a fantastic project! Crocheting a handbag bag using granny squares is a wonderfully versatile and rewarding craft. It allows for endless creativity with colors and layouts, and the result is a unique, stylish accessory that you can use every day or give as a thoughtful gift.
Considering your location in Phnom Penh, 100% cotton yarn or a cotton blend would be an excellent choice for your handbag. Cotton is known for its durability, clear stitch definition, and breathability, which is great for warmer climates. It also holds its shape well, which is important for a bag that will carry items.

How to Crochet a Handbag Bag Using Granny Squares
This guide will walk you through the process of creating a charming and functional handbag made from crocheted granny squares. We’ll cover everything from making the individual squares to joining them, adding a border, and attaching handles. For added durability and a polished finish, we’ll also discuss how to add an optional fabric lining.
1. Essential Materials You’ll Need
- Yarn:
- Fiber: 100% Cotton or a Cotton Blend is highly recommended for durability and shape retention. A sturdy acrylic yarn can also work well, especially if you prefer a softer drape, but be aware it might stretch more over time.
- Weight: Worsted Weight (Aran / Medium / Category 4) is ideal for handbags. It works up quickly and creates a robust fabric. You could use DK (Double Knitting / Category 3) for a smaller, more delicate bag.
- Colors: This is where you can let your creativity shine! You’ll need a main color (for joining your squares, the top border, and the handles) and several contrasting or complementary colors for the individual granny squares. This project is perfect for using up yarn scraps!
- Quantity: The amount of yarn needed will depend on the size of your handbag and your chosen granny square size. For a medium-sized tote-style bag using around 13-16 squares, plan for approximately 200-400g of yarn in total.
- Crochet Hook:
- Select a hook size appropriate for your chosen yarn weight. For worsted weight yarn, a 4.0mm (US G/6) or 5.0mm (US H/8) hook is common. Opting for a slightly smaller hook than the yarn label suggests can create a denser fabric, which results in a sturdier bag.
- Scissors: For cutting yarn.
- Yarn Needle (Tapestry Needle): This is absolutely essential for weaving in all your yarn ends (and there will be many in a granny square project!) and for securely joining your squares.
- Stitch Markers (Optional but helpful): Useful for marking corners or the beginning of rounds.
- Measuring Tape: To check the size of your squares and the overall bag dimensions.
- Optional for Lining: Fabric for lining (such as cotton canvas, linen, or a sturdy quilting cotton), a sewing machine or hand-sewing needle and thread, and pins.
- Optional for Handle: D-rings, metal or wooden purse hardware (if you’re not crocheting handles).
2. Basic Crochet Stitches You’ll Use
You’ll need to be comfortable with the following fundamental crochet stitches, particularly those used in classic granny squares:
- Chain (ch): Used for foundation and creating chain spaces.
- Slip Stitch (sl st): For joining rounds and neatening.
- Double Crochet (dc): The primary stitch for granny squares, forming the “clusters.”
- Magic Ring (MR) / Adjustable Ring: (Optional but highly recommended) Creates a tight, hole-free center for your first round. An alternative is to
ch 4, then sl st to joininto the first chain to form a ring.

The Classic Granny Square Pattern
This is the core building block of your handbag. You’ll crochet multiple copies of this pattern, experimenting with different color combinations for each square.
Abbreviations (US Crochet Terms):
- ch: chain
- sl st: slip stitch
- dc: double crochet
- sp: space
- MR: magic ring
(...): work stitches into the same stitch or space[...]: repeat instructions in brackets
Step 1: Crocheting Your Granny Squares
Decide on the size of your squares (number of rounds) and how many you’ll need for your desired handbag dimensions. A common starting point for a simple tote-style bag is 13 squares (9 for the main body and 4 for the bottom).
To Make One Granny Square (Example with 3 Rounds/Colors):
- Start (Color 1): With Color 1, create a Magic Ring (MR).
- (Alternatively: Ch 4, then sl st into the 1st ch to form a ring.)
- Round 1: Ch 3 (this counts as your first dc). Work 2 dc into the ring.
*Ch 2 (this creates a corner space). Work 3 dc into the ring.*Repeat from*to*2 more times. Ch 2. Join with a sl st to the top of the beginning Ch 3. (You’ll have 4 clusters of 3 dc, separated by ch-2 corner spaces).- Fasten off Color 1.
- Round 2 (Color 2): Join Color 2 with a sl st into any ch-2 corner space. Ch 3 (counts as 1st dc). Work (2 dc, ch 2, 3 dc) all into the same ch-2 corner space.
*Ch 1 (this creates a side space). In the next ch-2 corner space, work (3 dc, ch 2, 3 dc).*Repeat from*to*2 more times. Ch 1. Join with a sl st to the top of the beginning Ch 3.- Fasten off Color 2.
- Round 3 (Color 3): Join Color 3 with a sl st into any ch-2 corner space. Ch 3 (counts as 1st dc). Work (2 dc, ch 2, 3 dc) all into the same ch-2 corner space.
*Ch 1. Work 3 dc into the next ch-1 side space. Ch 1. In the next ch-2 corner space, work (3 dc, ch 2, 3 dc).*Repeat from*to*2 more times. Ch 1. Work 3 dc into the last ch-1 side space. Ch 1. Join with a sl st to the top of the beginning Ch 3.- Fasten off Color 3.
- Subsequent Rounds (Optional): If you want larger squares, continue adding rounds. Each new round, you’ll start in a corner space with
ch 3, 2 dc, ch 2, 3 dc. In each ch-1 side space, you’ll work3 dc. Remember toch 1between side clusters andch 2for the corner spaces. - Weave in ALL yarn ends on each individual granny square as you complete them, or at least before you start joining them. This will save you a lot of time and effort at the end!

Step 2: Planning Your Handbag Layout
Before you start joining, lay out all your crocheted granny squares on a flat surface. This step is crucial for visualizing the final shape of your handbag and for deciding the best order to join them.
- Simple Tote Bag (Common and Beginner-Friendly Layout):
- Main Body: Arrange 9 squares into a 3 rows by 3 squares grid. When folded, the middle column will form the front and back of your bag, and the outer columns will become the sides.
- Bottom: Arrange 4 squares into a 2 rows by 2 squares grid. This will form the base of your bag.
[SQ] [SQ] [SQ] <-- Top edge of front/back panel [SQ] [SQ] [SQ] [SQ] [SQ] [SQ] -------------- (Bottom edge of main body panel) [SQ] [SQ] <-- Bottom of bag panel [SQ] [SQ] - Other Potential Layouts: You can experiment with different configurations, such as a simpler pouch made from two large squares for the front and back, or a rectangular tote with fewer squares wide but more squares tall.
Step 3: Joining Your Granny Squares
This step is key to assembling your handbag. Use your main color yarn for joining to create a cohesive and professional look.
Common Joining Methods (Choose one based on your preference):

- Whip Stitch (with Yarn Needle):
- Result: Creates a neat, almost invisible seam.
- How: Line up two squares with their wrong sides facing each other. Using your yarn needle, whip stitch through either the back loops or both loops of both squares along the entire edge.
- Slip Stitch Join (with Crochet Hook):
- Result: Creates a slightly raised, visible ridge. It’s often quicker than hand-sewing.
- How: Line up two squares (wrong sides together for an external ridge, or right sides together for an internal ridge). Insert your hook through corresponding loops of both squares, yarn over, and pull through all loops on your hook to create a slip stitch across the seam.
- Single Crochet Join (with Crochet Hook):
- Result: Creates a stronger, more pronounced ridge. This method is very sturdy, ideal for a handbag.
- How: Line up two squares (wrong sides together). Insert your hook through corresponding loops of both squares, yarn over, pull up a loop, yarn over, and pull through both loops on your hook to create a single crochet across the seam.
- Join-As-You-Go (JAYG) (More Advanced):
- Result: Eliminates the need for extensive sewing, resulting in a very clean finish.
- How: Instead of completely finishing and fastening off each square, you crochet the last round of a square and simultaneously join it to already completed squares using slip stitches or single crochets into the corresponding spaces/stitches of the adjacent square. This method requires careful planning and a good understanding of your chosen JAYG technique. (Many video tutorials are available online if you’d like to explore this option.)
Joining Sequence for the Simple Tote Layout:
- Join the Main Body Squares: First, join the squares horizontally to form three strips of three squares each. Then, join these three strips vertically to create your complete 3×3 grid.
- Join the Bottom Squares: Join your 4 bottom squares together to form a 2×2 grid.
- Assemble the Bag:
- Take your finished 3×3 grid. Fold it into a tube shape; the middle column of squares will form the front and back of your bag, and the outer columns will fold to become the sides. Join the two vertical seams (these will be the side seams of your bag) to create the main body tube.
- Now, attach the 2×2 bottom panel to the bottom edges of the square tube you’ve just formed. This is done by joining all around the perimeter of the base to the corresponding stitches on the bottom edge of the bag’s body.
Step 4: Finishing the Top Edge (Main Color – MC)
Adding a neat border to the top opening of your bag will give it a clean finish and provide a sturdy base for attaching handles.
- Join your main color yarn (or a complementary color that works well) to any stitch on the top edge of your assembled bag.
- Round 1: Ch 1 (does not count as a stitch). Work 1 single crochet (sc) into each stitch around the entire top opening of the bag. When you encounter a seam where squares are joined, try to work 1-2 sc stitches over the seam to neatly bridge the gap and add stability. Join with a sl st to the first sc of the round.
- Round 2-3 (or more): Ch 1, sc in each stitch around. Join with a sl st.
- Continue adding as many rounds of single crochet as you like to create a border of your desired width. You could also use half double crochet or double crochet for a wider, taller border, or explore decorative stitches.

Step 5: Adding the Handbag Handle
The handle is essential for the functionality of your handbag. For crocheted handles, use your main color yarn for consistency and strength.
Option A: Crocheted Handles (Recommended for Beginners and a Fully Handmade Look)
- Determine Length: Measure roughly how long you want your handles to be. For a handheld bag, 12-16 inches (30-40 cm) might suffice. For a shoulder bag, 20-24 inches (50-60 cm) is common.
- Crochet a Strip (Make 2 identical strips): Use a dense stitch like single crochet for maximum durability and minimal stretch.
- Ch a chain that is slightly longer than your desired handle length. (For example, if you want a 20-inch handle, you might chain 80-100 stitches, depending on your yarn and tension). It’s always better to make it a bit longer than too short, as you can always trim excess.
- Row 1: Sc in the 2nd ch from hook and in each ch across to the end of your chain.
- Rows 2-5 (or more): Ch 1, turn. Sc in each sc across. Continue repeating this row until your handle strip reaches the desired width and sturdiness. (For a 1-inch wide handle, 4-6 rows of sc are often sufficient; for a 2-inch wide handle, 8-12 rows might be needed).
- For extra durability: You can fold this flat strip in half lengthwise and carefully sew the long edges together to create a sturdy, tubular handle.
- Fasten off, leaving a very long tail (at least 12-18 inches / 30-45 cm) for securely sewing the handle to your handbag.
- Attach Handles:
- Lay your bag flat and decide where you want your handles to be placed. Typically, they are positioned equidistant from the side seams, on the front and back panels of the bag. Use stitch markers to mark these attachment points.
- Thread the long tail from your crocheted handle onto your yarn needle.
- Position one end of the handle onto the inside of your bag’s top border.
- Sewing Strategy: Stitch through multiple layers of your bag’s top border and the handle. Use small, strong stitches. Go back and forth several times, perhaps creating an “X” pattern or straight lines, ensuring the handle is very firmly anchored. Reinforce the corners.
- Repeat this process for the other end of the first handle, and then for both ends of the second handle.
Option B: Using Pre-made Bag Hardware (Wooden, Metal, or Bamboo Handles)
- Purchase your desired handbag hardware. These come in various styles, some with rings to attach to, others with holes for sewing.
- Attach to Bag: Follow the specific instructions that come with your chosen hardware. You may need to crochet directly around a D-ring or create sturdy tabs of crocheted fabric (e.g., a few rows of sc in a small rectangle) and sew these tabs to your bag’s top edge, then thread the hardware through the tabs.

Step 6: Optional Handbag Lining (Highly Recommended for Durability and Finish)
Adding a fabric lining significantly enhances the durability of your crocheted handbag, prevents it from stretching out of shape with use, keeps small items from slipping through stitches, and gives it a professional, finished look.
- Measure Bag: Precisely measure the finished dimensions of your crocheted handbag (its height, its flat width, and the depth of its bottom panel).
- Cut Fabric: Choose a sturdy fabric like cotton canvas, linen, duck cloth, or a heavy-weight quilting cotton. Cut fabric pieces to match your bag’s dimensions, adding about 1/2 inch (1.25 cm) seam allowance on all sides. For a simple tote, you’ll typically need:
- One large rectangular piece for the main body of the lining (length = bag’s circumference, width = bag’s height), plus seam allowances.
- One rectangular piece for the bottom of the lining (length = bag’s width, width = bag’s depth), plus seam allowances.
- (Alternatively, for simplicity, you could cut one single, larger piece of fabric that will fold up to form the bag’s body and bottom, then sew only the side seams).
- Sew Lining: Using a sewing machine or hand-sewing, stitch your fabric pieces together to create a fabric bag shape that perfectly matches the inside of your crocheted handbag. Make sure the seams are strong. Hem the top edge of your fabric lining (fold it over twice and stitch down) for a neat finish.
- Insert and Sew: Carefully insert the finished fabric lining into your crocheted handbag, aligning any side seams. Pin the top edge of the fabric lining just below the crocheted border of your bag (or you can fold the fabric over the crocheted border and stitch it down for a visible fabric edge). Using a matching sewing thread and a hand-sewing needle, carefully hand-stitch the lining securely to the inside of the crocheted bag using small, neat stitches (like a running stitch or whip stitch) all the way around the top opening.

7. Finishing Your Crochet Handbag Bag
- Weave in All Remaining Ends: Before considering your bag complete, double-check every part of your bag for any remaining loose yarn tails. Weave them in thoroughly and securely into the stitches of the bag. This is crucial for both appearance and durability.
- Blocking (Optional but Recommended): For a more structured and professional-looking handbag, a gentle steam block or wet block can significantly help. Lay the bag flat (or lightly stuff it with towels if it’s a structured tote), gently shape it to its desired form, paying attention to straight seams and flat squares, and then allow it to air dry completely. Blocking helps even out your stitches and gives the bag a more refined finish.
You now have a detailed guide on how to crochet a beautiful and functional handbag bag using granny squares! This project is a wonderful way to express your personal style. Enjoy the process of creating your unique accessory!


