 by
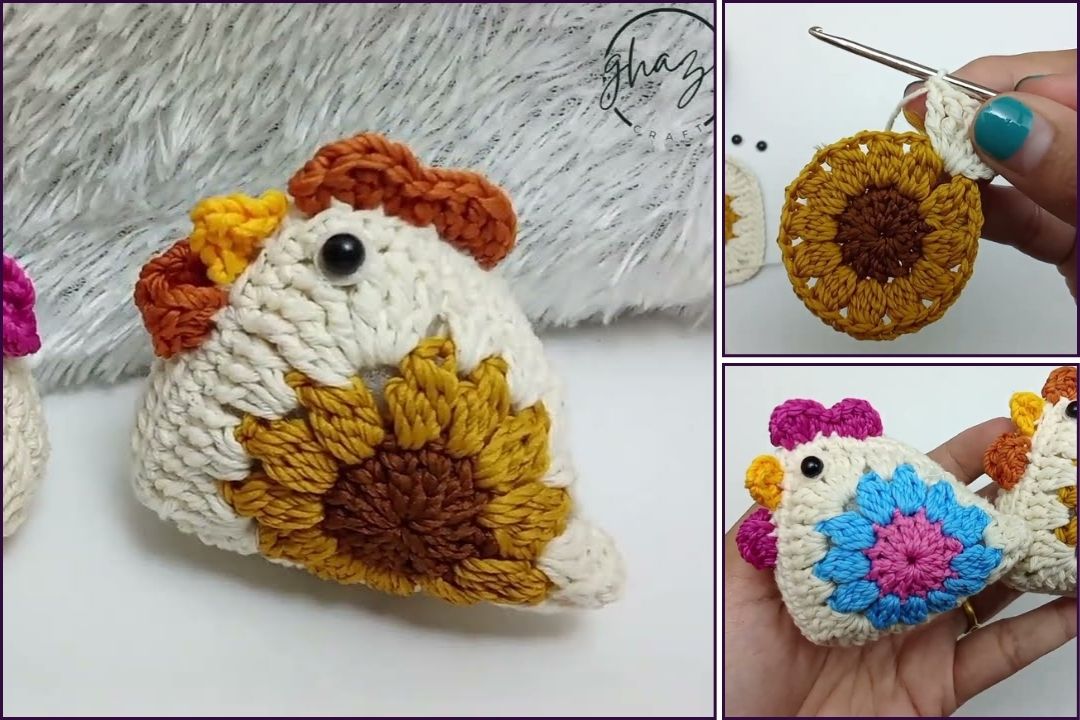
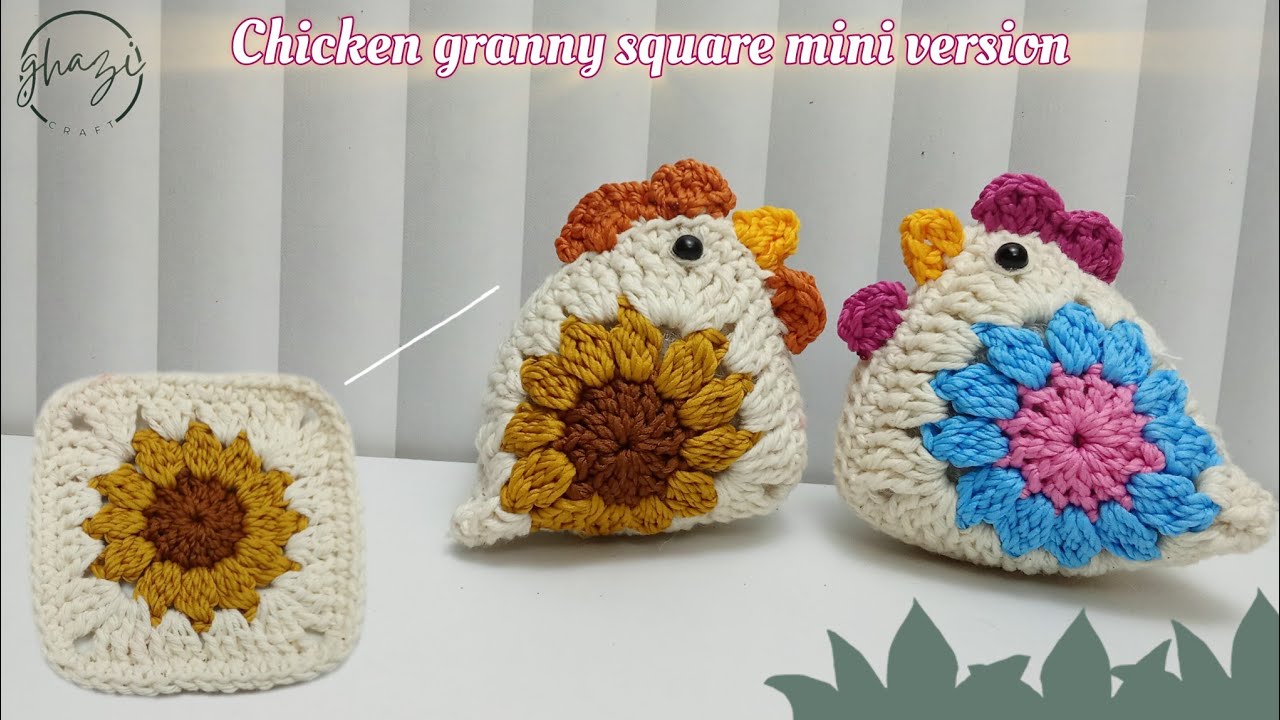
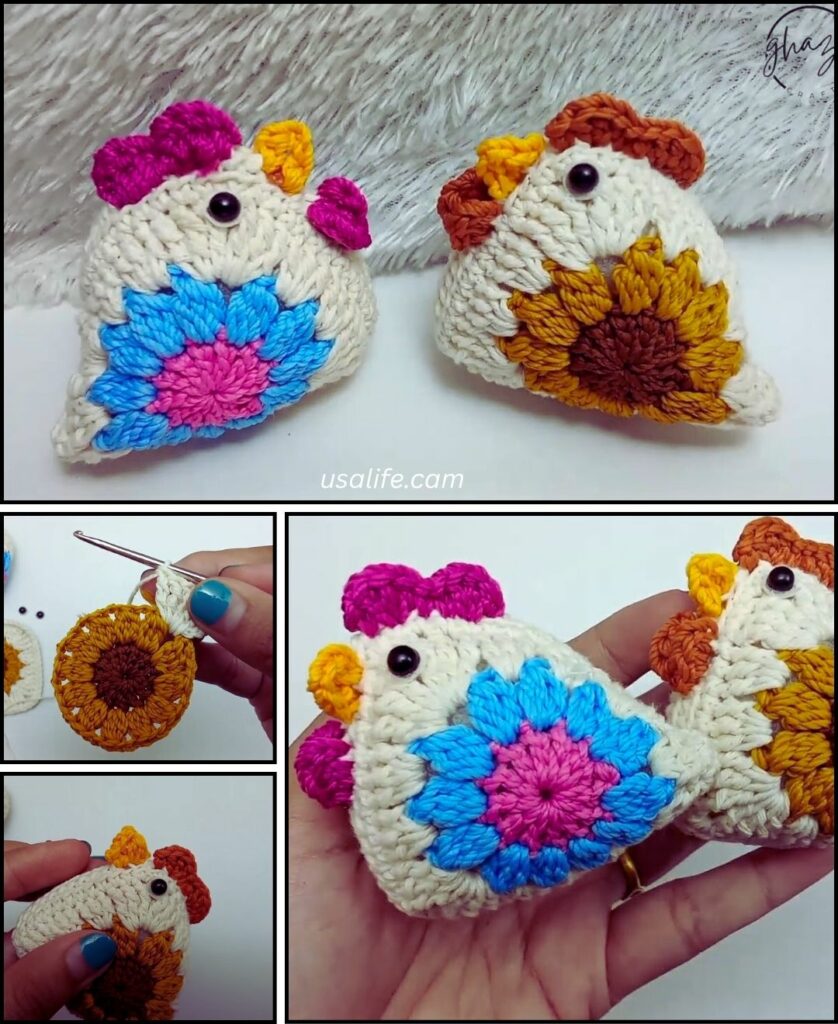
by You’re looking to crochet a chicken square mini! This sounds like a delightful project, combining the charm of a chicken with the versatility of a granny square, but in a smaller, probably solid form. This mini square could be perfect for a coaster, a washcloth, an applique for a blanket, or even joined with others to make a larger item.
Since you’re in Phnom Penh, 100% cotton yarn is an excellent choice for a mini square. Cotton holds its shape well, is durable, and its stitch definition will really make the details of your chicken stand out.

How to Crochet a Cute Chicken Mini Square
This tutorial will guide you through creating a flat, solid square with a chicken’s head, comb, wattle, and tail integrated into the design. It’s a bit different from a traditional “granny square” but will result in a square shape with a chicken motif.
1. Essential Materials You’ll Need
- Yarn:
- Main Color (MC): For the chicken’s body and the majority of the square (e.g., white, cream, light brown, yellow). Worsted Weight (Aran / Medium / Category 4) 100% Cotton. You’ll need about 15-25g.
- Red Yarn: For the comb and wattle (small scrap).
- Orange or Yellow Yarn: For the beak (small scrap).
- Black Yarn or Embroidery Floss: For the eyes (tiny scrap).
- Crochet Hook:
- A 4.0mm (US G/6) or 4.5mm (US 7) hook. Choose a hook size that makes your stitches fairly dense so the square lies flat and holds its shape well.
- Scissors: For cutting yarn.
- Yarn Needle (Tapestry Needle): Essential for weaving in ends and embroidering features.
- Stitch Marker (Optional but helpful): To mark the beginning of rounds or specific stitches.
2. Basic Crochet Stitches & Techniques You’ll Use
This pattern uses fundamental crochet stitches and shaping techniques to create the square and the chicken features:
- Chain (ch): For starting and small elements.
- Slip Stitch (sl st): For joining and neatening.
- Single Crochet (sc): Creates a dense, sturdy fabric.
- Half Double Crochet (hdc): A medium-height stitch.
- Double Crochet (dc): A taller stitch.
- Triple/Treble Crochet (tr): The tallest stitch used, for the tail.
- Increase (inc): Work 2 stitches into the same stitch.
- Decrease (dec / sc2tog): Single Crochet 2 Together (or hdc2tog, dc2tog as needed).
- Working in Rows: The main part of the square will be worked in rows, with shaping for the chicken parts added as you go.
- Fasten Off: Securely ending your work.
- Weaving in Ends: Hiding tails for a neat finish.

Crochet Chicken Mini Square Pattern
This pattern is designed to create a solid square with the chicken integrated into one corner/side. The square will be approximately 5-6 inches (12-15 cm) depending on your tension and yarn.
Abbreviations (US Crochet Terms):
- MC: Main Color
- R/Row: Row
- ch: chain
- sl st: slip stitch
- sc: single crochet
- hdc: half double crochet
- dc: double crochet
- tr: triple crochet
- inc: increase (2 sts in next st)
- sc2tog: single crochet 2 together (decrease)
- st(s): stitch(es)
(...): work stitches into the same stitch/space[...]: repeat instructions in brackets
Part 1: The Square Base (Main Color – MC)
We’ll start with a solid square, and then modify its corner to form the chicken.
- Ch 22.
- Row 1: Sc in the 2nd ch from hook and in each ch across. (21 sc)
- Row 2: Ch 1, turn. Sc in each sc across. (21 sc)
- Repeat Row 2 for a total of 16 rows.
- You now have a solid square/rectangle base. Keep yarn attached.

Part 2: Adding the Chicken Head & Neck (Main Color – MC)
Now we’ll work into the side of the square to form the chicken’s head and neck.
- From where you finished Row 16, do NOT turn. You will now work along the side edge of your square (down the side of rows).
- Row 17 (Chicken Neck/Head Base):
- Ch 1. Sc evenly down the side of the last 4 rows you crocheted (from Row 16 down to Row 13, approximately). Aim for about 1 sc per row. (4 sc)
- Sc into the stitch at the top right corner of your square (where Row 1 began, if you were to reorient it).
- Sl st into the next stitch of the foundation chain (the actual corner of the square).
- Row 18 (Head Shaping): Ch 1, turn.
- Sc in the first 2 sts.
- Hdc in the next 2 sts.
- Dc in the next st.
- (Hdc, sc) in the last st.
- Sl st into the corner stitch of the square base to anchor it.
- You should see a small curved shape forming.
Part 3: Adding the Chicken Tail (Main Color – MC)
The tail will be integrated into the opposite side of the square.
- Do NOT Fasten Off. Now, we’ll work along the opposite side of the square to add the tail. Locate the approximate “tail” corner of your square (the top left corner if you consider the head on the right).
- Row 19 (Tail Feathers): Ch 1 (does not count as st).
- Work sl st into the corner stitch of the square (where your chain 22 began, but on the other side).
- Work sc into the next st (down the side of the square).
- Work (hdc, dc) all into the next st.
- Work (tr, dc) all into the next st.
- Work (hdc, sc) all into the next st.
- Sl st into the next st on the square’s edge.
- Fasten off MC, leaving a long tail for weaving in.

Part 4: Adding Chicken Details – Comb, Wattle, Beak, Eyes
Now to add the charming details!
- Comb (Red Yarn): Use your smaller hook.
- Ch 5.
- Sl st into the 2nd ch from hook. Sc into the next ch. Hdc into the next ch. Dc into the last ch.
- Fasten off, leaving a tail for sewing.
- Attach: Using your yarn needle, sew the comb securely onto the top curve of the chicken’s head (the part made with the dc/hdc stitches in Row 18).
- Wattle (Red Yarn): Use your smaller hook.
- Ch 3.
- Dc into the 2nd ch from hook. Sl st into the same ch.
- Fasten off, leaving a tail for sewing.
- Attach: Sew the wattle just under where the beak will be, on the “chin” area of the head.
- Beak (Orange or Yellow Yarn): Use your smaller hook.
- Ch 4.
- Sl st into the 2nd ch from hook. Sc into the next ch. Sl st into the last ch.
- Fasten off, leaving a tail for sewing.
- Attach: Sew the beak onto the front of the chicken’s head, positioned over the wattle.
- Eyes (Black Yarn or Embroidery Floss):
- Thread a short piece of black yarn or embroidery floss onto your yarn needle.
- Make a small ‘V’ shape or a simple straight stitch on the side of the head, above the beak, where the eye would be.
- Secure the ends on the back of the square.
5. Finishing Your Crochet Chicken Mini Square
Proper finishing ensures your square looks neat and holds up to use.
- Weave in All Ends NEATLY: This is absolutely crucial for a polished, professional-looking piece. Use your yarn needle to carefully weave in every single yarn tail securely into the stitches on the back of your square. Take your time to hide them well. Do not just snip them short, or they may unravel.
- Blocking (Highly Recommended!): For a flat, well-shaped square, blocking is key.
- Gently wet your finished square.
- Carefully squeeze out any excess water (do NOT wring!).
- Lay the square flat on a clean, dry towel or a foam blocking mat. Gently pull and shape it into a perfect square, making sure the chicken features are positioned nicely.
- Allow it to air dry completely. This will help it lie flat and maintain its shape beautifully.
6. Tips for a Stylish & Durable Chicken Mini Square
- Yarn Choice: Cotton is best for its durability and clear stitch definition, especially for a flat item like this.
- Tension: Aim for consistent, firm tension to create a dense fabric that won’t stretch out easily with use.
- Placement of Features: Experiment with where you place the comb, wattle, and beak. A slightly different angle can give your chicken a different personality!
- Embroidering: Small, neat embroidery stitches for the eyes make a big difference.
- Uses for your Mini Square:
- Coaster: Perfect for a mug!
- Washcloth/Dishcloth: Practical and cute for the kitchen.
- Applique: Sew it onto a plain tote bag, a pillow, a baby blanket, or a garment.
- Garland: Make several and string them together for a cute decoration.
- Granny Square “Joining”: While this isn’t a traditional granny square, you could still join multiple chicken squares with a border around each, or by working a standard granny square border around them to make them joinable to other classic granny squares.
You now have a detailed tutorial on how to crochet an adorable chicken mini square! Enjoy bringing this little feathered friend to life with your hook and yarn.