by
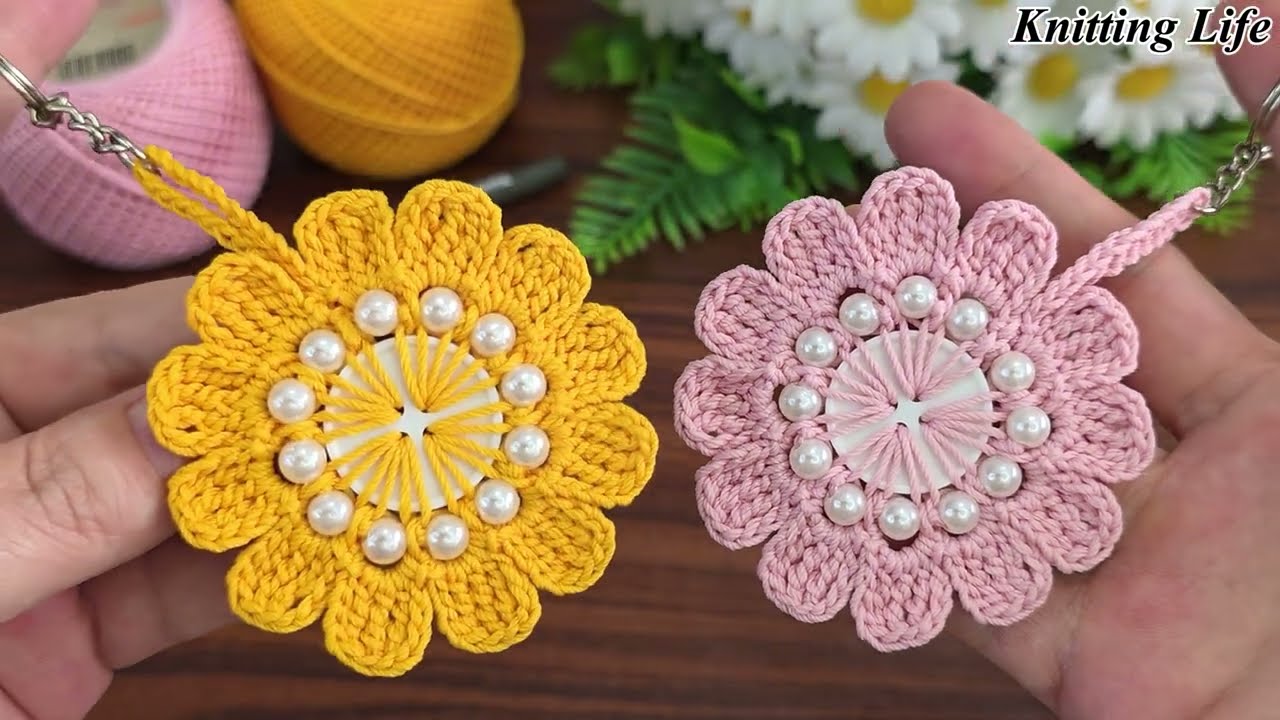
by A crochet keychain with a 3D flower is a lovely way to add a handmade touch to your keys or bag! It’s a quick, small project, perfect for using up yarn scraps and practicing your 3D flower skills on a miniature scale.
Here’s a detailed guide on how to make a charming 3D flower crochet keychain.
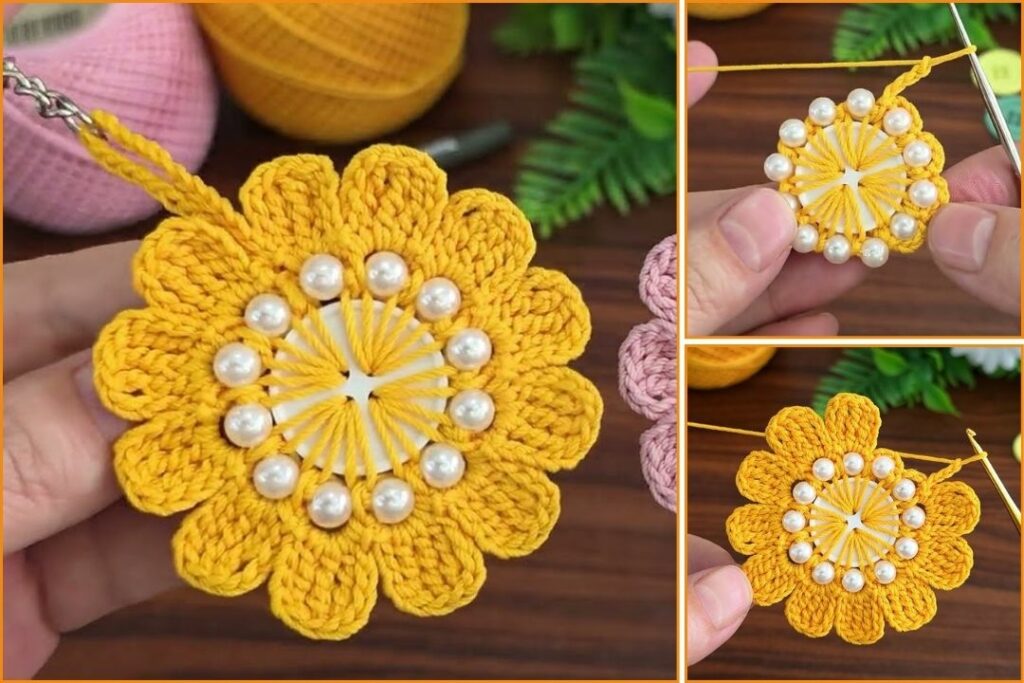
How to Make a Crochet Keychain with a 3D Flower
This project involves two main parts: creating the small 3D flower and then adding a simple loop and attaching the keychain hardware.
1. Essential Materials You’ll Need
- Yarn:
- Main Flower Color: Small amount of worsted weight (Aran) cotton or acrylic yarn (e.g., pink, yellow, blue, white). Cotton blends work great for good stitch definition.
- Optional Center Color: Very small amount of a contrasting color yarn (e.g., yellow, brown) for the flower’s center.
- Crochet Hook: 3.5mm (US E/4) or 4.0mm (US G/6). Since it’s a small item, a slightly smaller hook can help create denser, firmer stitches that hold their shape better.
- Scissors: For cutting yarn.
- Yarn Needle (Tapestry Needle): Absolutely essential for weaving in ends and assembling the flower.
- Keychain Hardware: A split ring, a lobster clasp, or a small key ring. You can often find these at craft stores or online.
2. Basic Crochet Stitches You’ll Use
This project uses a few common stitches, similar to the 3D flowers we’ve made before:
- Chain (ch): To begin and for loops.
- Slip Stitch (sl st): For joining rounds and neatening.
- Single Crochet (sc): Creates a dense fabric, good for the flower’s base.
- Double Crochet (dc): A taller stitch, perfect for petals.
- Magic Ring (MR): (Also called Magic Circle) The best way to start small, tight circles.
Part 1: Crocheting the 3D Flower
We’ll make two layers of petals for a full, dimensional flower, similar to the coaster flower, but scaled down slightly.
Abbreviations (US Crochet Terms):
- ch: chain
- sl st: slip stitch
- sc: single crochet
- dc: double crochet
- MR: magic ring
- st(s): stitch(es)
Instructions for the 3D Flower:
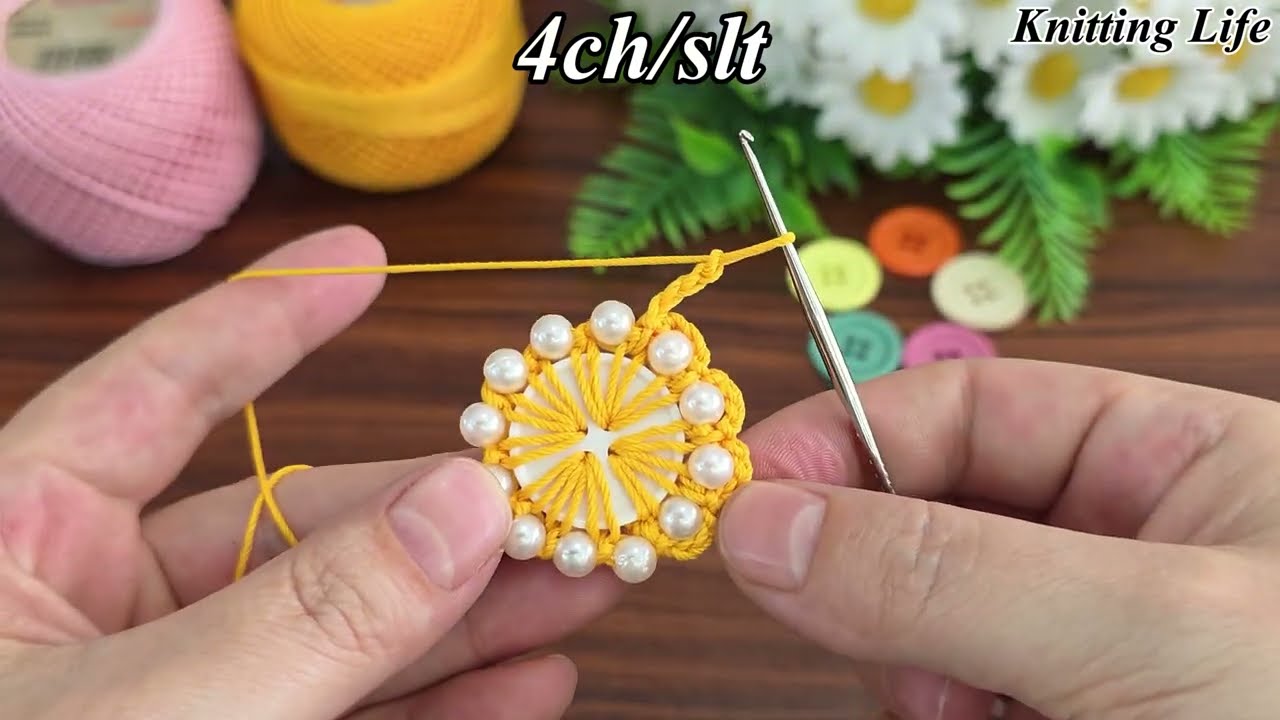
Flower Center / Base (Common for both layers):
- Create a Magic Ring (MR).
- Ch 1 (does NOT count as a stitch).
- Work 8 sc into the Magic Ring.
- Pull the ring tight. Join with a sl st to the first sc. (8 sc)
- This forms the small central base for your petals.
Flower Layer 1 (Back Layer – Larger Petals):
This layer forms the fuller, back portion of your flower. Use your main flower color.
- From the center base (8 sc), Ch 2 (does NOT count as a stitch).
- *In the same stitch where you just joined, work (3 dc).
- Sl st into the next stitch.* Repeat from * to * 7 more times.
- You will have created 8 “petals,” each made of a 3-dc cluster, with a slip stitch in between. This makes a dense, slightly ruffled layer.
- Fasten off, leaving a long tail (about 12 inches / 30 cm) for sewing. Weave in the starting tail of this flower base.
Flower Layer 2 (Front Layer – Smaller Petals):
This layer sits on top of the first, adding more definition and height. Use the same main flower color, or a contrasting color for a two-tone effect.
- Create a Magic Ring (MR).
- Ch 1 (does NOT count as a stitch).
- Work 6 sc into the Magic Ring.
- Pull the ring tight. Join with a sl st to the first sc. (6 sc)
- This is a smaller base for a smaller, more prominent top layer of petals.
- Ch 2 (does NOT count as a stitch).
- *In the same stitch where you just joined, work (3 dc).
- Sl st into the next stitch.* Repeat from * to * 5 more times.
- You will have created 6 “petals” made of 3-dc clusters.
- Fasten off, leaving a long tail (about 12 inches / 30 cm) for sewing. Weave in the starting tail of this layer’s base.

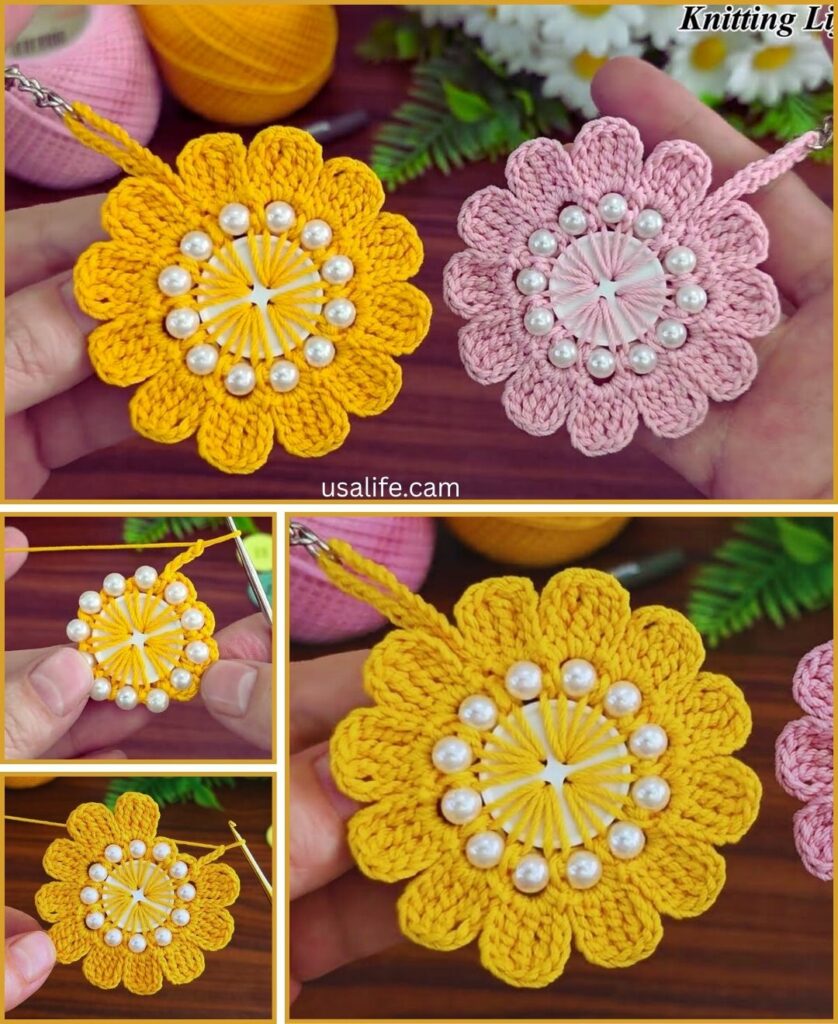
Part 2: Assembling the Flower and Adding the Keychain Loop
Now, let’s bring the flower together and prepare it for your keychain hardware.
- Stack the Flower Layers: Place the smaller 6-petal flower (Layer 2) directly on top of the center of the larger 8-petal flower (Layer 1). Gently arrange the petals so they are staggered (not directly on top of each other) for a fuller, more “blooming” look.
- Secure Flower Layers Together: Use the long yarn tail from Layer 2 and your yarn needle. Stitch through the very center of both flower layers a few times (like an “X” or a small circle) to secure them to each other.
- Add Optional Center Detail: If you’re using a contrasting color for the flower’s center (e.g., yellow or brown), now is the time. With a small piece of this yarn and your yarn needle, make a few small stitches (like a French knot or a simple cross) in the very center of the top flower layer. Securely knot on the back and weave in ends.
- Create the Keychain Loop:
- With your yarn needle and the long tail from Layer 2 (the one you used to secure the flower layers), pass the needle through the very center of the back of your assembled flower.
- Bring the tail up to the front, then back down through a stitch directly next to where it emerged. Do this a few times to firmly anchor the start of your loop.
- Now, chain about 10-15 stitches (adjust this length depending on how long you want your loop to be. Make sure it’s long enough to attach your hardware easily).
- Sl st the end of your chain back into the center of the flower (or a very secure stitch nearby). This creates the loop.
- Reinforce the Loop: Use your yarn needle to weave the remaining tail around the base of this loop and into the flower’s back, making several secure stitches to ensure the loop won’t pull out. This is very important for a keychain that will get daily use!
- Final Weaving: Double-check that all yarn tails from all parts of the flower are securely woven into the back of your flower. Trim any excess yarn very close to the fabric.
Part 3: Attaching the Keychain Hardware
- Simply slide your split ring, lobster clasp, or key ring onto the crocheted loop you just created. Ensure it’s fully on the loop and secure.
Tips for a Durable and Lovely Keychain
- Tight Tension: For a keychain that holds its shape and lasts, aim for a firm, tight tension. This also prevents small items from slipping through stitches.
- Securely Weave Ends: This is paramount for keychains that get a lot of wear and tear. Loose ends will quickly unravel. Weave them in thoroughly, going back and forth through stitches.
- Reinforce the Loop: Don’t just tie off the loop. Use your yarn needle to weave the yarn several times through the base of the loop and into the flower’s fabric for maximum durability.
- Blocking (Optional): For such a small item, blocking isn’t strictly necessary, but a quick steam block (hovering a steam iron over it without touching) can help the petals lie nicely and give it a polished finish.
You’ve now created a wonderfully charming and personalized 3D flower crochet keychain! It’s perfect for yourself, or as a thoughtful handmade gift.