by
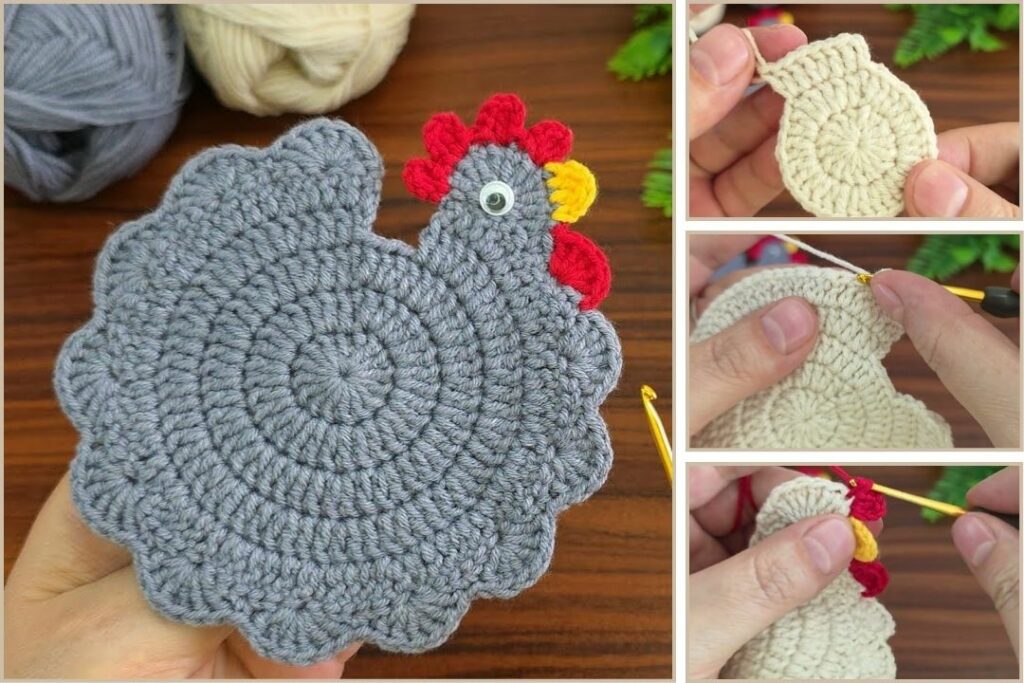
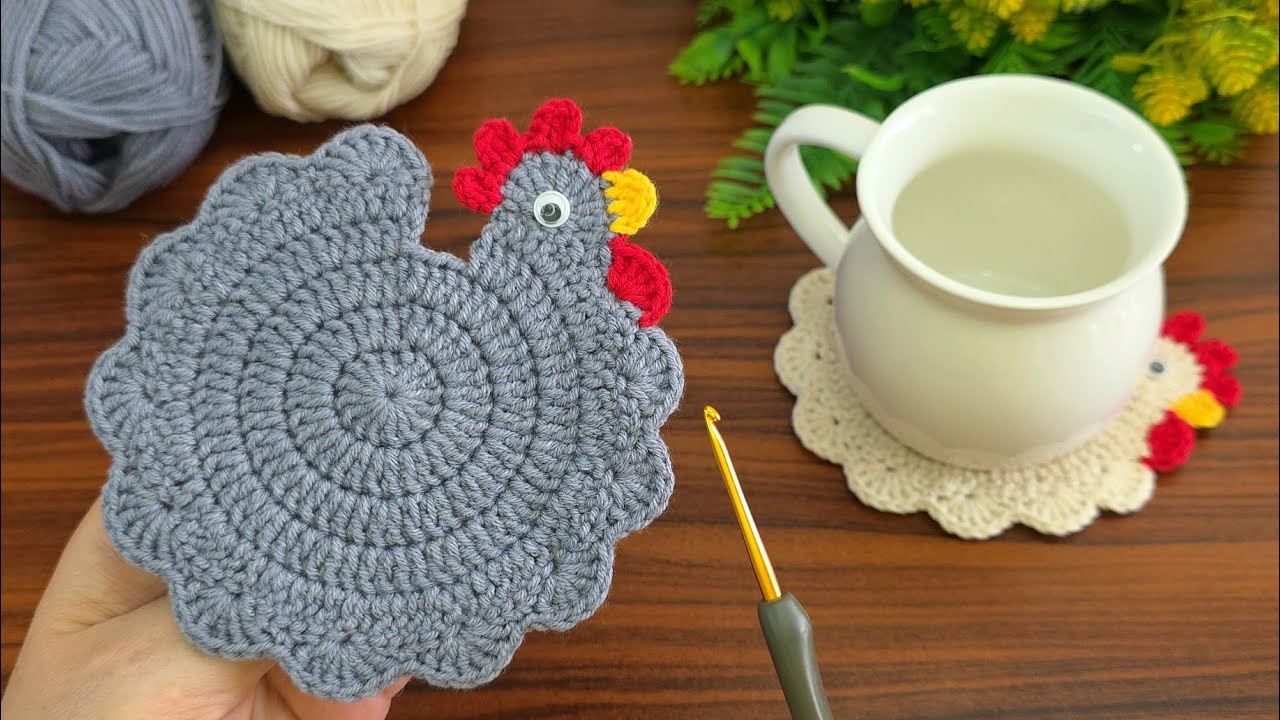
by This is a delightful idea! A chicken coaster combines practicality with a charming, whimsical touch, perfect for adding character to your home or as a unique gift. It’s a bit more intricate than a plain round coaster, as it involves shaping, but it’s still very manageable for someone with basic crochet skills.
For this project, 100% cotton yarn is highly recommended due to its absorbency and heat resistance, which are crucial for a functional coaster.
How to Make a Crochet Chicken Coaster
This pattern will guide you through creating a charming chicken-shaped coaster, suitable for protecting your surfaces. We’ll break it down into parts: the body, wings, comb, beak, and eye, then assembly.
1. Essential Materials You’ll Need
- Yarn:
- Main Body Color (White, Grey, Brown, Black, etc.): 100% Worsted Weight Cotton Yarn (approx. 30-40 yards / 27-36 meters).
- Comb Color (Red or Orange-Red): Small amount of 100% Worsted Weight Cotton Yarn.
- Beak Color (Yellow or Orange): Very small amount of 100% Worsted Weight Cotton Yarn.
- Eye Color (Black): Very small amount of 100% Worsted Weight Cotton Yarn (or a small black bead/button).
- Crochet Hook: 4.0mm (US G/6) or 4.5mm (US 7). Aim for a tight gauge so the coaster is dense and protective.
- Scissors: For cutting yarn.
- Yarn Needle (Tapestry Needle): Essential for weaving in ends and assembling the chicken parts.
- Optional: Fabric glue or hot glue gun (for extra security of small parts, but sewing is preferred for washability).

2. Basic Crochet Stitches You’ll Use
You’ll use several common stitches to create the various parts and shapes:
- Chain (ch): To begin projects and create spaces.
- Slip Stitch (sl st): For joining and neatening edges.
- Single Crochet (sc): Creates a dense fabric, great for shaping.
- Half Double Crochet (hdc): A medium-height stitch.
- Double Crochet (dc): A taller stitch.
- Magic Ring (MR): (Also called Magic Circle) Good for starting small, tight circles.
Part 1: The Chicken Body (Main Color)
We’ll start with the main body, which is a round-ish shape that gets slightly elongated.
Abbreviations (US Crochet Terms):
- ch: chain
- sl st: slip stitch
- sc: single crochet
- hdc: half double crochet
- dc: double crochet
- st(s): stitch(es)
- MR: magic ring
- inc: increase (work 2 sc in same stitch)

Instructions for Body:
- Start: Create a Magic Ring (MR).
- Round 1: Ch 1 (does not count as st). Work 8 sc into MR. Pull ring tight. Join with sl st to first sc. (8 sc)
- Round 2: Ch 1. Work 2 sc in each st around. Join with sl st to first sc. (16 sc)
- Round 3: Ch 1. *1 sc in next st, 2 sc in next st*. Repeat from * to * around. Join with sl st to first sc. (24 sc)
- Round 4: Ch 1. *1 sc in each of next 2 sts, 2 sc in next st*. Repeat from * to * around. Join with sl st to first sc. (32 sc)
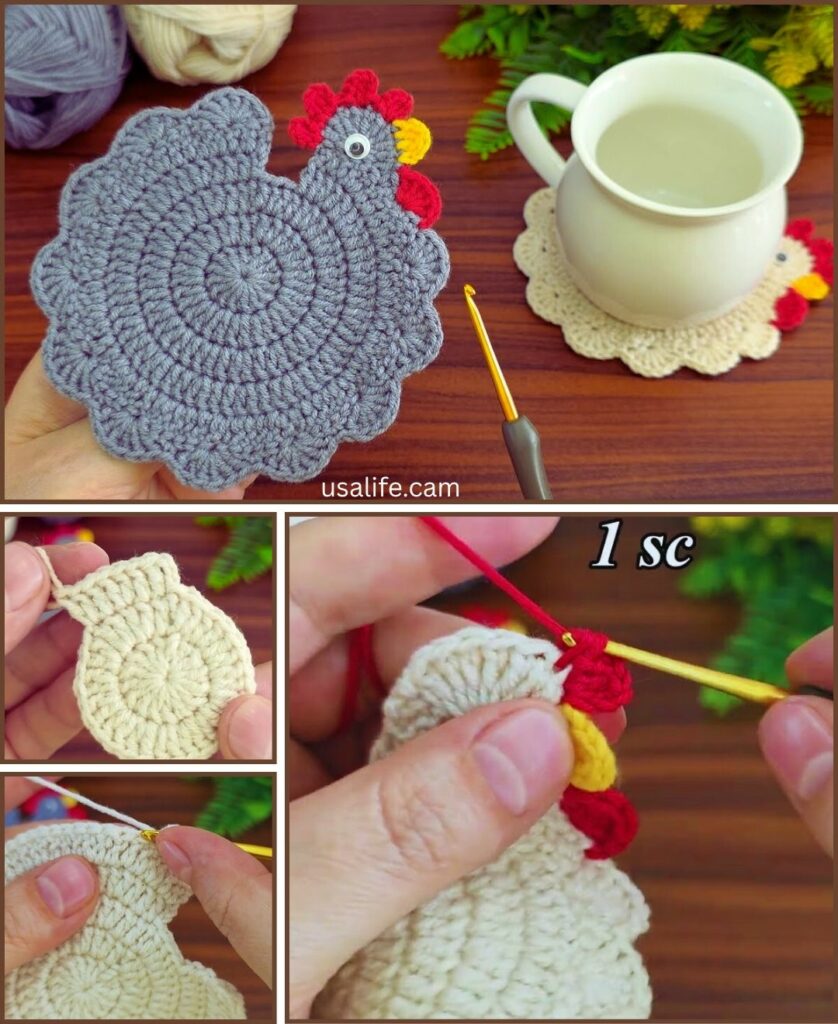
- Round 5 (Start of shaping): Ch 1. Sc in each of next 10 sts. (This forms the ‘front’ of the chicken).
- Work 1 hdc in each of next 6 sts. (This starts the ‘back’ curve).
- Work 1 dc in each of next 6 sts. (Continues the ‘back’ curve, making it taller).
- Work 1 hdc in each of next 6 sts.
- Sc in each of last 4 sts. Join with sl st to first sc. (32 sts)
- Note: The sl st join here might make a slight seam. You can choose to work in continuous rounds, marking your first stitch with a stitch marker, for a smoother finish. If so, just omit the sl st join and ch 1 at the start of new rounds.
- Fasten off, leaving a long tail (approx. 12-15 inches / 30-38 cm) for sewing. Weave in the starting tail from the Magic Ring.
Part 2: The Wings (Main Color)
Make two identical wings for your chicken.
Instructions for Wings (Make 2):
- Start: Ch 5.
- Row 1: Work 1 sc into 2nd ch from hook. 1 sc in each of next 3 ch. (4 sc)
- Row 2: Ch 1. Turn. Work 1 sc in first st. 1 hdc in next st. 1 dc in next st. 1 sc in last st. (4 sts)
- Fasten off, leaving a tail for sewing.

Part 3: The Comb (Red/Orange-Red Yarn)
This is the spiky part on top of the chicken’s head.
Instructions for Comb:
- Ch 6.
- Work 1 sc into 2nd ch from hook. Sl st into next ch.
- *Sc into next ch. Sl st into next ch.* Repeat from * to * 2 more times. (You will have 3 small ‘spikes’.)
- Fasten off, leaving a tail for sewing.
Part 4: The Beak (Yellow/Orange Yarn)
A small triangular shape for the beak.
Instructions for Beak:
- Ch 4.
- Work 1 sc into 2nd ch from hook. 1 sc into next ch. 1 sc into last ch. (3 sc)
- Fasten off, leaving a tail for sewing.
Part 5: The Eye (Black Yarn or Bead)
For a crochet eye, a simple French knot or a few stitches will do. For a bead, you’ll need a regular sewing needle and thread.
Instructions for Crocheted Eye:
- With black yarn and your yarn needle, make a few small stitches in a circular or “X” pattern to form a small dot on the chicken’s ‘head’ area (the flatter, sc part of the body).
- Knot securely on the back and weave in ends.
- Alternatively, sew a small black bead or button for the eye.
Part 6: Assembly
Now, bring all your chicken parts to life!
- Position the Comb: Place the red comb on the top edge of the chicken’s ‘head’ (the part of the body where you worked mostly sc stitches in the beginning of Round 5). Use your yarn needle and the tail from the comb to sew it securely in place.
- Position the Beak: Place the yellow beak just below the comb, slightly to the front. Sew it securely using its tail.
- Attach the Wings: Place one wing on each side of the chicken body, slightly below the head/neck area and overlapping the hdc/dc stitches. Use the tail from each wing to sew them securely to the body. You can sew only the top edge of the wing to allow the bottom to “flap” slightly, or sew it completely flat.
- Final Weaving: Ensure all remaining yarn tails from assembly are securely woven into the back of your chicken coaster. Take your time to hide them neatly within the stitches.
- Blocking (Recommended):
- Gently wet your entire chicken coaster.
- Carefully squeeze out excess water (do NOT wring!).
- Lay it flat on a clean towel or a foam blocking mat. Gently shape the chicken and its features (body, wings, comb, beak) so they lay flat and look neat. You can use rust-proof pins to hold the shape if needed.
- Allow it to air dry completely. Blocking will help your coaster lay perfectly flat and give it a polished finish.
You’ve now created a wonderfully charming and unique crochet chicken coaster! This makes a fantastic gift or a fun addition to your kitchen decor.