 by
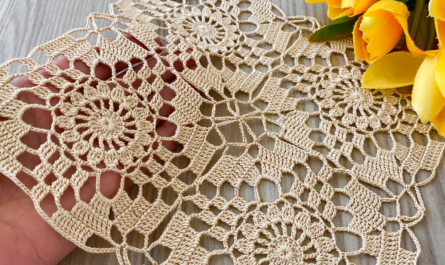
by That is a fantastic request! Adding a crocheted lace edge is the perfect finishing touch for blankets, towels, pillowcases, or garment hems. For a beginner, the best lace edge is one that uses basic stitches and is easy to work evenly around a corner.
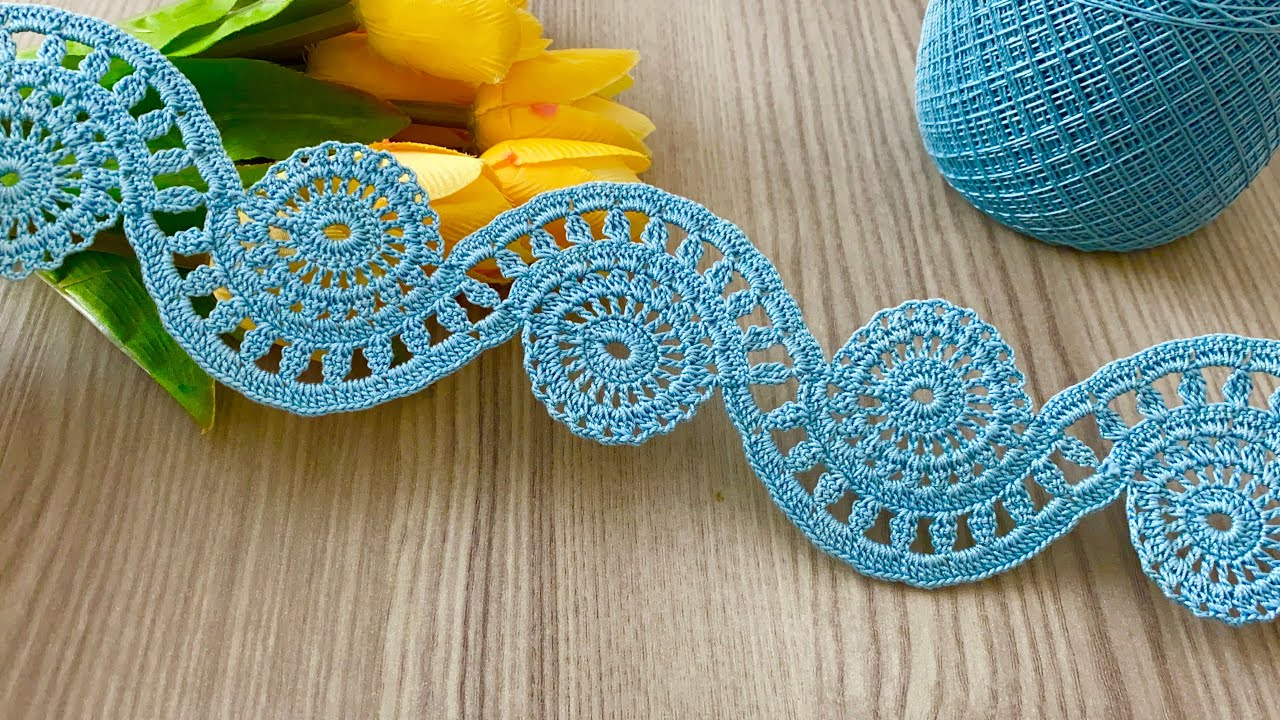
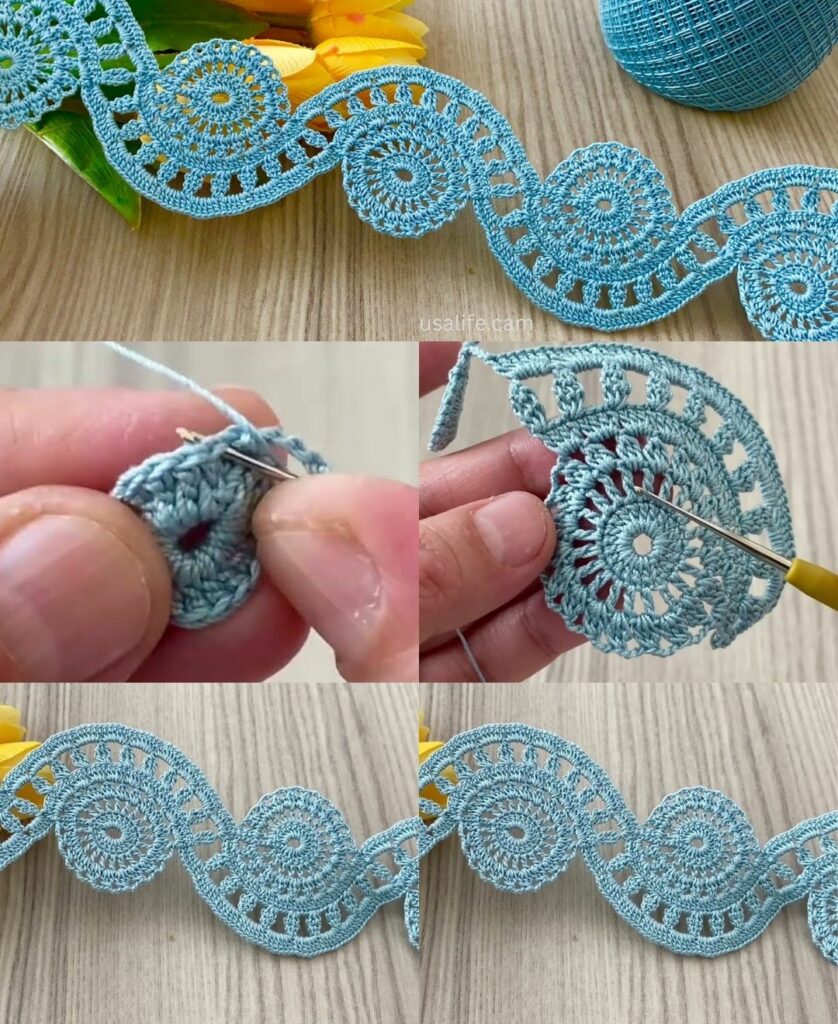
I will detail the pattern for the Simple Picot Scallop Edging, which is classic, easy to execute, and adds beautiful definition.

🎀 Simple Picot Scallop Edging Tutorial
This edging uses single crochet (sc), double crochet (dc), and the decorative picot stitch to create small, symmetrical scallops.
Materials You’ll Need
- Yarn/Thread: Match the weight of the yarn/thread to the item you are edging (e.g., use DK weight for a blanket edge, or cotton thread for a towel edge).
- Crochet Hook: The size appropriate for your material.
- Scissors, Tapestry Needle.
Key Crochet Terms
| Abbreviation | Stitch Name |
| ch | Chain |
| sl st | Slip Stitch |
| sc | Single Crochet |
| dc | Double Crochet |
| Picot | ch 3, sl st into the first ch |
Part 1: Preparation (Crucial for Even Edging)
If you are edging a finished crocheted item, you can skip to Part 2. If you are edging fabric (like a towel or pillowcase), you need to create a stable base first.
Step P1: Creating the Base Row (Foundation for Fabric)
- Marking: Using a sewing needle and thread, or a fine hook, work a line of sc stitches evenly around the perimeter of the fabric edge.
- Spacing Rule: Aim for about 3 sc stitches per centimeter (or 6 sc stitches per inch). Do not pull the fabric too tightly.
- Corners: Place 3 sc stitches into the exact corner point to ensure the fabric stays flat.
- Join with a sl st to the first sc.

Part 2: The Edging Pattern
This pattern is worked in a single round. The pattern repeat is 6 stitches.
Round 1: Establishing the Scallops
- Start: Join yarn anywhere with a sl st. ch 1. Work sc in the same stitch.
- Corner Strategy: If you are starting near a corner, ensure your corner stitch lands on the peak of a scallop (Step 5 below). Adjust your starting point if necessary.
- Base Stitches: ch 3. Skip 2 stitches. Work sc in the next stitch.
- Scallop Anchor: ch 3. Skip 2 stitches.
- Scallop Peak: Work Shell (5 dc) into the next stitch.
- Descent: ch 3. Skip 2 stitches. Work sc in the next stitch.
- Repeat: Continue the sequence [ch 3, skip 2 sts, Shell (5 dc) in the next st, ch 3, skip 2 sts, sc in the next st] around the entire perimeter.

Special Instructions for Corners
When you approach a corner:
- If your pattern alignment places a sc in the corner stitch, work (sc, ch 1, sc) into that corner stitch.
- If your pattern alignment places a Shell (5 dc) in the corner stitch, work (7 dc) into the corner stitch instead, allowing the larger cluster to wrap around the corner smoothly.
Round 2: Adding the Picot Detail
We work this round to secure the lace, making it cleaner and adding the decorative Picot.
- sl st into the first ch-3 space. ch 1.
- Ascent: Work (sc, sc) into the ch-3 space.
- Scallop Top: Work sc in the first 2 dc stitches of the shell.
- Picot Peak: Work (sc, Picot, sc) into the center (3rd) dc stitch of the shell.
- Descent: Work sc in the remaining 2 dc stitches of the shell.
- Valley: Work (sc, sc) into the next ch-3 space. sl st into the next sc anchor.
- Repeat: Continue the sequence [sc 2 in ch-3 sp, sc 2 in dc, (sc, Picot, sc) in center dc, sc 2 in dc, sc 2 in ch-3 sp, sl st in anchor] around the perimeter.
- Finish: Join with a sl st to the first sc. Fasten off.

Final Step: Blocking/Pressing
If you used thread, blocking (wetting and pinning the edge) is crucial to define the scallops and picots. If you used yarn, a gentle steam press will help the lace lie flat and smoothly follow the curve of the fabric.
Would you like a tutorial for a much simpler, one-row lace edge (without shells)?
Video tutorial: