by
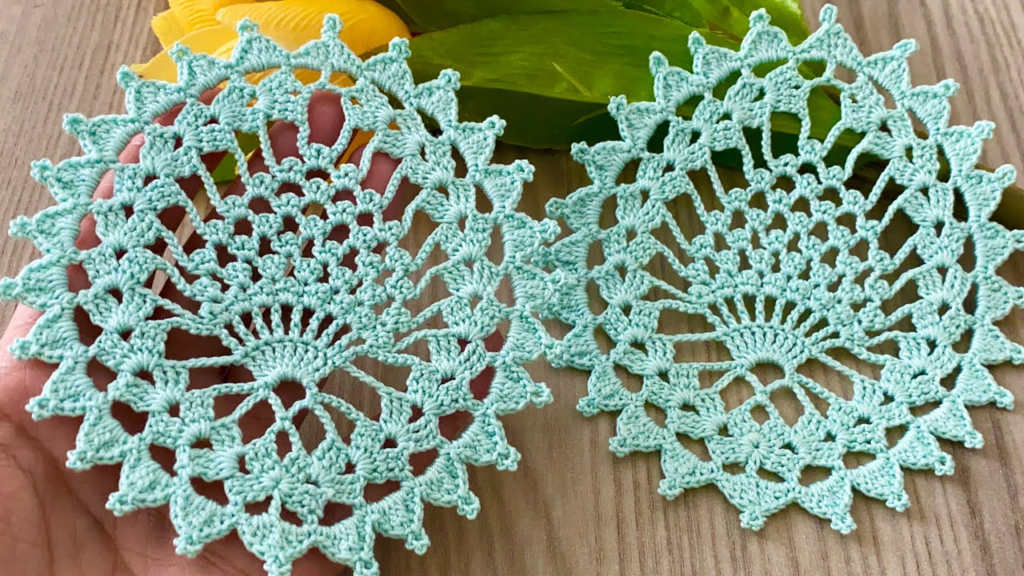
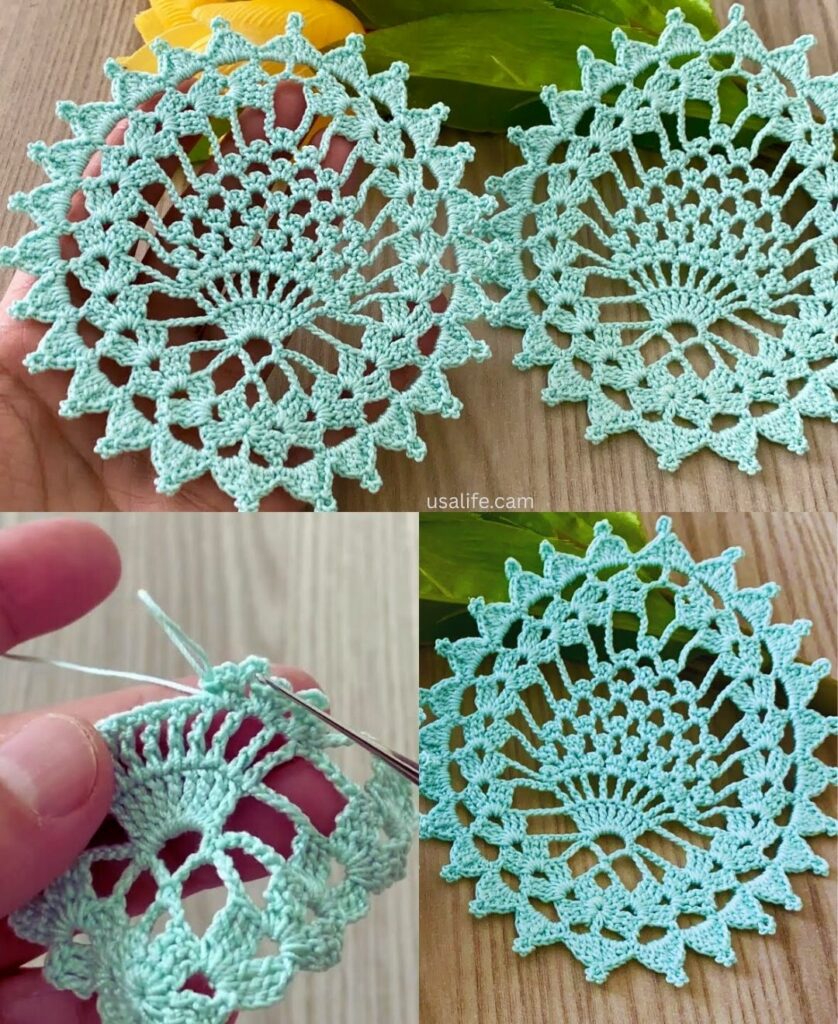
by That is an exquisite request! The Pineapple Motif is one of the most classic and elegant motifs in lace crochet, known for its flowing, fan-like shape. While many pineapple patterns use multiple pieces, the One-Piece Pineapple Motif grows outward in a continuous, flowing motion, which is perfect for doilies, runners, or elegant lace inserts.
I will provide a detailed, step-by-step tutorial for a standalone, single One-Piece Pineapple Motif.
🍍 One-Piece Pineapple Motif Tutorial
This pattern is typically worked in fine thread (Size 10 or 20) with a steel hook to achieve a crisp, lacy appearance. It begins with a circular foundation and flows outward into a single large, teardrop-shaped lace fan.
Materials You’ll Need
- Thread: Size 10 or 20 Cotton Thread is traditional.
- Crochet Hook: Steel Hook size appropriate for the thread (e.g., 1.5 mm – 2.0 mm).
- Scissors, Tapestry Needle, Blocking Pins.
Key Crochet Terms
| Abbreviation | Stitch Name |
| ch | Chain |
| sl st | Slip Stitch |
| sc | Single Crochet |
| dc | Double Crochet |
| tr | Treble Crochet |
Export to Sheets
Part 1: Establishing the Base Circle
We first create a small, dense circle that will act as the anchor for the flowing lace fan.
Round 1: Foundation Ring
- Start: Make a Magic Ring (or ch 5, sl st to join).
- ch 3 (counts as dc). Work 11 dc into the ring.
- Finish: Pull the tail tight. Join with a sl st to the top of the ch 3. (12 dc).
Round 2: Creating the First Points
- ch 1. Work sc in the same st.
- Point Loop: ch 3. Skip 1 stitch.
- Repeat: [sc in the next st, ch 3, skip 1 st] 5 more times.
- Finish: ch 3. Join with a sl st to the first sc. (6 ch-3 loops).

Part 2: Forming the Pineapple Fan
We stop working in the round and begin working back and forth in rows to form the fan shape.
Row 3: Building the Fan Edge
- ch 3 (counts as dc). Turn your work.
- Work 2 dc in the first ch-3 space. ch 1.
- Work (3 dc, ch 3, 3 dc) in the next ch-3 space (This forms the decorative Outer Fan Edge).
- ch 1. Work 3 dc in the next ch-3 space. ch 1.
- Work (3 dc, ch 3, 3 dc) in the next ch-3 space (Second Outer Fan Edge).
- Side Anchor: ch 1. Work 3 dc in the next ch-3 space. ch 1. Work dc in the last sc stitch. ch 5 and turn.
Row 4: Starting the Mesh (The Body of the Pineapple)
- Skip 1 dc. Work dc in the next dc. ch 1. Skip 1 dc.
- Work (dc, ch 1, dc) into the next ch-1 space. ch 1.
- Outer Fan Edge: Work (3 dc, ch 3, 3 dc) into the ch-3 space. ch 1.
- Side Mesh: Work (dc, ch 1, dc) into the next ch-1 space. ch 1.
- Work (3 dc, ch 3, 3 dc) into the next ch-3 space (Second Outer Fan Edge).
- Repeat Side Mesh: Work (ch 1, dc) in the next ch-1 space. ch 1. Skip 1 dc. Work dc in the next dc. ch 1. Skip 1 dc. Work dc in the 3rd ch of the turning ch 5. ch 5 and turn.

Row 5: Beginning the Pineapple Grid
The “Pineapple” effect is created by working a tight series of SC stitches into the arch below, which makes the netting.
- Work dc in the next ch-1 space. ch 1.
- Work (dc, ch 1, dc) in the next ch-1 space. ch 1.
- Pineapple Arch: Work 9 sc into the next ch-3 space (This is the start of the defined pineapple grid).
- Outer Fan Edge: ch 1. Work (3 dc, ch 3, 3 dc) into the next ch-1 space. ch 1.
- Work 9 sc into the next ch-3 space.
- Repeat Side Mesh: Work (ch 1, dc) in the next ch-1 space. ch 1. Skip 1 dc. Work dc in the next ch-1 space. ch 1. Work dc in the 3rd ch of the turning ch 5. ch 5 and turn.
Row 6 (and subsequent rows): Expanding the Pineapple
This process repeats until the pineapple is closed.
- Work the mesh section as established (V-stitches and ch 1).
- Pineapple Grid: When you reach the group of 9 sc, you will work [sc in the first sc, ch 3] 8 times. Finish with an sc in the last sc. (You will now have 7 ch-3 loops).
- Repeat: In the next row, you work sc into the ch-3 loops and chain 3 between them, decreasing the number of loops by one in each row (from 7 to 6, then 5, 4, etc.).
- Continue working the Outer Fan Edges with
(3 dc, ch 3, 3 dc)until the pineapple is completely closed (1 ch-3 loop remaining).

Final Step: Blocking
Blocking is crucial for pineapple lace.
- Stiffen: Dip the motif in a solution of liquid starch or a 50/50 mixture of white glue and water.
- Pin: Lay the damp motif flat. Use pins to sharply define the outer fan edge and pull the center of the pineapple grid taut and symmetrical.
- Dry: Allow to dry completely. The stiffness will hold the delicate lace pattern perfectly.
Would you like instructions for joining multiple pineapple motifs side-by-side to create a runner?
Video tutorial: