by
by That is a fantastic request! Choosing a single motif pattern that works beautifully for both a decorative home item like a Runner and a flowing garment like a Blouse requires a design that balances openness, structure, and ease of joining.
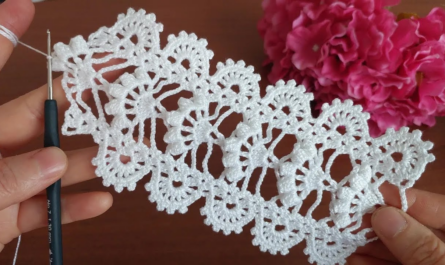
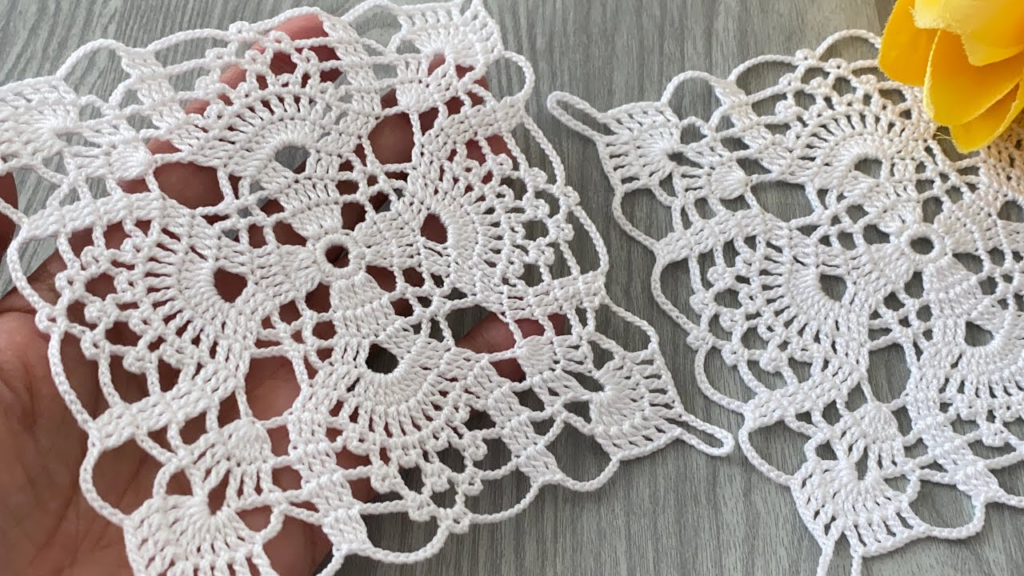
I will detail the pattern for the “Victorian Lace Flower Square,” a versatile motif that features a delicate floral center and a stable, easily repeatable lace square frame.
🌸 Victorian Lace Flower Square Motif Tutorial
This square combines dimensional petals with a final round of open mesh, creating a lightweight fabric that is ideal for draping in a blouse or lying flat in a runner.
Materials You’ll Need
- Yarn: DK Weight (Size 3) or Sport Weight (Size 2) cotton or a blend for blouse drape; or Worsted (Size 4) for a denser runner.
- Crochet Hook: The size appropriate for your yarn (e.g., 3.5 mm – 4.0 mm).
- Scissors, Tapestry Needle, Blocking Pins.
Key Crochet Terms
| Abbreviation | Stitch Name |
| ch | Chain |
| sl st | Slip Stitch |
| sc | Single Crochet |
| dc | Double Crochet |
| Shell | 5 dc worked into the same space |
| Picot | ch 3, sl st into the first ch |
Part 1: Crocheting the Motif
Round 1: Foundation (Inner Disk)
- Start: Make a Magic Ring. ch 3 (counts as dc). Work 11 dc into the ring.
- Finish: Pull the tail tight. Join with a sl st to the top of the ch 3. (12 sts).

Round 2: Creating the Flower Petals
- ch 1. Work sc in the same st.
- Petal Loop: ch 4. Skip 1 stitch.
- Repeat: [sc in the next st, ch 4, skip 1 st] 5 more times.
- Finish: ch 4. Join with a sl st to the first sc. (6 ch-4 loops).
Round 3: The Dimensional Shells
We work the Shells into the ch-4 spaces to create the raised flower texture.
- sl st into the first ch-4 loop. ch 3 (counts as dc). Work 4 dc into the same ch-4 loop (First Shell).
- Anchor: Work sc into the next sc anchor.
- Repeat: Work [Shell (5 dc) into the next ch-4 loop, sc into the next sc anchor] 5 more times.
- Finish: Join with a sl st to the top of the beginning ch 3. (6 Shells).

Round 4: Squaring the Shape (The Corners)
This round converts the 6-sided shape into a 4-sided square using large chains.
- sl st over the first 2 dc of the shell to reach the center stitch. ch 1. Work sc in that center dc.
- Side Mesh: ch 5. Work sc in the next sc anchor. ch 5.
- Corner Space: Work sc in the center dc of the next shell. ch 7.
- Anchor: Work sc in the center dc of the next shell.
- Repeat: Continue the sequence [ch 5, sc in sc anchor, ch 5, sc in center dc, ch 7 (Corner), sc in center dc] two more times.
- Finish: ch 5, sc in sc anchor, ch 5, sl st to the first sc to join. (4 ch-7 corners established).
Round 5: Final Edge (Joining Round)
This round stabilizes the lace with simple clusters for clean assembly.
- sl st into the ch-5 space. ch 3 (counts as dc). Work 2 dc into the same space.
- Side: Work ch 1, 3 dc into the next ch-5 space.
- Corner Shell: Work ch 1. Work (3 dc, ch 2, 3 dc) into the ch-7 corner space. ch 1.
- Repeat: Continue the sequence [3 dc in ch-5 sp, ch 1, 3 dc in ch-5 sp, ch 1, Corner Shell (3 dc, ch 2, 3 dc) in corner sp, ch 1] 3 more times.
- Finish: Join with a sl st to the top of the ch 3. Fasten off.

Part 2: Assembly and Finishing
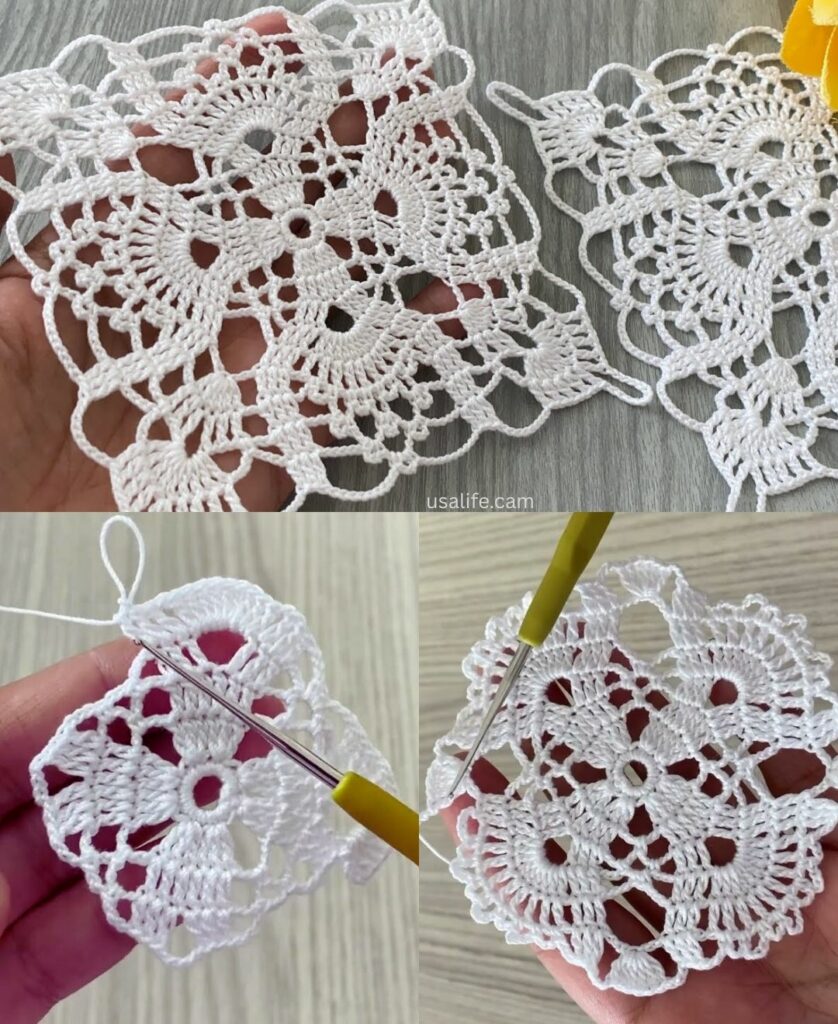
1. Joining the Motifs
The open framework makes the Join-as-You-Go (JAYG) method while working the final Round 5 ideal for seamless assembly.
- Side Join: Replace the
ch 1with asl stinto the corresponding ch-1 space of the finished motif. - Corner Join: Replace the
ch 2withch 1, sl st into the finished motif's ch-2 corner, ch 1.
2. Project Layouts
| Project | Shape/Layout | Customization Tips |
| Table Runner | Shape: A long, narrow rectangle (e.g., 2 motifs wide by 8–10 motifs long). | Edging: Add a clean border of 1-2 rounds of SC around the perimeter. Use Size 4 yarn/thread for structure. Block aggressively for a crisp, flat finish. |
| Blouse | Construction: Join motifs into two rectangles (Front/Back) that fit your width measurement. | Fit: Use lightweight yarn (Size 2 or 3) for drape. Join shoulders and side seams, leaving openings for the neckline (usually 8–10 inches wide) and armholes (usually 7–9 inches deep). |
3. Final Blocking (Essential)
Blocking is crucial for lace motifs. Wet the finished item, pin all four corners sharply outward to define the square, and allow it to dry completely. This step ensures the lace opens up and the fabric lies flat and elegantly.
Would you like a tutorial on how to work a simple Picot edge around the finished neckline of the blouse?
Video tutorial: