 by
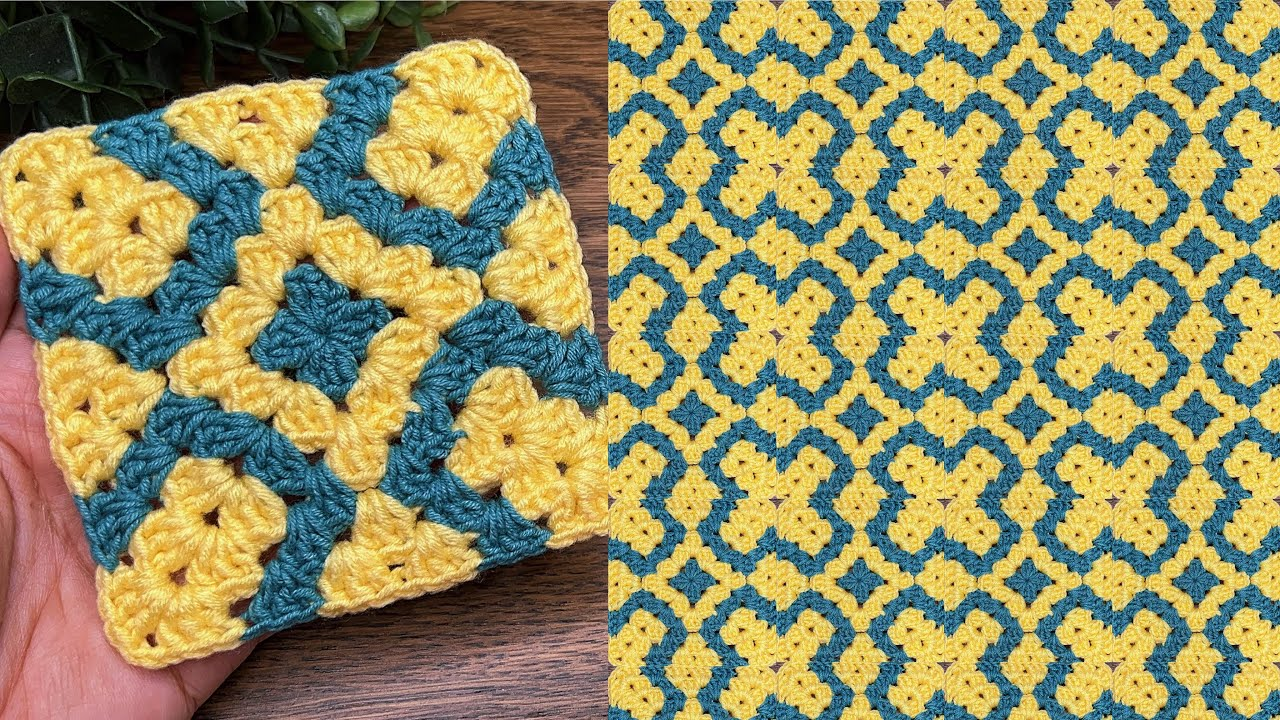
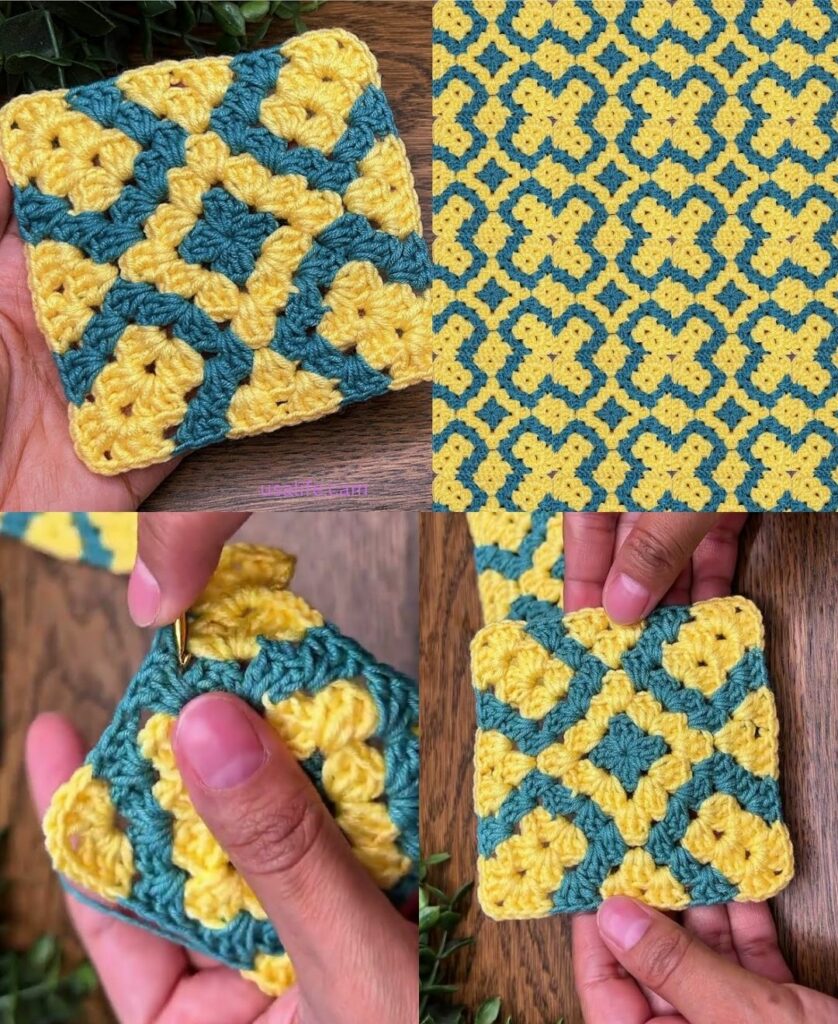
by That’s a fantastic idea! A Geometric Granny Square takes the basic granny structure and elevates it by introducing solid blocks, strategic chains, and often sharp color changes to create intricate geometric patterns that are perfect for modern projects.
I will detail a pattern for a Solid Center Pinwheel Granny Square, which is a great beginner-friendly geometric motif that creates a dynamic, optical effect.
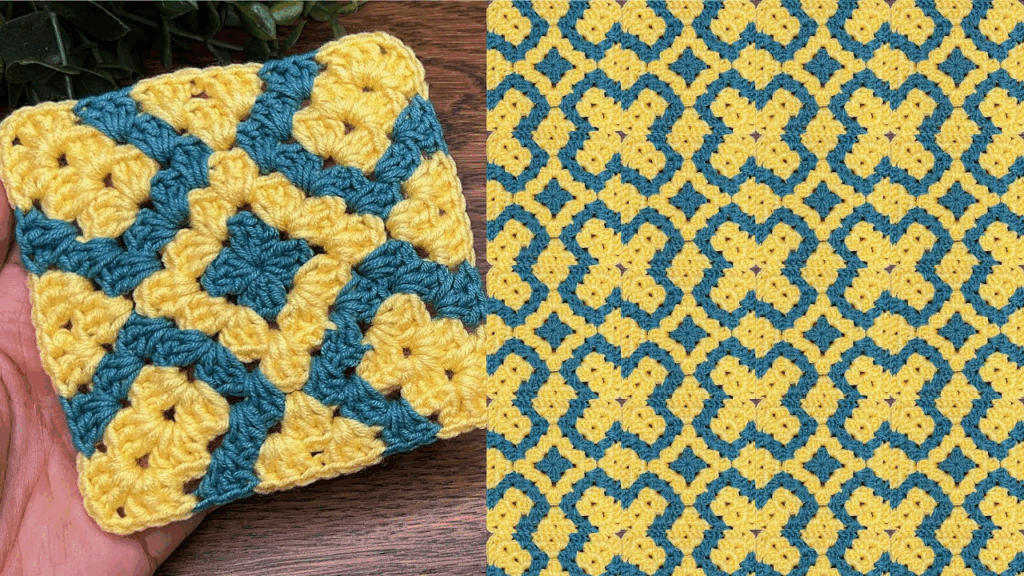
🤩 Geometric Pinwheel Granny Square Tutorial
This pattern starts with a solid center and transitions to classic granny corners, using color changes to define the geometric “pinwheel” effect.
Materials You’ll Need
- Yarn: Medium-weight yarn (worsted/size 4) works well for practice.
- Color A (Center/Swirl): A vibrant color.
- Color B (Background/Frame): A neutral or contrasting color.
- Crochet Hook: The size appropriate for your yarn (e.g., 5.0 mm).
- Scissors, Tapestry Needle.
Key Crochet Terms
| Abbreviation | Stitch Name |
| ch | Chain |
| sl st | Slip Stitch |
| sc | Single Crochet |
| dc | Double Crochet |
| V-st | V-Stitch (dc, ch 1, dc) |
| Corner | (dc, ch 2, dc) |
Step-by-Step Instructions
Round 1: Solid Center (Color A)
We establish the foundation for the solid center disk.
- Start: With Color A, make a Magic Ring.
- Base: ch 3 (counts as dc). Work 15 dc into the Magic Ring.
- Finish: Pull the tail tight. Join with a sl st to the top of the ch 3. (16 sts).

Round 2: Defining the Swirl (Color A)
This round introduces the geometric spacing that creates the pinwheel’s initial structure.
- ch 3 (counts as dc). dc in the next 3 stitches. (4 dc total).
- Corner Space: ch 3.
- Side: dc in the next 4 stitches.
- Repeat: [ch 3, dc in the next 4 stitches] 3 more times. (You will have 4 sets of 4 dc, separated by 4 ch-3 spaces).
- Finish: Join with a sl st to the top of the beginning ch 3. Fasten off Color A.
Round 3: Squaring Up (Color B)
We transition to the square shape and introduce the contrasting color.
- Join: Join Color B into any ch-3 corner space with a sl st.
- First Corner: ch 3 (counts as dc). Work (2 dc, ch 2, 3 dc) into the same corner space. (Full Corner Shell).
- Side: ch 1. Work sc into the space between the two central DC posts from the previous 4-dc cluster (this anchors the side centrally and starts the geometric gap).
- Side: ch 1.
- Repeat: [Corner Shell (3 dc, ch 2, 3 dc) in the next ch-3 corner sp, ch 1, sc in the center of the 4-dc post, ch 1] 3 more times.
- Finish: Join with a sl st to the top of the beginning ch 3.

Round 4: Expanding the Geometry (Color B)
We expand the “pinwheel arms” by filling the gaps and defining the straight sides.
- Move to Corner: sl st over to the ch-2 corner space.
- Corner: ch 3. Work (2 dc, ch 2, 3 dc) into the corner space.
- Side: ch 1. Work 3 dc into the next ch-1 space (before the sc). ch 1.
- Anchor: Work sc into the single sc stitch from the previous round (the center anchor).
- Side: ch 1. Work 3 dc into the next ch-1 space (after the sc). ch 1.
- Repeat: Continue the sequence [Corner Shell, ch 1, 3 dc in next sp, ch 1, sc in anchor, ch 1, 3 dc in next sp, ch 1] 3 more times.
- Finish: Join with a sl st to the top of the beginning ch 3.
Continuing the Geometry (Optional)
- To make the square larger, repeat Round 4, always working the Corner Shell in the ch-2 space.
- The side clusters (3 dc, ch 1) will increase in number, and the single sc anchor will remain centrally located, giving the pinwheel structure room to expand.
Finishing the Motif
- Weave in Ends: Securely weave in all tails with a tapestry needle.
- Blocking: Blocking is particularly important for geometric motifs to ensure the angles are sharp and the square is perfectly flat, which enhances the optical pinwheel effect. Wet the square, pin the corners firmly, and allow it to dry completely.
This geometric square is now ready for joining into a modern blanket, bag, or pillow!
Video tutorial: