by
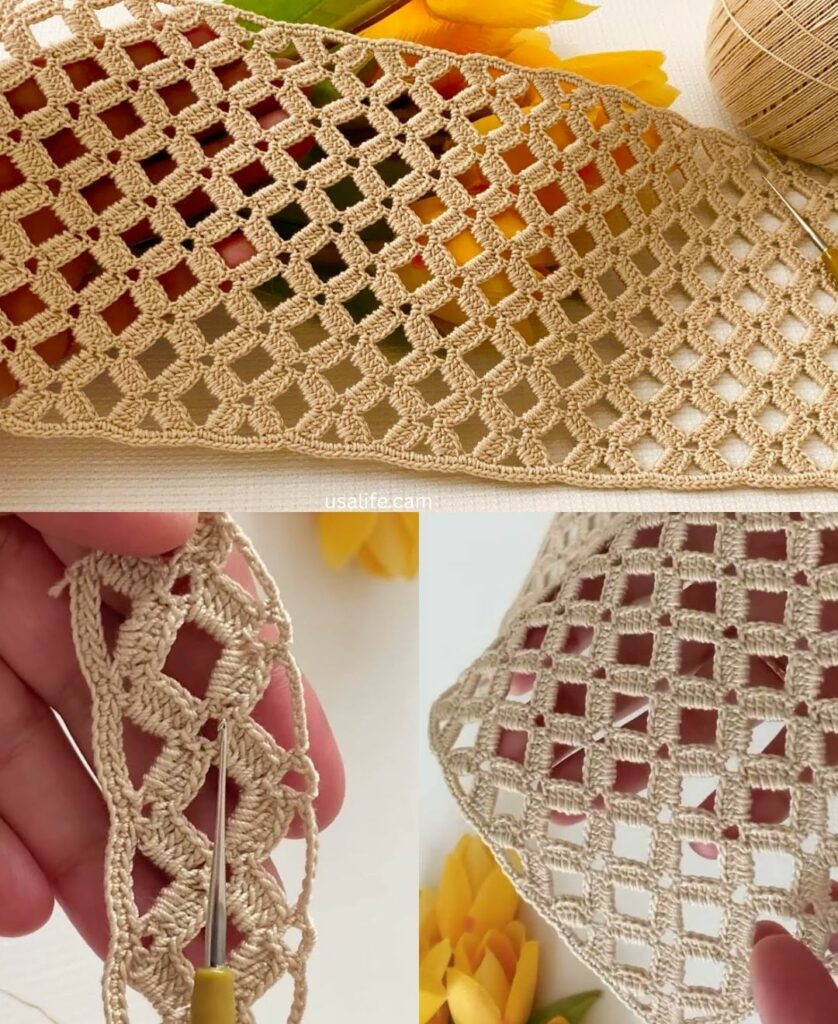
by That is an excellent choice for a simple yet highly elegant project! Mesh Crochet (often called Filet Crochet when using a grid pattern) is one of the easiest techniques for beginners to master, as it relies on just two stitches: the chain and the double crochet.
I will detail the pattern for the Classic Filet Mesh (Open Square), which forms a simple, even grid perfect for lightweight scarves, bags, or decorative netting.
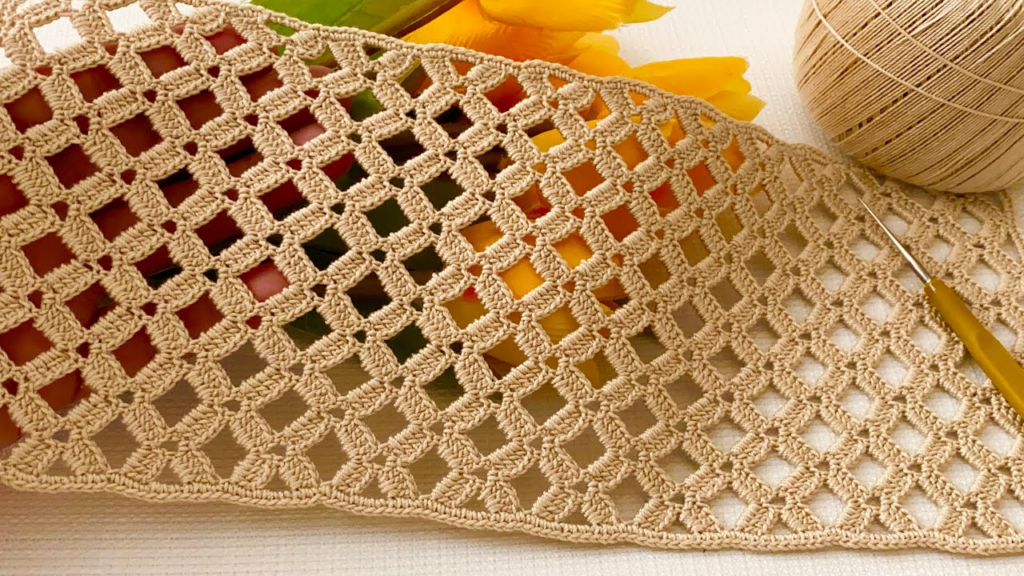
🔗 Classic Filet Mesh Pattern Tutorial
This pattern is created by alternating double crochet (dc) stitches with chain spaces (ch), resulting in a breathable, square grid.
Materials You’ll Need
- Yarn: Lightweight yarn (DK or Sport weight) or cotton thread for a finer look. The texture of the mesh is highly dependent on your material choice.
- Crochet Hook: The size appropriate for your chosen yarn (e.g., 3.5 mm – 4.0 mm).
- Scissors
- Tapestry Needle (for weaving in ends).
Key Crochet Terms
| Abbreviation | Stitch Name |
| ch | Chain |
| sl st | Slip Stitch |
| dc | Double Crochet (forms the “post”) |
| Open Mesh Square | dc, ch 1, skip 1 st |
Part 1: Setting Up the Foundation
The pattern uses a repeat of 2 chains plus 1 extra for the border/turning chain.
Foundation Chain
- Determine the desired width of your project (e.g., 10 inches for a scarf, 20 inches for a placemat).
- Chain a length that reaches that width. Your final chain count must be an odd number.
- Example: If you need 50 chains for the pattern posts, you chain $50 \times 2 + 1 = 101$ chains.

Row 1: Establishing the Mesh Posts
- Work dc in the 4th ch from the hook (the skipped 3 chains count as the first dc post).
- Repeat: [ch 1, skip 1 ch, dc in the next ch] across the entire foundation chain.
- Finish: You should end the row with a single dc post in the last chain.
- (Count your dc posts—this number must be the same in every row.)
- ch 3 (counts as the first dc post for the next row) and turn.
Part 2: Working the Repeating Mesh Rows
Row 2: Creating the Open Grid
- ch 1 (this forms the chain space over the open mesh square below).
- Work dc in the top of the next dc post below.
- Repeat: [ch 1, dc in the top of the next dc post] across the entire row.
- Finish: Work dc in the top chain of the turning ch 3 from the previous row.
- ch 3 (counts as the first dc post for the next row) and turn.
Repeating the Pattern
- Repeat Row 2 until your project reaches the desired length.
- Every row will look identical, with the dc posts always lining up vertically, forming a perfect grid.
Part 3: Solid Squares (Filet Decoration)
For a more traditional Filet Crochet look, you can easily switch from an open square to a solid square (or block) within the pattern. This allows you to create images or geometric patterns.
| Square Type | Instructions |
| Open Square | dc in the post, ch 1, skip the space, dc in the next post. |
| Solid Square (Block) | dc in the post, 2 dc into the chain-1 space, dc in the next post. |

Example Row (Creating a small solid section):
- Work 3 Open Mesh Squares: (dc, ch 1) three times.
- Work 1 Solid Square (Block): dc in the next post, 2 dc in the ch-1 space, dc in the next post. (Total of 4 dc stitches).
- Continue with Open Mesh Squares for the rest of the row.
Finishing the Project
- Weave in Ends: Use your tapestry needle to securely weave any starting and ending tails into the solid dc posts along the edges of your work.
- Blocking: Filet mesh often benefits greatly from blocking. Wet or steam the finished piece and gently stretch and pin the sides to ensure the grid is perfectly square and the edges are straight. Allow it to dry completely.
Would you like a tutorial on how to add a simple, clean border (like the Moss Stitch) around your finished mesh piece?
Video tutorial: