by
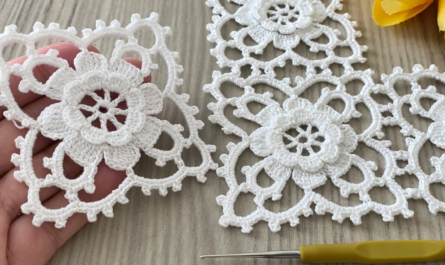
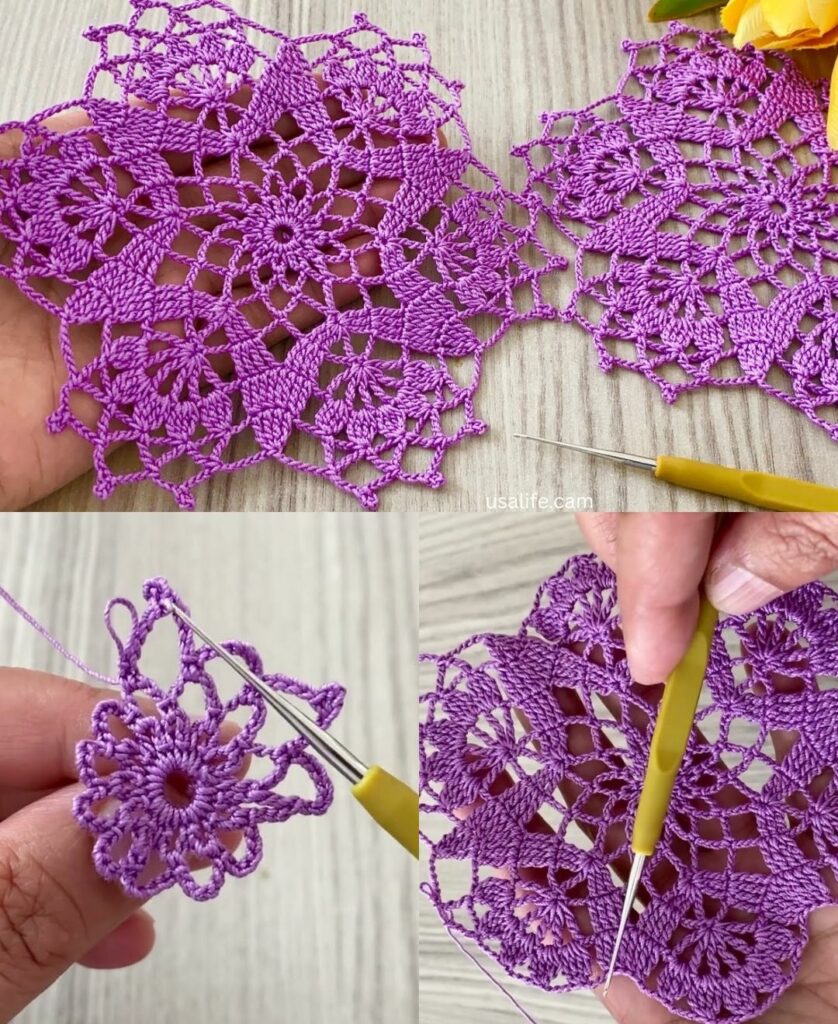
by A Motif is a small, independent piece of crochet (like a square, circle, or hexagon) that can be joined with others to create blankets, bags, or garments. For a beginner, the Classic Granny Square is the ultimate motif to learn because it uses basic stitches and teaches you how to “read” your work.
Since you are in a warm climate, I recommend using 100% Cotton yarn (DK weight) and a 4.0mm hook. Cotton will make your motifs crisp and breathable.

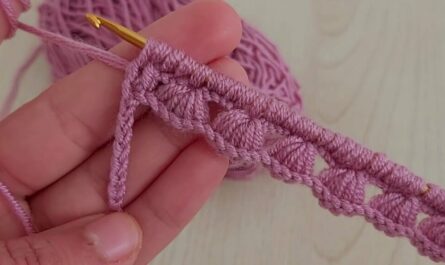
1. Essential Skills You’ll Use
- Magic Ring (MR): The best way to start a motif without a hole in the center.
- Chain (ch): Used for height and corner spaces.
- Double Crochet (dc): The “building block” of most motifs.
- Slip Stitch (sl st): To join the end of the round to the beginning.
2. Beginner Motif Tutorial: The Classic Granny Square
Round 1: The Foundation
- Start: Make a Magic Ring.
- First Cluster: Ch 3 (this counts as your first dc). Work 2 dc into the ring.
- Corner: Ch 2.
- Repeat: Work 3 dc into the ring, Ch 2. Repeat this 2 more times.
- Finish: You should have 4 clusters of 3-dc. Pull the magic ring tail tight.
- Join: Sl st into the top of the beginning Ch 3.

Round 2: Growing the Square
- Move Hook: Sl st into the next 2 dc and into the first Ch-2 corner space. (This gets you ready to start in the corner).
- First Corner: Ch 3, then work (2 dc, Ch 2, 3 dc) all in that same corner space.
- Side Space: Ch 1.
- Next Corner: In the next Ch-2 space, work (3 dc, Ch 2, 3 dc).
- Repeat: Ch 1, and repeat the corner pattern in the remaining two corners.
- Join: Ch 1, then sl st to the top of the beginning Ch 3.
Round 3: The Pattern Established
- Move Hook: Sl st across to the corner space again.
- Corners: Always work (3 dc, Ch 2, 3 dc) in the corners.
- Sides: In the Ch-1 spaces on the sides, work only 3 dc.
- Separator: Always Ch 1 between every 3-dc cluster (except in the corners, which get a Ch 2).
- Join: Sl st to the beginning.

3. How to Turn Motifs into a Project
Once you have practiced making a few squares, you can turn them into something beautiful:
- A Simple Bag: Crochet 13 squares. Lay them out in a specific “V” shape, fold, and sew the edges together to make a trendy “market bag.”
- A Summer Top: Join two large squares (about 12 inches each) at the shoulders and sides, leaving holes for the head and arms.
- A Runner: Join 5 to 10 motifs in a single long row.
4. Beginner Tips for Motifs
- Color Changes: To make your motif look “stunning,” change colors every round. Tie off the old color and join the new color in any corner to start the next round.
- Count Your Clusters: It is very easy to accidentally make 3 corners or 5 clusters in the beginning. Always count to ensure you have 4 corners after Round 1.
- Weave as You Go: Motifs create many yarn tails. Use your yarn needle to weave them into the back of the stitches immediately so you don’t have a giant mess at the end of your project.
Would you like me to show you how to join these motifs together using an “invisible” seam?
Video tutorial: