by
by That’s a fantastic and practical request! A Multi-Purpose Lace Edge Pattern is essential for finishing various projects, such as blankets, scarves, towels, pillowcases, or garment hems (like a blouse or tunic).
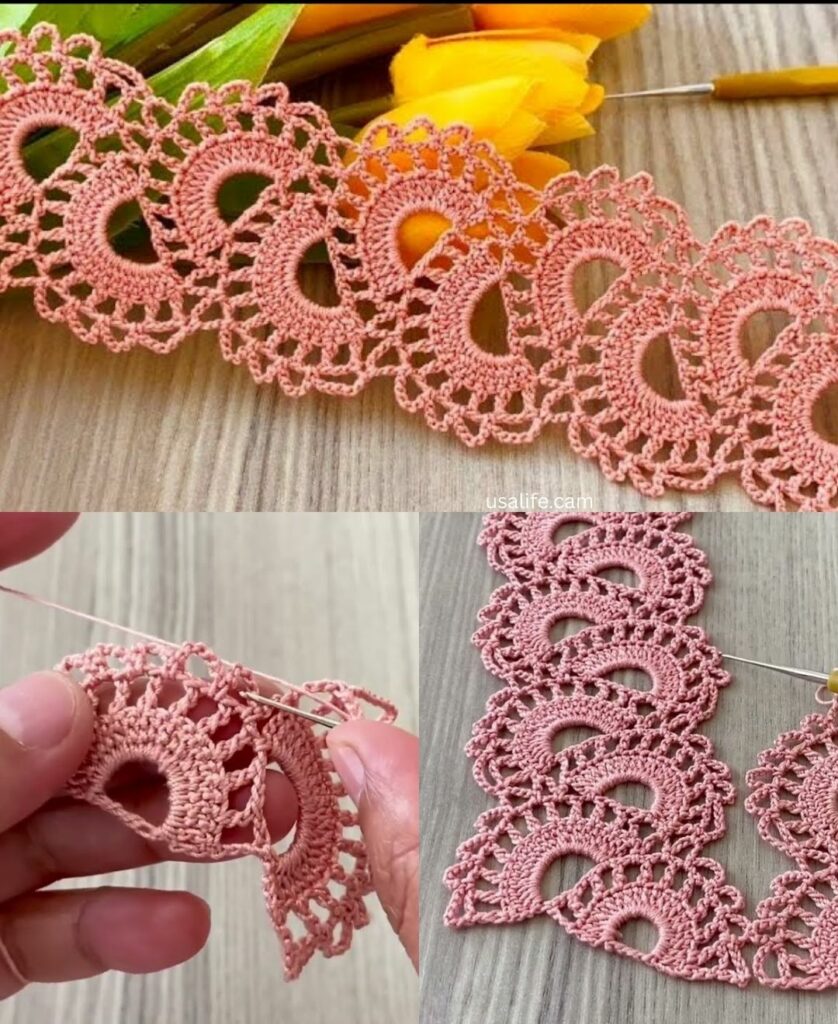
For versatility, we will detail the V-Stitch and Picot Scallop Edging. This pattern is simple, quick to memorize, and creates a beautiful, feminine, wavy border that works well on straight edges.
Given your location in Phnom Penh, choosing 100% cotton yarn is great, as it holds the crispness of the lace and washes well, making it suitable for home items. Use the same yarn weight and hook size as the main item you are edging for a cohesive look.

Core Preparation: Preparing the Edge
Before adding any lace border, you must create a stable foundation along the raw edge of your fabric. This is especially true if you are adding lace to a sewn fabric (like a towel) or a blanket with uneven edges.
Step 1: Even Out the Edges (Crucial)
- Work Single Crochet (SC) Evenly: Join your yarn to any corner of the edge you wish to finish.
- Work 1 Row of SC: Work single crochet stitches evenly all the way around the edge.
- If edging crochet fabric: Work 1 SC into the end of each DC row, and 2 SC into the end of each HDC row. Work 1 SC per stitch along the top/bottom edges. This creates a solid base.
- If edging a woven fabric (e.g., blanket edge): You may need to create punch holes first, or simply pierce the hook through the fabric edge evenly before working the SC.
- Corner Count: In each corner stitch, work 3 SC (this ensures the edge lies flat when turning the corner).
- Join: Join the round with a slip stitch (sl st) to the first SC.

The Multi-Purpose Lace Edge Pattern: V-Stitch & Picot Scallop
This pattern is worked in one final round/row and is designed to create a delicate, wavy scallop.
A. Essential Stitches Used
- Chain (ch), Slip Stitch (sl st), Single Crochet (sc).
- Double Crochet (dc).
- Picot: A tiny decorative loop:
ch 3, sl st back into the first ch. - V-Stitch:
(dc, ch 1, dc)worked into one stitch.
B. Pattern Requirements
- Stitch Multiple: The pattern repeats over 4 stitches. Ensure the number of stitches on your prepared edge (from the SC row) is a multiple of 4, or is very close (you can usually fudge 1-2 stitches in the final round without notice).
C. Step-by-Step Edging Instructions
- Setup: Join your yarn into any stitch (preferably not a corner, unless you are working a corner motif). If you are continuing from the preparation row, simply slip stitch to the next stitch if needed.
- Scallop Base:
Ch 1, andscinto the same stitch. - Skip:
Skip 1 st. - V-Stitch Scallop Center: In the next stitch, work the main feature:
- Work 1 DC.
- Work 1 Picot (
ch 3, sl st back into the 1st ch). - Work 1 DC into the same stitch as the previous DC. $\rightarrow$ V-Stitch with Picot Center
- Skip:
Skip 1 st. - Anchor:
Scinto the next stitch. (This anchors the scallop down and starts the repeat).
Repeat this sequence around the entire edge:
*Skip 1 st, V-Stitch with Picot Center in the next st, skip 1 st, SC in the next st.*

D. Managing Corners (Important!)
When you reach the corner SC from the preparation row (where you worked 3 SC together):
- Anchor Point: The anchor point (
sc) should fall directly on or very close to the center corner stitch. - Corner Scallop: Work the V-Stitch with Picot directly into the center corner stitch. You may need to skip 2 stitches on either side instead of 1 to allow the scallop to spread and lie flat around the corner.
E. Finishing
- Join: When you reach the start of the round,
sl stto the first SC to join. - Fasten Off (FO).
- Weave in Ends: Securely weave in all tails.
- Blocking: For lace edges, blocking is highly recommended. Gently wet the edge and pin the scallops out individually, ensuring the waves are perfectly straight and the picots are defined. Allow to dry completely.
This V-Stitch and Picot Scallop creates a delicate, professional finish suitable for nearly any square, rectangular, or straight-edged item!
Video tutorial: