by
by 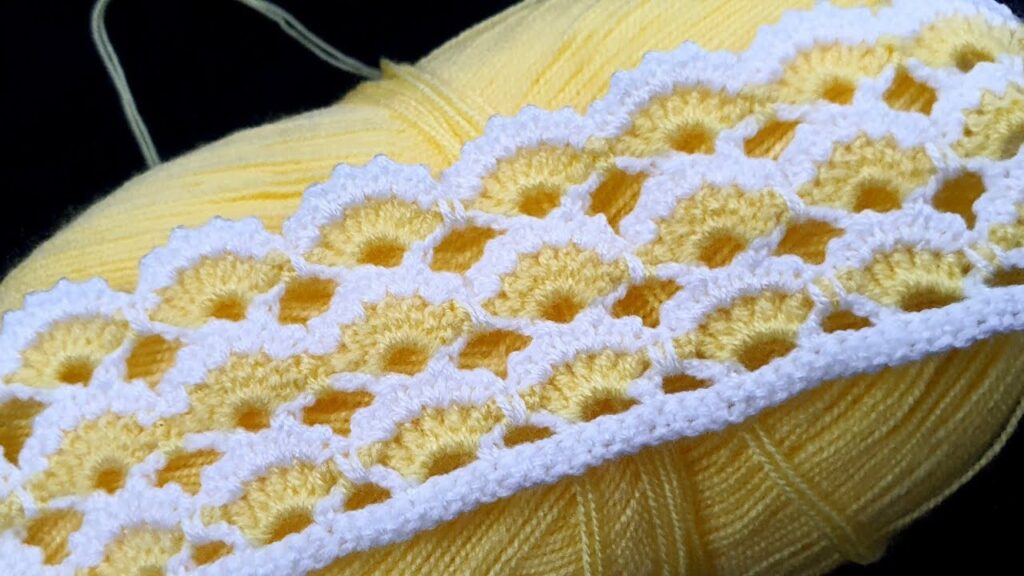
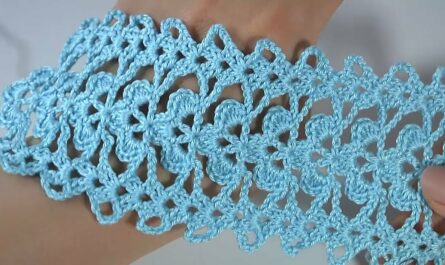
The Arcade Stitch is a beautiful and versatile stitch, perfect for creating blankets with a lovely drape and subtle texture. But why stop the fun there? Adding an Arcade Stitch border can elevate your blanket to a whole new level, giving it a polished and finished look.
This blog post will guide you through the process of crocheting a stunning Arcade Stitch border, step-by-step. Whether you’re a seasoned crocheter or just starting out, this pattern is easy to follow and adaptable to various blanket sizes.
Materials:
- Yarn in a contrasting color to your blanket (weight should be similar to your blanket yarn)
- Crochet hook suitable for your chosen yarn weight
- Scissors
- Tapestry needle (optional, for weaving in ends)
Gauge:
Gauge is not crucial for this border, as it will adjust to fit your blanket size. However, knowing your gauge will help you estimate the border width and yarn needed.
Skill Level:
Intermediate – This pattern involves working into spaces and skipping stitches, which requires some practice and attention.
Stitches Used:
- Chain (ch)
- Single Crochet (sc)
- Double Crochet (dc)
- Slip Stitch (sl st)
Instructions:
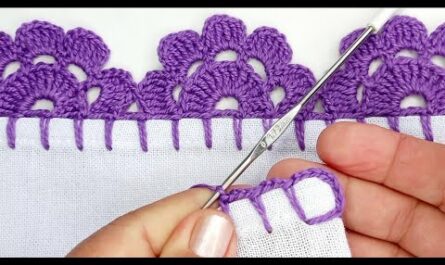
1. Starting Round:
- Attach your yarn to a corner of your blanket with a slip stitch.
- Chain 2 and work a double crochet into the corner space.
- Chain 2, skip 1 stitch (the corner stitch), and work a single crochet into the next stitch.
- Repeat chain 2, skip 1 stitch, single crochet into the next stitch around the entire blanket, ending with a single crochet in the same space as your starting double crochet.
- Slip stitch to join the round.
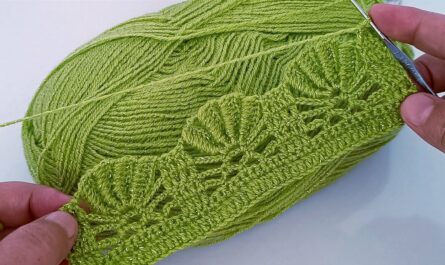
2. Border Round:
- Chain 2 and work a double crochet into the same space as your starting single crochet.
- Chain 2, skip 2 stitches, and work a single crochet into the next stitch. This creates the first “shell” of the border.
- Chain 3, skip 2 stitches, and work 3 single crochets into the next 3 stitches (the center of the previous shell). This creates the “arch” of the border.
- Chain 2, skip 2 stitches, and work a single crochet into the next stitch. This completes the second shell.
- Repeat the sequence of chain 2, skip 2, single crochet, chain 3, skip 2, 3 single crochets, chain 2, skip 2, single crochet around the entire blanket.
- Corner: In the corner spaces, chain 3, skip 2 stitches, work 3 single crochets in the corner space, chain 2, skip 2 stitches, and continue with the regular border pattern.
- Slip stitch to join the round.
3. Repeating Rounds:
- Repeat round 2 as many times as desired for the border width. You can adjust the number of repeats based on your preference and blanket size.
4. Finishing Touches:
- Fasten off and weave in any loose ends.
- Enjoy your beautifully bordered blanket!
Tips:
- Use a stitch marker to mark the beginning of each round.
- Pay attention to your tension, especially when skipping stitches.
- You can customize the border by using different stitch combinations for the shells and arches.
- If your blanket has a different stitch count, you may need to adjust the number of skipped stitches in the border pattern.
- For a more decorative touch, you can add a picot stitch edging around the border.
Video Tutorial
Additional Resources:
- Crochet Arcade Stitch BLANKET BORDER Tutorial (YouTube): https://www.youtube.com/watch?v=chKhJb8k4SI
- How To Crochet Arcade Stitch The Easy Way (YouTube): https://m.youtube.com/watch?v=Gg5GwLKFKjQ
- Crochet Arcade Waffle Crochet Blanket Pattern: https://www.windingroadcrochet.com/blog/
I hope this detailed guide helps you create a stunning Arcade Stitch border for your blanket! Remember, practice makes perfect, so don’t hesitate to redo sections if needed. Most importantly, have fun and enjoy the process of adding a unique touch to your project!tunesharemore_vert