by
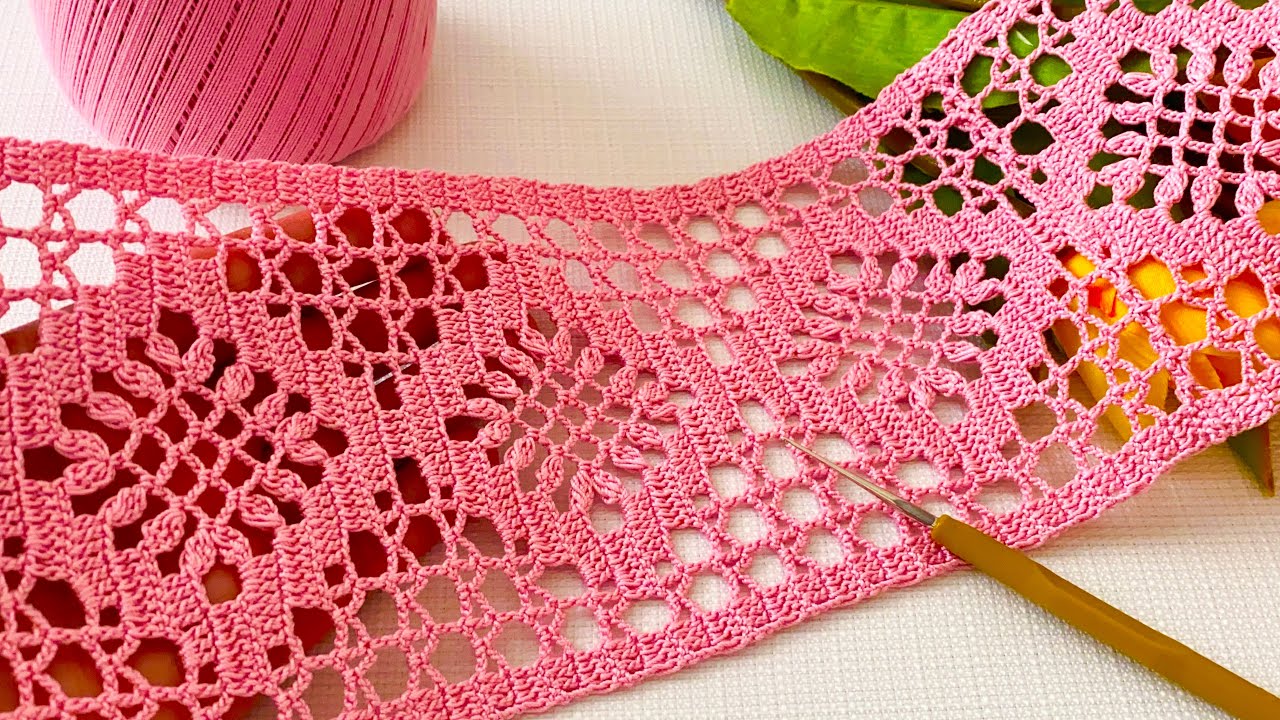
by That is a beautiful request! Working with a small steel crochet hook and fine thread to create delicate lace is a rewarding skill. This type of lace is perfect for projects requiring exquisite detail, such as table runners, doilies, decorative trims, or lace inserts.
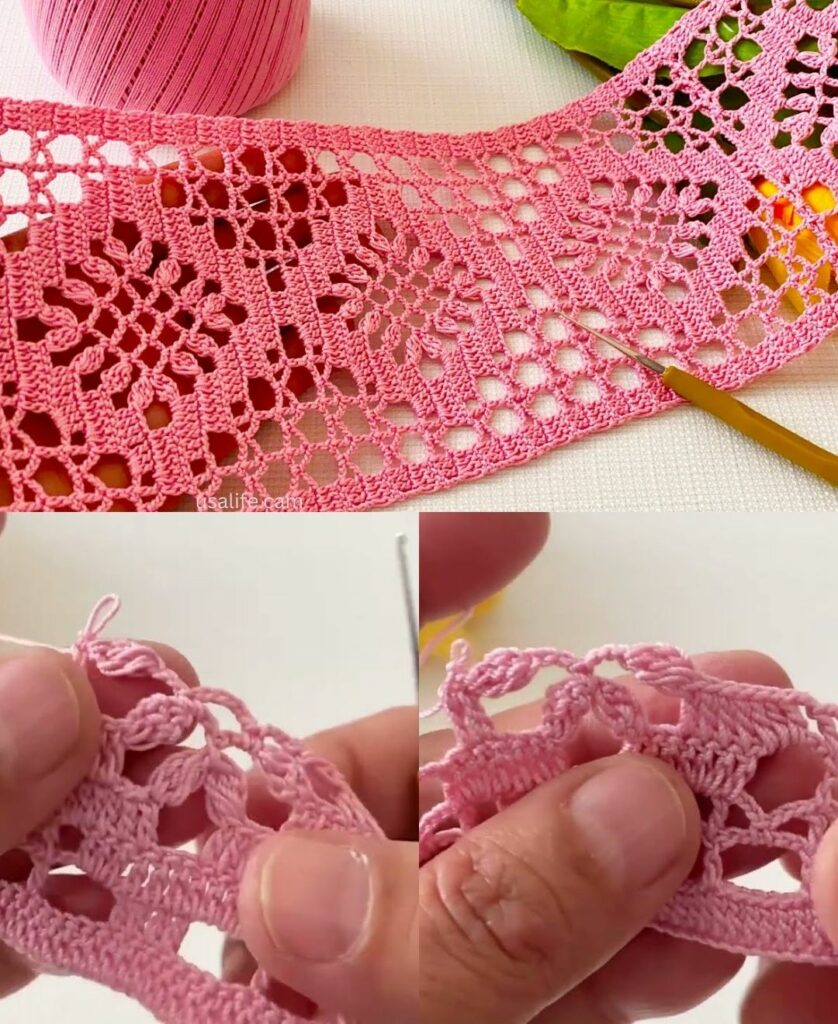
I will detail the pattern for the “Delicate Picot Mesh Lace,” a versatile pattern that creates a beautiful, lightweight mesh accented with tiny, defined points.
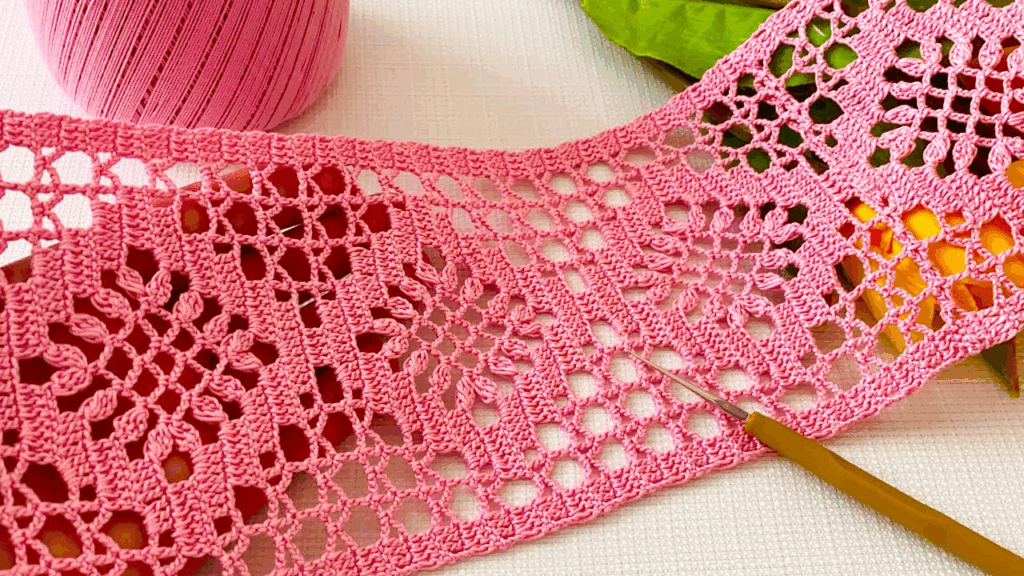
✨ Delicate Picot Mesh Lace Tutorial
This pattern uses a combination of basic chain spaces and taller stitches (double crochet) to create a flowing mesh, while the Picot stitch adds the classic lace ornamentation. This pattern can be worked in rows (for trims/runners) or in the round (for doilies).
Materials You’ll Need
- Thread: Size 10, 20, or 30 Mercerized Cotton Thread. The higher the number, the finer the thread and the smaller the hook needed.
- Crochet Hook: A Steel Crochet Hook appropriate for your thread (e.g., Size 7, 8, or 9 for Size 10 thread, or Size 10, 11, or 12 for Size 20/30 thread).
- Scissors, Tapestry Needle.
- Stiffening Solution/Blocking Pins (Essential for setting the final shape).
Key Crochet Terms
| Abbreviation | Stitch Name |
| ch | Chain |
| sl st | Slip Stitch |
| sc | Single Crochet |
| dc | Double Crochet |
| Picot | ch 3, sl st into the first ch (or the back loop of the dc below) |
Part 1: Crocheting a Linear Piece (Runners/Trims)
This pattern is worked in rows. The stitch multiple is 4 stitches + 1.
Foundation Chain
- ch a length that is a multiple of 4, then add 5 chains for the turning chain and base. (Example: ch 45 for a narrow runner).

Row 1: Establishing the Mesh
- Work dc in the 6th ch from the hook (counts as dc + ch 2).
- Mesh Loop: ch 2. Skip 2 chs.
- Repeat: [dc in the next ch, ch 2, skip 2 chs] across the row until you have 3 chains remaining.
- Finish: dc in the last ch. ch 5 and turn.
Row 2: Introducing the Picot Lace
This row places the decorative Picot stitches into the centers of the mesh arches.
- Work dc in the next dc stitch below.
- Lace Arch: ch 2. Work sc in the next ch-2 space. ch 3. Work sc in the next ch-2 space. ch 2.
- Repeat: [dc in the next dc stitch, ch 2, sc in the next ch-2 space, ch 3, sc in the next ch-2 space, ch 2] across the row.
- Finish: Work dc in the 3rd ch of the beginning ch 5. ch 3 and turn.
Row 3: Continuing the Mesh Arch
This row prepares the base for the next row of Picots.
- Work dc in the next dc stitch. ch 2.
- Work dc in the next sc stitch. ch 2.
- Work dc in the center ch of the ch 3 arch. ch 2.
- Work dc in the next sc stitch. ch 2.
- Repeat: [dc in the next dc, ch 2, dc in sc, ch 2, dc in center ch of arch, ch 2, dc in sc, ch 2] across the row.
- Finish: Work dc in the 3rd ch of the beginning ch 5. ch 5 and turn.

Repeating the Pattern
- Repeat Row 2 and Row 3 until the desired length is reached.
Part 2: Adapting for Circular Pieces (Doilies/Mandala)
For doilies, the pattern must increase stitches each round to lay flat.
- Start: Work a foundation of 8 V-stitches (dc, ch 2, dc) separated by chains in a Magic Ring.
- Round 2: Place the Picot Arch into the large ch-2 spaces of the V-stitches.
- Expansion: You must constantly increase the chain count on the side arches (e.g., ch 5 instead of ch 3) or add an extra anchor stitch (sc/dc) between the main elements in subsequent rounds.
Part 3: Essential Finishing: Stiffening and Blocking
For fine lace, this step is non-negotiable for achieving a professional, crisp finish.
- Preparation: Mix a solution of liquid starch, or a mixture of white glue and water (50/50).
- Soak: Submerge the finished piece completely in the solution. Gently squeeze out the excess (do not wring).
- Pinning: Lay the damp lace on a blocking board or mat.
- Table Runner/Trims: Pin the edges perfectly straight and taut along the length.
- Doilies: Pin the center and then pin out every single peak/point firmly, ensuring the piece is a perfect circle.
- Dry: Allow the piece to dry completely (may take 12–24 hours). The lace will hold its shape beautifully when removed.
Would you like detailed instructions on how to work the Picot directly onto a finished fabric edge for trim?
Video tutorial: