 by
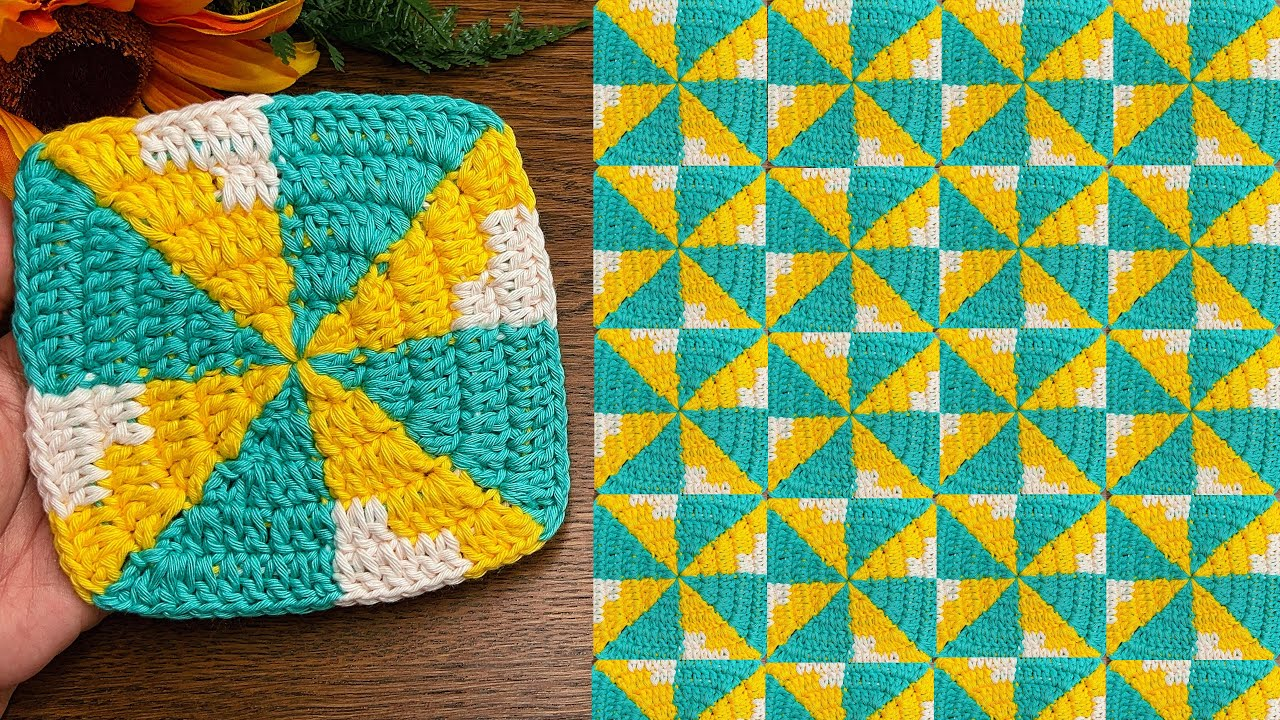
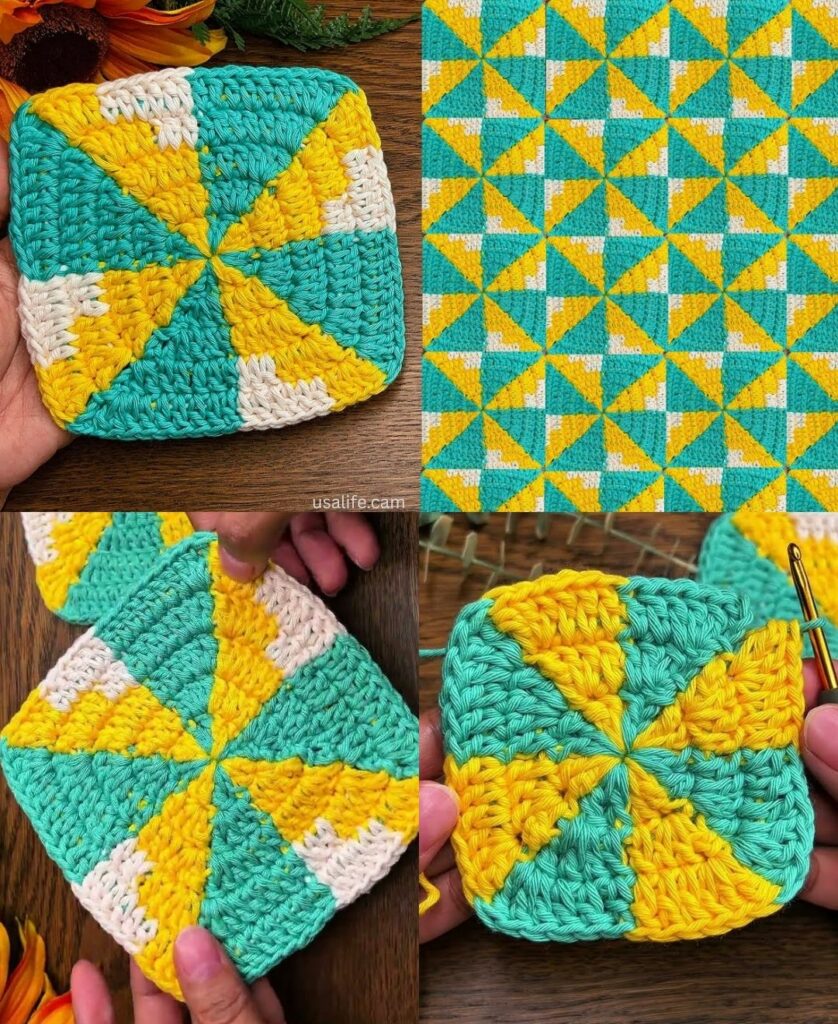
by The Pinwheel Square is the “optical illusion” of the crochet world. It uses a clever spiral technique to create the appearance of motion, making it a striking choice for everything from modern throw pillows to geometric baby blankets.
While it looks complex, it is actually a “two-round” repetition once you establish the base. The secret lies in working with two colors simultaneously.

🧶 The Designer’s Toolkit
To make the “blades” of the pinwheel pop, high contrast is your best friend.
| Item | Recommendation | Why? |
| Yarn | Worsted Weight (Size 4) Cotton or Acrylic | Holds the spiral shape without sagging. |
| Hook | 5.0 mm (H/8) | Provides clear stitch definition for the spiral rows. |
| Colors | Two High-Contrast Solids (e.g., Black & White or Navy & Gold) | Essential for the “motion” effect to be visible. |
Essential Stitch Key (US Terms)
- ch / sl st: Chain / Slip Stitch.
- sc / hdc: Single Crochet / Half Double Crochet.
- dc: Double Crochet.
- inc (Increase): Two stitches worked into the same space.

🛠 Step-by-Step: The Two-Color Spiral Pinwheel
Step 1: The Foundation (The Multi-Color Start)
This is the only tricky part. You will be leaving “live” loops of yarn as you switch colors.
- Color A: Make a Magic Ring. ch 1, work 1 sc, 1 hdc, 2 dc into the ring. Pull the loop long and drop the yarn (do not cut).
- Color B: Join in the Magic Ring. ch 1, work 1 sc, 1 hdc, 2 dc into the ring.
- Tighten: Pull the magic ring tail to close the center. You now have two sets of “growing” blades.
Step 2: Round 2 (The Spiral Begins)
- Color B: Work 2 dc into the top of the Color A sc, hdc, and the two dc’s (8 dc total for this section). Pull loop long and drop.
- Color A: Pick up the Color A loop. Work 2 dc into the top of the Color B stitches from the previous round (8 dc total).
Step 3: Round 3 (Expanding the Blades)
- Pattern: You are now working in a continuous spiral.
- Rule: In every “blade” section, work (1 dc in the first stitch, 2 dc in the next).
- Color Switch: When you reach the other color’s “long loop,” drop your current yarn and pick up the other.
Geometric Check: Your circle should be flat. If it starts to “bowl,” you aren’t increasing enough. If it “ruffles,” you are increasing too much.

Step 4: Squaring the Circle
Once your circle is the desired size (usually 4–5 inches), you must “level it out” to make it a square.
- The Gradient: As you finish a blade, work: 2 hdc, 2 sc, 1 sl st. This brings the height of the spiral down to the level of the previous row.
- The Frame: Attach a neutral “Anchor” color (like Cream or Grey) to any stitch.
- Corner: (2 dc, ch 2, 2 dc).
- Side: 2 hdc, 3 sc, 2 hdc.
- Repeat: Work this around to create four sharp $90^\circ$ corners.
📐 The Math of the Spiral
If you want to calculate how much yarn you need for a specific blanket size, use the area of the square ($A$):
$$A = s^2$$
Where $s$ is the side length of your finished, blocked square. Because the pinwheel uses two colors equally, you will need approximately 50% of Color A and 50% of Color B for the interior, plus a small amount of an anchor color for the squaring frame.

💡 Troubleshooting Like a Pro
- The “Gap” Problem: If you see holes where you switch colors, make sure you are pulling the new color snug before making your first stitch.
- Tension Management: Spiral crochet tends to pull tighter than traditional rows. Relax your hands. If the square feels stiff, move up to a 5.5 mm hook.
- The “Live Loop” Hack: Use a safety pin or stitch marker to hold your “dropped” loops. There is nothing more heartbreaking than accidentally unraveling three inches of a spiral because you tugged on the wrong strand!
✨ Style Tip: The 3D Effect
If you want to add a bit of 3D texture to this geometric motif, work your double crochets into the Back Loops Only (BLO). This creates a raised “staircase” effect along the edges of the pinwheel blades, making the spiral look like it’s actually spinning.
Would you like me to show you how to join these pinwheels so the spirals look like they are flowing into one another across a full blanket?