by
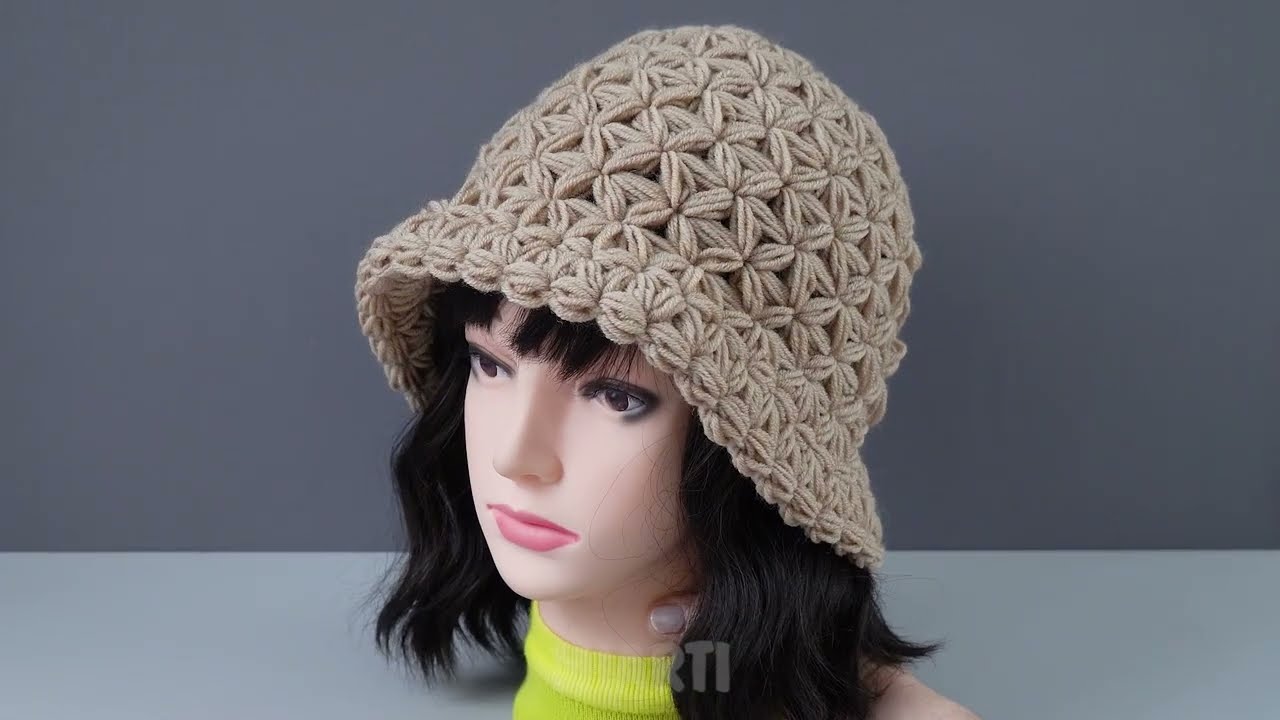
by Crocheting a bucket hat is a fantastic project that’s both stylish and practical, especially for the sunny weather in Phnom Penh! It’s a relatively simple shape to create, making it a great choice for confident beginners who are comfortable with working in the round and increasing stitches.
For a bucket hat in a warm climate, 100% cotton yarn or a sturdy cotton blend is definitely your best bet. Cotton is breathable, absorbs sweat, and holds its shape well when crocheted with a firm tension. Avoid wool or overly fuzzy acrylics, as they’ll be too hot and might stretch out more easily.
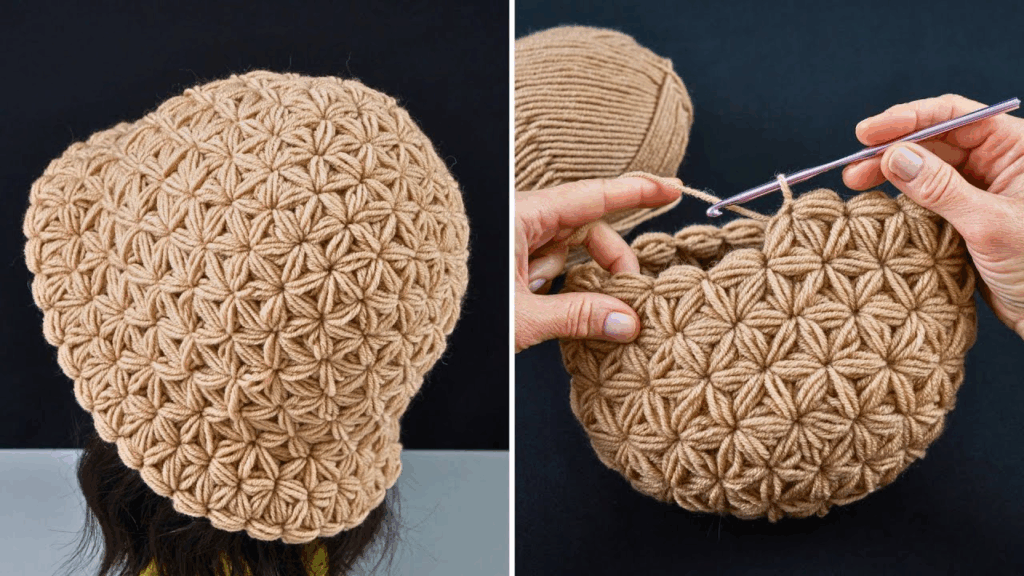
How to Crochet a Bucket Hat: A Detailed Guide for Beginners
This tutorial will guide you through creating a classic bucket hat, working from the top down. The hat consists of three main parts: the crown (top), the sides, and the brim.
1. Essential Materials You’ll Need
- Yarn:
- Worsted Weight (Aran / Medium / Category 4) Cotton Yarn: Approximately 100-150g for an adult-sized hat. Choose a color you love!
- Crochet Hook:
- A 4.0mm (US G/6) or 4.5mm (US 7) hook. You want your fabric to be firm and dense, with minimal gaps between stitches, so the hat holds its shape. If your stitches are naturally loose, go down a hook size.
- Scissors: For cutting yarn.
- Yarn Needle (Tapestry Needle): Essential for weaving in loose ends.
- Stitch Marker (Highly Recommended!): To mark the beginning of each round, as you’ll be working in continuous spirals.
2. Basic Crochet Stitches You’ll Use
This pattern uses fundamental crochet stitches:
- Magic Ring (MR) / Adjustable Ring: (Highly Recommended!) Creates a tight, hole-free center for the top of your hat. Alternatively, you can
ch 4, then sl st to joininto the first chain to form a ring. - Chain (ch): Used for starting and as a turning chain (though we’ll largely work in continuous rounds).
- Slip Stitch (sl st): For joining rounds (if you choose not to work in a continuous spiral) or for neatening.
- Single Crochet (sc): Creates a very dense, sturdy fabric, perfect for a hat. This will be your primary stitch.
- Working in Rounds (Continuous/Spiral): You’ll build the hat from the top down in a continuous spiral, which creates a seamless look.
- Fasten Off: To securely end your work.
- Weaving in Ends: Hiding yarn tails for a neat and professional finish.
Crochet Bucket Hat Pattern (Adult Medium Size)
This pattern makes an adult-sized bucket hat with a circumference of approximately 21-22 inches (53-56 cm). You’ll achieve this by increasing stitches for the crown, then working straight for the sides, and finally increasing again for the brim.
Abbreviations (US Crochet Terms):
- MR: Magic Ring
- ch: chain
- sl st: slip stitch
- sc: single crochet
- st(s): stitch(es)
- inc: increase (work 2 sc into the same stitch)
(...): work stitches into the same stitch or space[...]: repeat instructions in brackets- FO: Fasten off
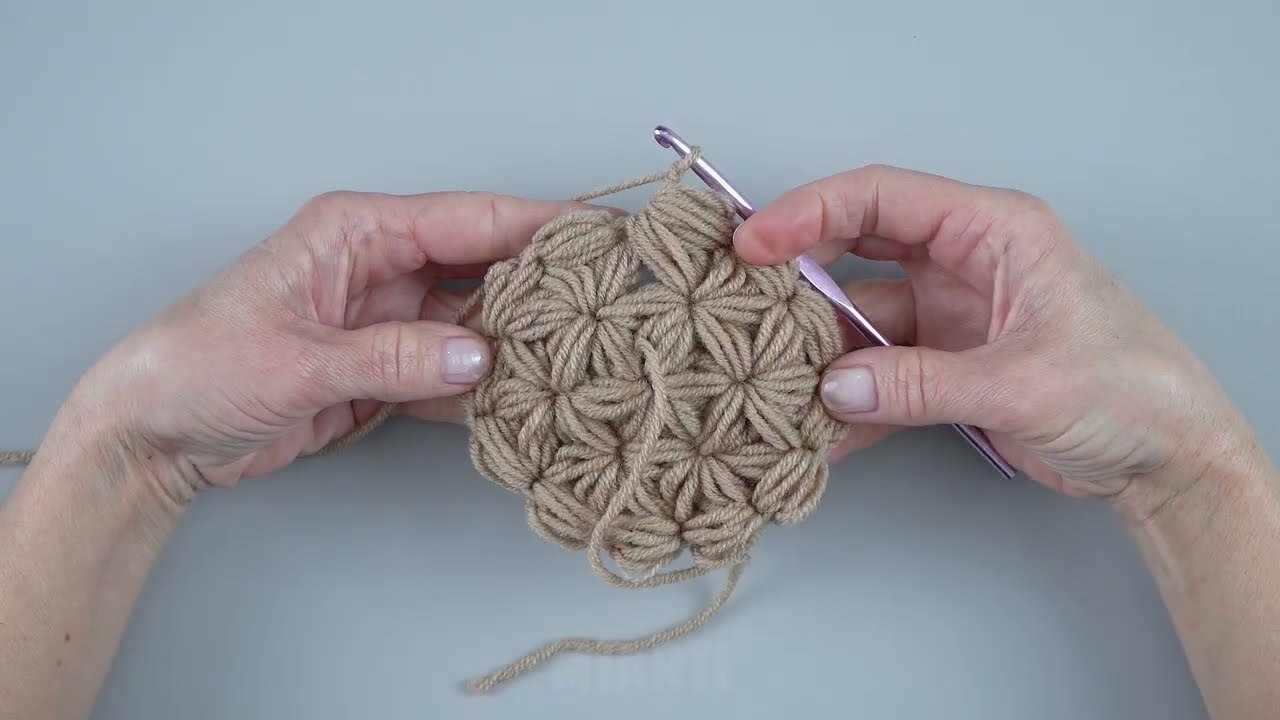
Part 1: The Crown (Flat Top)
You’ll start by crocheting a flat circle, which will form the top of your hat. The key here is consistent increases to keep it flat.
- Round 1: Create a MR. Ch 1. Work 8 sc into the MR. (8 sc)
- Place your stitch marker in the first sc you made. You will move this marker up to the first stitch of each new round.
- Round 2: Inc in each st around. (16 sc)
- Round 3:
*Sc in the next st, inc in the next st.*Repeat from*to*around. (24 sc) - Round 4:
*Sc in the next 2 sts, inc in the next st.*Repeat from*to*around. (32 sc) - Round 5:
*Sc in the next 3 sts, inc in the next st.*Repeat from*to*around. (40 sc) - Round 6:
*Sc in the next 4 sts, inc in the next st.*Repeat from*to*around. (48 sc) - Round 7:
*Sc in the next 5 sts, inc in the next st.*Repeat from*to*around. (56 sc) - Round 8:
*Sc in the next 6 sts, inc in the next st.*Repeat from*to*around. (64 sc) - Round 9:
*Sc in the next 7 sts, inc in the next st.*Repeat from*to*around. (72 sc) - Round 10:
*Sc in the next 8 sts, inc in the next st.*Repeat from*to*around. (80 sc)- Check your Crown Diameter: Lay your circle flat. For an average adult head, the crown should be approximately 6.5 – 7 inches (16.5 – 18 cm) in diameter. If it’s too small, add more increase rounds (e.g., Round 11:
*Sc in next 9 sts, inc*– 88 sc). If it’s too large, remove a round or use a smaller hook.
- Check your Crown Diameter: Lay your circle flat. For an average adult head, the crown should be approximately 6.5 – 7 inches (16.5 – 18 cm) in diameter. If it’s too small, add more increase rounds (e.g., Round 11:

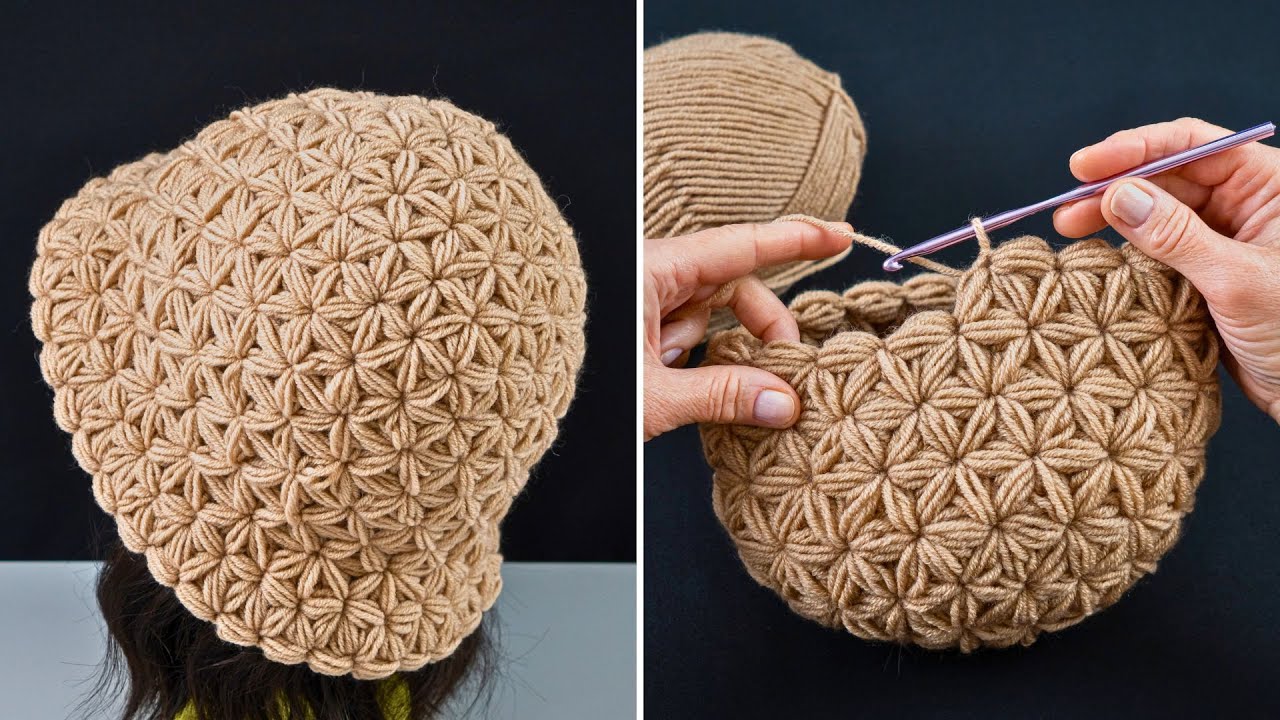
Part 2: The Sides of the Hat
Now we’ll stop increasing and work straight down to form the body of the hat. This will cause the fabric to curve downwards.
- Round 11: Sc in each st around. (80 sc)
- Continue moving your stitch marker up to the first stitch of each new round.
- Repeat Round 11 for a total of 10-14 more rounds, or until the sides of the hat reach just above your ears. For most adults, this will be about 4-5 inches (10-12.5 cm) from the edge of the crown.
- Try on the hat as you go to get the right depth. Make sure it’s not too shallow or too deep before starting the brim.
Part 3: The Brim
The brim gives the hat its distinctive bucket shape. We’ll add increases again to make it flare out.
- Brim Round 1:
*Sc in the next 9 sts, inc in the next st.*Repeat from*to*around. (88 sc) - Brim Round 2: Sc in each st around. (88 sc)
- Brim Round 3:
*Sc in the next 10 sts, inc in the next st.*Repeat from*to*around. (96 sc) - Brim Round 4: Sc in each st around. (96 sc)
- Brim Round 5:
*Sc in the next 11 sts, inc in the next st.*Repeat from*to*around. (104 sc) - Brim Round 6: Sc in each st around. (104 sc)
- Final Round (Optional for a firmer edge): Sc in each st around. (104 sc)
- You can add or remove Brim Rounds to make your brim wider or narrower. Just make sure to finish on a non-increase round for a smooth edge.
- Fasten Off: After your final round, sl st into the next st to create a seamless finish. Cut your yarn, leaving a 6-inch tail. Yarn over and pull the tail completely through the loop on your hook. Pull tight to secure.
4. Finishing Your Bucket Hat
- Weave in ALL Ends NEATLY: This is crucial for a polished, professional-looking hat. Use your yarn needle to carefully weave in every single yarn tail on the inside of your hat. Take your time, going back and forth through stitches several times to ensure they’re hidden and won’t unravel.
- Blocking (Optional but Recommended for Cotton): Blocking can significantly improve the shape and drape of your hat, especially if you’re using cotton yarn.
- Gently wet the entire hat.
- Place it over a bowl, ball, or wig head that’s roughly the size of your head to help it dry in the correct shape. You can also stuff it lightly with plastic bags or towels.
- Gently shape the brim as desired (flat, slightly upturned, or downturned).
- Allow it to air dry completely. Blocking helps to even out your stitches and gives the hat a more crisp, professional appearance.
5. Tips for a Stylish & Sturdy Bucket Hat
- Consistent Tension is Key: This is probably the most important factor for a successful bucket hat. Uneven tension will lead to a wavy brim or a lopsided hat. Practice keeping your stitches uniform.
- Gauge Swatch (Recommended for beginners): If you’re new, make a small sample swatch (e.g., a 4×4 inch square of sc stitches) to check your tension against the pattern’s suggested hook size. This helps ensure your hat will be the right size.
- Try It On As You Go: Don’t wait until the very end to try on your hat! Regularly try it on as you work the sides and brim to ensure the fit is correct for your head.
- Stitch Count: Always count your stitches at the end of each increase round for the crown and brim. If your count is off, your hat won’t lie flat or flare correctly.
- Customization:
- Stripes: Change colors every few rounds on the sides or brim for a striped effect.
- Different Stitches: Once you’re comfortable, experiment with stitches like half double crochet (hdc) or even double crochet (dc) for a different texture. Just remember to adjust your increase pattern and stitch count accordingly!
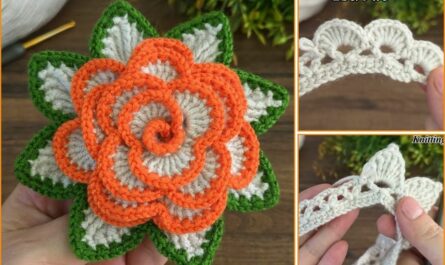
- Embellishments: Add a simple crocheted flower, a band of contrasting color, or embroidery to personalize your hat.

You’re now ready to crochet a fantastic bucket hat perfect for the sun in Phnom Penh! Enjoy the process of creating your own custom headwear.