 by
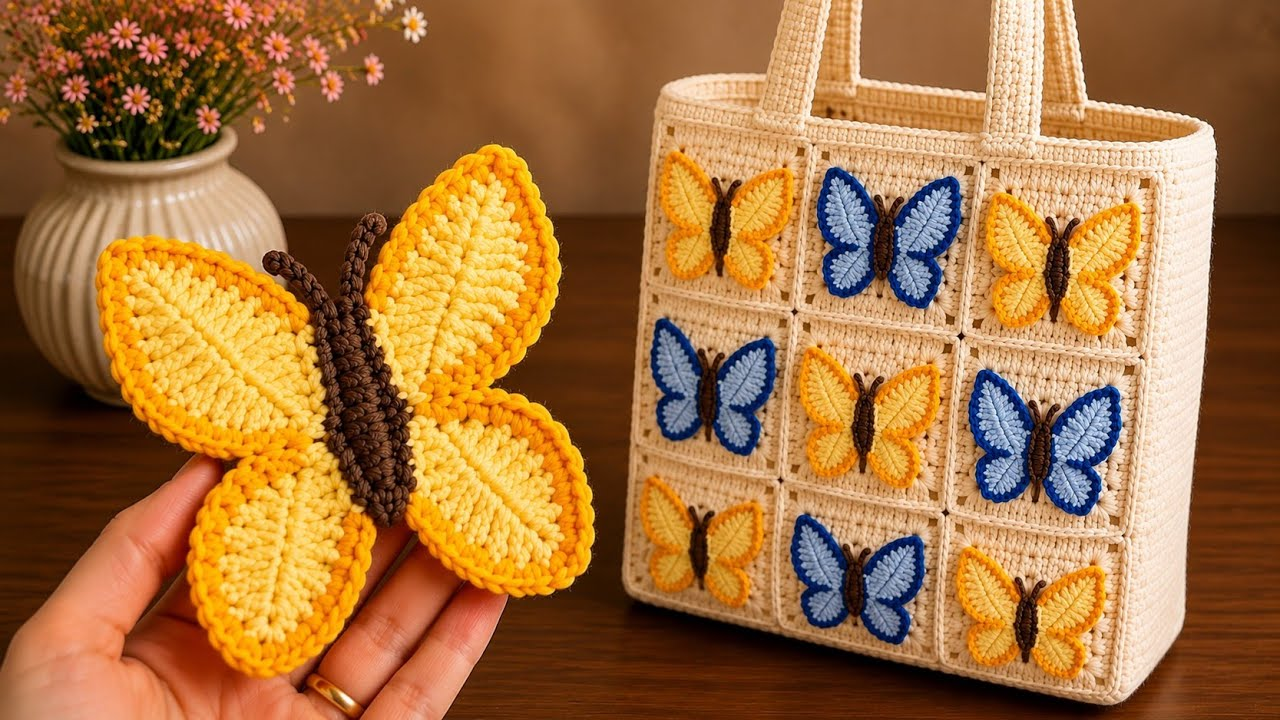
by The butterfly motif is a symbol of transformation and delicate beauty. When translated into crochet, the Butterfly Square becomes a versatile geometric building block. Because the motif is symmetrical and features an “open” wing structure, it is perfect for items that need to drape well, like apparel and blankets, as well as structured items like bags.
Here is your comprehensive guide to mastering the Butterfly Square and using it across four different projects.
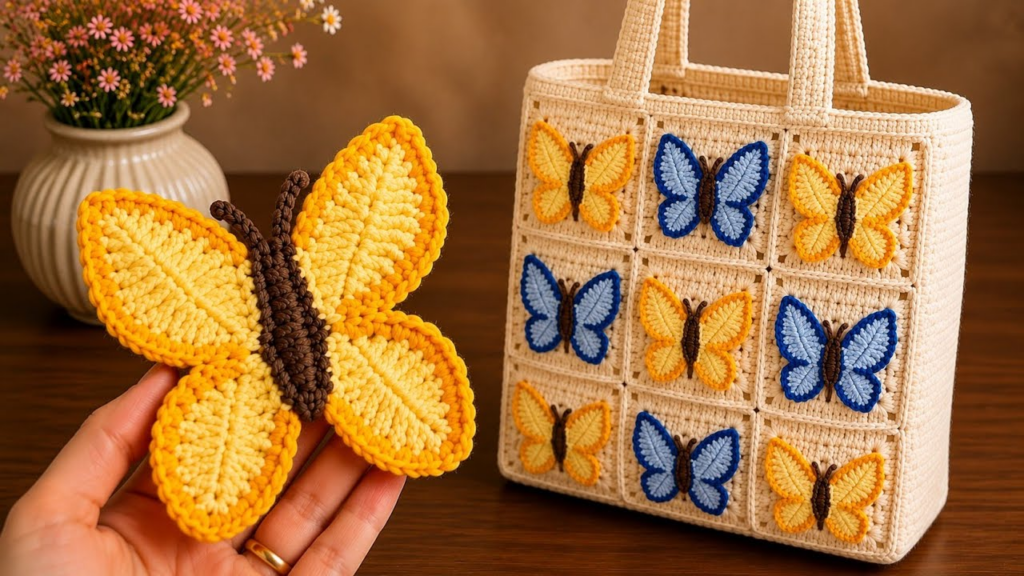
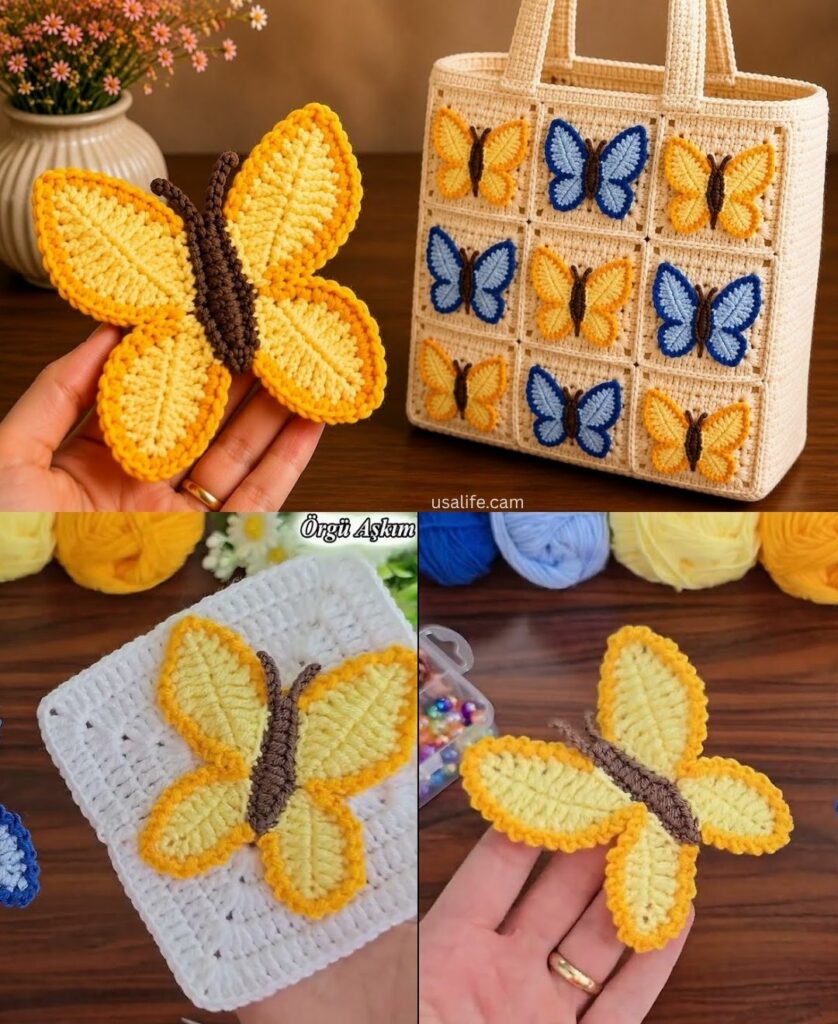
🧶 The Butterfly Square Pattern (The Foundation)
To keep the butterfly crisp, use a DK or Worsted weight cotton.
- The Butterfly Body:
ch 4, join.ch 3, work2 dcinto the ring.ch 2,3 dcinto the ring. This creates the center. - The Wings (The “Pop”): In the corners, work
(3 dc, ch 2, 3 dc). In the side spaces, work3 dcusing a different color. - The “Butterfly” Shape: To get the butterfly effect, on Round 3,
ch 2instead ofch 1at the center of the side edges. This creates a slight “dip,” which gives the wings their signature curved silhouette.

👜 Project 1: The Butterfly Square Tote Bag
A bag requires structure, so focus on density.
- Construction: Use 13 squares (as detailed in previous bag guides).
- Structure: Use a 5.0 mm hook to keep the stitches tight so your belongings don’t peek through the “wings.”
- The “Pro” Tip: Sew a sturdy canvas lining inside. Since the butterfly square has open chain spaces, the lining is non-negotiable to prevent your keys or coins from slipping through the wings.
- Handles: Use wooden D-rings or braided rope handles to contrast with the delicate butterfly motifs, giving it a high-end, “boho-chic” look.
🧶 Project 2: The Heirloom Blanket
The beauty of a butterfly blanket is the “honeycomb” effect when the squares are joined.
- The Join: Use the Flat Slip Stitch Join in a neutral color (like white or cream). This acts as the “webbing” that highlights the butterfly shapes.
- Layout: Arrange them in a color gradient. Start with light pink butterflies at the bottom, transitioning to deep purple or blue at the top.
- Border: Finish with a scalloped edge (work
5 dcinto the same stitch, skip 2,sl st) to mimic the fluttering motion of a butterfly wing.

🍽 Project 3: The Butterfly Table Runner
Table runners should be flat and elegant.
- Layout: Arrange your squares in a long, single row (or two rows wide for a wider table).
- The “Gap” Technique: Instead of joining the squares tightly, join them with a “mesh join” (a series of
ch 5loops connecting the corners of the squares). This creates a “lacey” runner that looks like it is floating on your table. - Finishing: Add tassels to the two end squares. It adds weight, helping the runner stay flat and preventing it from sliding off the table.
☕ Project 4: The “Flutter” Coasters
These are the fastest way to master the motif.
- Scale: Use a 2.5 mm hook and Size 10 crochet thread to make a dainty coaster.
- Stiffening: To make these functional, you must use a fabric stiffener. Soak the finished coaster in the stiffener, pin it out into a perfect square, and let it dry. This ensures that when you set a mug on it, the wings don’t flip up.
- Gift Idea: Set a bundle of four, tied with a simple ribbon, as a handmade housewarming gift.

✨ Pro-Tips for Success
- The “Wing” Definition: To make the butterfly wings look more defined, use a darker color for the outline of the square (the frame) and a lighter color for the center of the butterfly. The contrast makes the wings pop.
- Blocking (Crucial): Butterfly squares are prone to uneven edges because of the “wing” gaps. Use a square blocking board to pin the corners at perfect $90^\circ$ angles. Steam them well to ensure your blanket or bag doesn’t look lopsided.
- Yarn Selection: If you are making the bag, use cotton. If you are making the blanket, use acrylic or bamboo-blend for a softer, drape-heavy feel.
Would you like me to provide the exact stitch count for the “wing” round to ensure your square remains perfectly flat, or would you like a guide on how to arrange the colors for the gradient blanket?