by
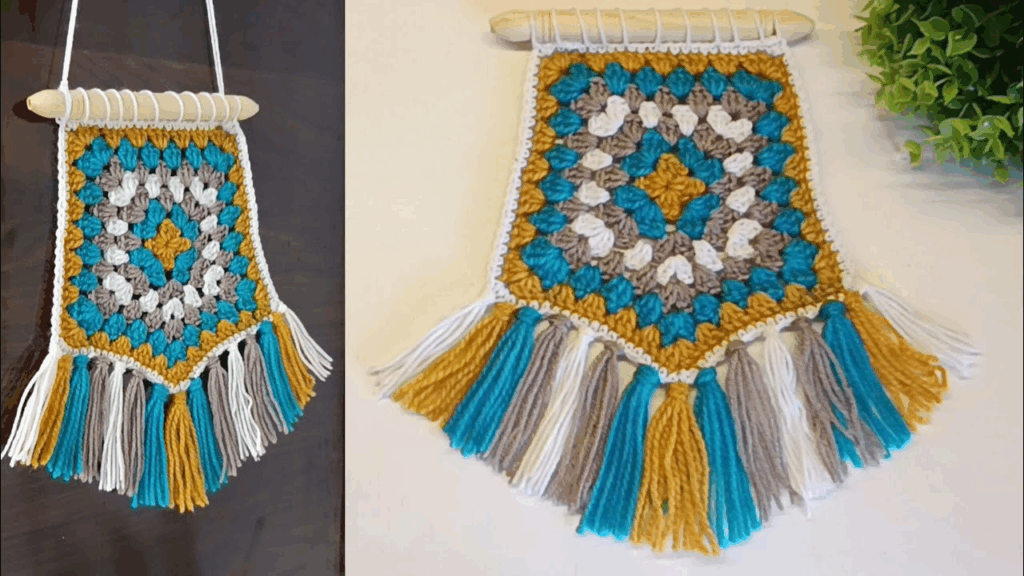
by Making an Amigurumi Granny Square Wall Hanging is a fantastic way to combine two popular crochet styles: the classic, flat, repeating motif of the granny square and the cute, three-dimensional shaping of Amigurumi characters. The result is a charming, textured piece of home decor.
Here is a detailed guide on how to design and construct one.
Part 1: Design and Materials
A. Materials Needed
- Yarn: Medium-weight yarn (worsted/size 4) is ideal.
- Color A: Background for the granny square.
- Colors B, C, D: For the Amigurumi pieces (e.g., body, features).
- Crochet Hook: A hook size appropriate for your yarn.
- Dowels or Sticks: A smooth wooden dowel, tree branch, or metal rod for hanging.
- Stuffing: Polyester fiberfill for the Amigurumi pieces.
- Scissors
- Tapestry Needle: For weaving ends and assembly.
- Safety Eyes (optional): For faces.

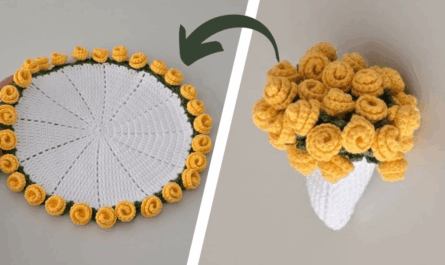
B. Choosing a Design
The easiest Amigurumi shapes for a wall hanging are flat-backed or simple spheres/circles. Good ideas for beginners include:
- Animals: A small, flat-backed cat face, a sleepy bear, or a simple frog.
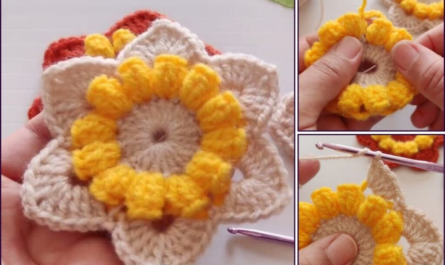
- Objects: A daisy, a star, or a heart.
- Food: A tiny lemon slice, a strawberry, or a donut.
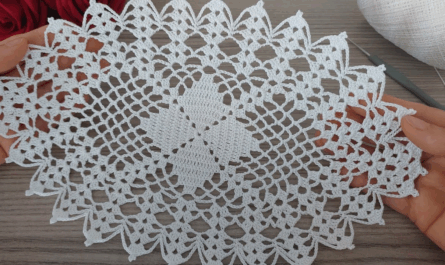
Part 2: Creating the Granny Squares
You’ll need a set of granny squares that are all the same size to form the base of your wall hanging.
- Start the Square: Follow a classic granny square pattern (see previous guidance). The key is to make several and keep them all exactly the same size.
- Determine Layout: Decide how many squares you need (e.g., a 2×3 layout for six squares, or a simple 1×3 vertical strip).
- Joining the Squares (Method: Slip Stitch Seam):
- Place two squares right sides facing.
- Join a new strand of yarn at a corner.
- Work a slip stitch (sl st) through the corresponding stitches of both squares, moving along the seam. This creates a clean, durable seam.
- Repeat until all squares are joined into your final rectangular base.

Part 3: Crocheting and Preparing the Amigurumi
For the characters, use the single crochet (sc) stitch, worked in continuous rounds, for a dense, stable fabric.
A. Example: Simple Bear Head
- Round 1: Start with a magic ring. Work 6 sc into the ring. (6 sts)
- Round 2: inc in each stitch around. (12 sts)
- Round 3: [sc in the next st, inc] 6 times. (18 sts)
- Rounds 4-6: sc in each stitch around. (18 sts)
- Stuffing: Lightly stuff the head.
- Round 7 (Closing): [sc in the next st, dec] 6 times. (12 sts)
- Fasten off, weave the tail through the remaining stitches, and pull tight to close.
B. Ears (Make 2)
- Start with a magic ring. Work 6 sc into the ring. (6 sts)
- Round 2: sc in each stitch around. (6 sts)
- Fasten off, leaving a tail for sewing. Do not stuff the ears.

C. Assembly of Amigurumi
- Attach Features: Use safety eyes or embroider eyes and a nose onto the head.
- Sew Ears: Sew the two ears onto the top of the head.
- Flat Back: The back of the finished Amigurumi piece should be relatively flat so it sits neatly on the granny square base.
Part 4: Final Assembly and Hanging
- Position Amigurumi: Decide where you want your Amigurumi piece(s) to sit on the granny square base.
- Sew to Base: Use the yarn tail and a tapestry needle to sew the Amigurumi piece(s) securely onto the granny square base. Use a simple whip stitch around the perimeter of the Amigurumi piece, ensuring the stitching is neat and hidden.
- Attach the Dowel:
- Hanging Loop: Join your background yarn to the top corner of the granny square base.
- Top Seam: Work a row of sc or sl st across the entire top edge of the squares.
- Dowel Sleeve: Work 3 rows of sc above the top edge. This creates a sleeve.
- Insert Dowel: Slip the wooden dowel through this sleeve.
- Hanging Cord: Tie a length of yarn or cord securely to both ends of the dowel. Adjust the length to your liking.
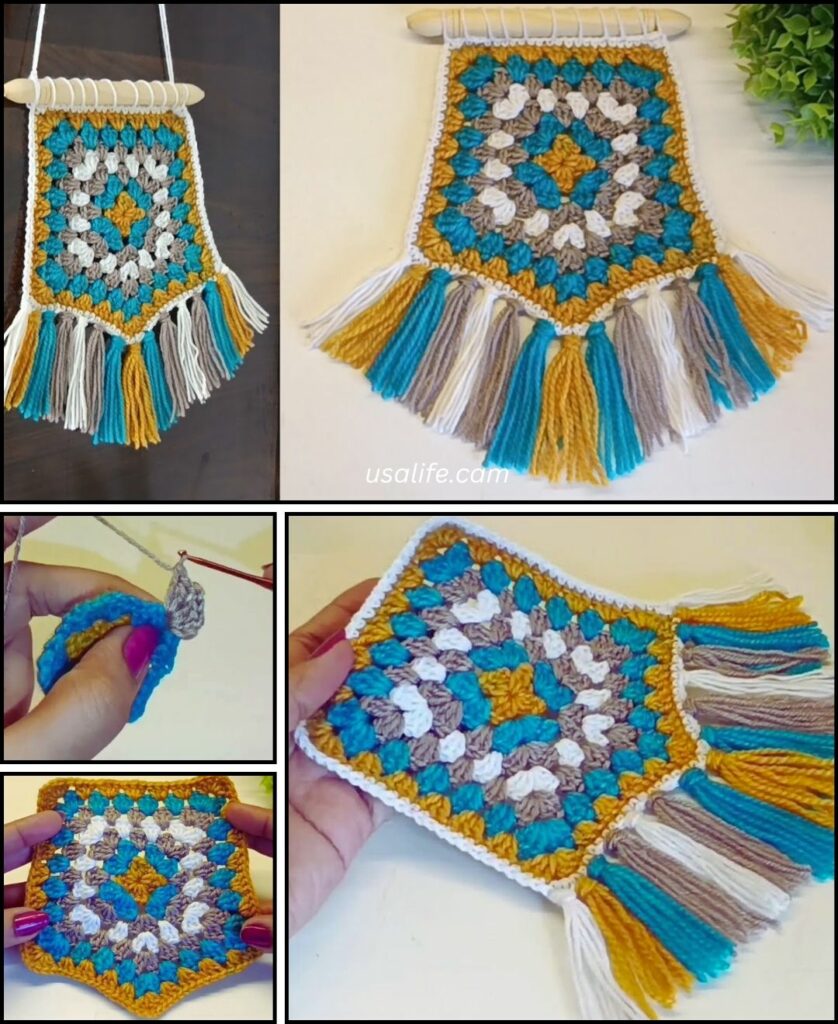
Your unique Amigurumi Granny Square Wall Hanging is complete! You can customize it further by adding fringe, tassels, or beads along the bottom edge.
Video tutorial: