 by
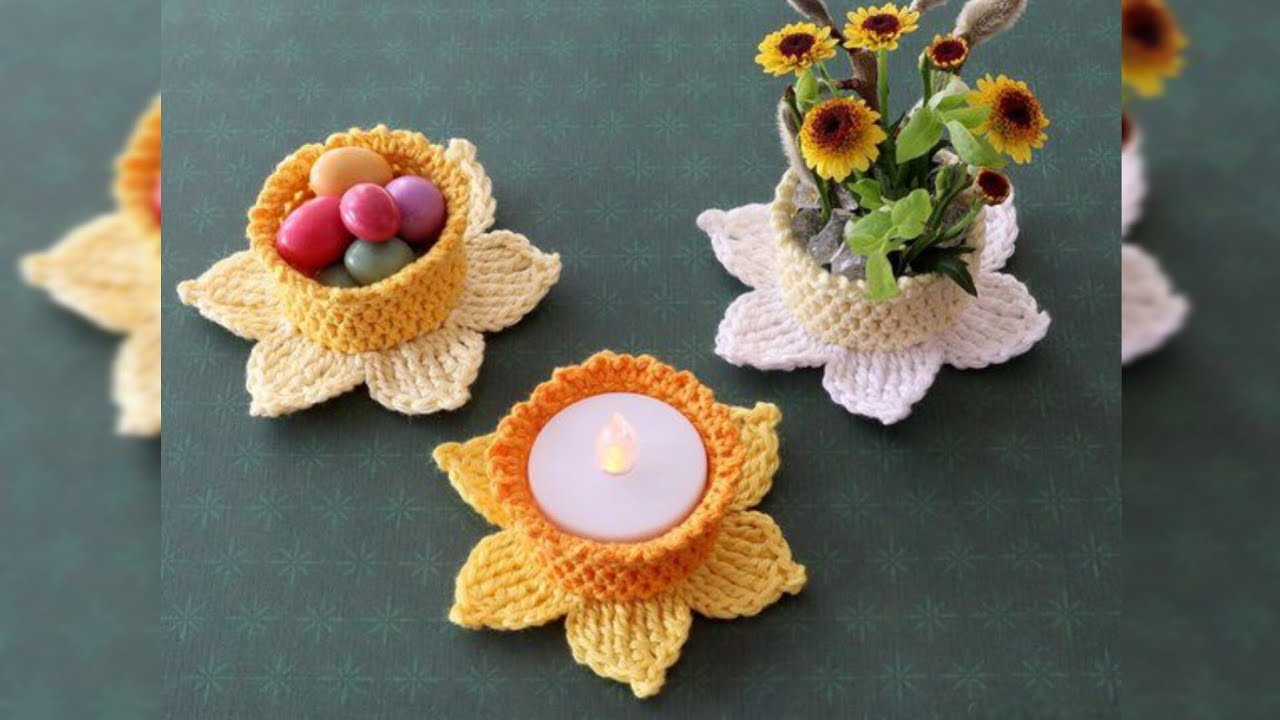
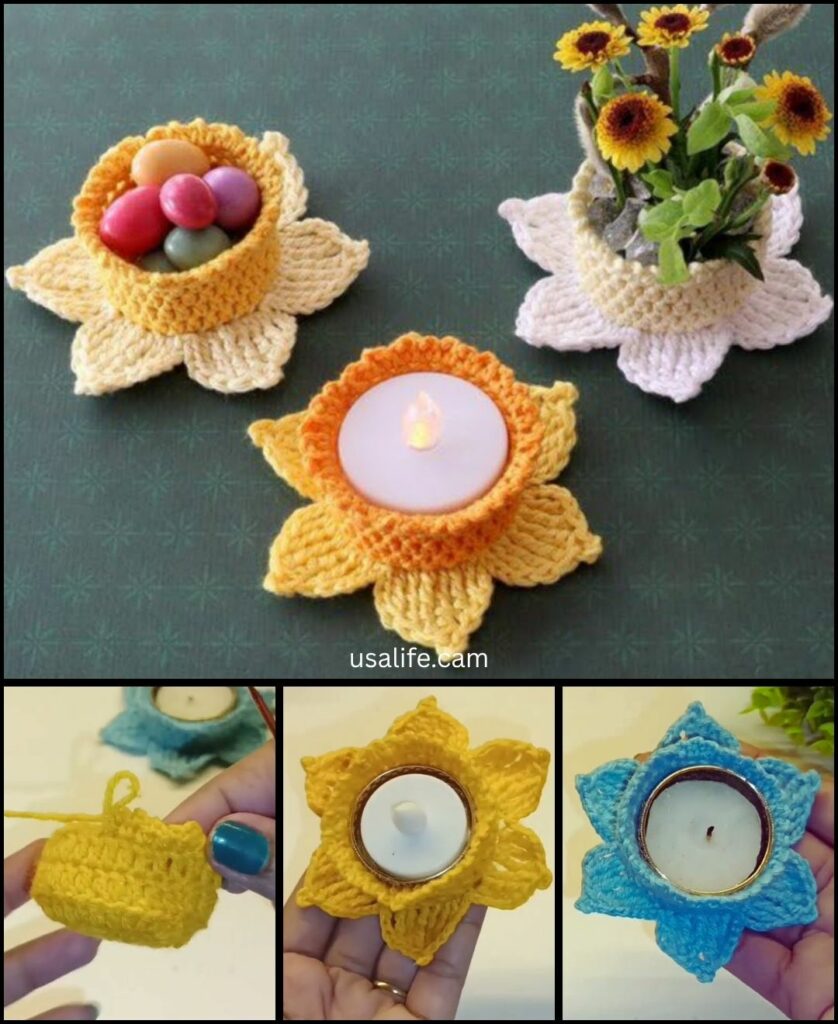
by Crocheting a flower tealight candle holder is a wonderful way to add a cozy, handmade touch to your home decor. The design typically involves creating a sturdy, flat base and then adding petals that stand up to enclose the tealight candle.
Here is a detailed guide on how to crochet a beautiful, sturdy flower tealight candle holder.

Materials Needed
- Yarn: Medium-weight yarn (worsted/size 4). Cotton or an acrylic/cotton blend is highly recommended because it handles heat better than 100% acrylic. Choose two colors: one for the base/center and one for the petals.
- Crochet Hook: The size recommended for your yarn.
- Tealight Candle: A standard-sized metal or plastic cup tealight. (Safety Note: Never leave a burning candle unattended, and ensure your crochet work does not touch the flame!)
- Scissors
- Tapestry Needle: For weaving in ends.
Abbreviations
- ch: chain
- sl st: slip stitch
- sc: single crochet
- hdc: half double crochet
- dc: double crochet
- st(s): stitch(es)
- inc: increase (2 sc in one stitch)
- BLO: back loop only

Part 1: The Base (Base Color)
The base needs to be flat and sized just right for the candle. We’ll aim for a diameter of about 1.5 to 2 inches.
- Round 1: Start with a Magic Ring. Work 6 sc into the ring. Pull the tail tight to close the ring. (6 sts)
- Round 2: inc in each stitch around. (12 sts)
- Round 3: [sc in the next st, inc] 6 times. (18 sts)
- Round 4 (Creating the Side Wall): Working in the BLO, sc in each stitch around. (This creates a crisp edge for the side to stand up.) (18 sts)
- Rounds 5-6 (Straight Sides): sc in each stitch around. (This forms the side of the cup.) (18 sts)
- Switch Color: On the last pull-through of the final sc in Round 6, drop the Base Color and switch to the Petal Color.

Part 2: The Petals (Petal Color)
The petals are worked directly onto the top edge of the base.
- Round 7 (Starting the Petals):
- ch 1 (does not count as a stitch).
- Work sc in the first stitch.
- ch 3. Skip the next stitch.
- sc in the next stitch.
- Repeat [ch 3, sk 1, sc] around the top edge. You should end up with 9 loops/spaces.
- Join with a sl st to the first sc.
- Round 8 (Building the Petals):
- sl st into the first ch-3 space.
- ch 2 (counts as first hdc).
- In the same ch-3 space, work 1 hdc, 3 dc, 1 hdc.
- sl st into the next sc anchor point.
- sl st into the next ch-3 space.
- Repeat the petal sequence [ch 2, 1 hdc, 3 dc, 1 hdc] into the space, then sl st into the next sc anchor point.
- Finish Petals: Repeat this sequence 8 more times to create 9 beautiful, rounded petals.
- Join with a sl st to the starting point.
Part 3: Finishing and Safety
- Weave in Ends: Fasten off and use your tapestry needle to securely weave in all yarn ends on the underside of the base.
- Check Fit: Place your tealight candle inside the crocheted holder. The petals should stand slightly taller than the metal cup, keeping the flame safely away from the yarn. If the petals are too short, you can add an extra row of taller stitches (like treble crochet) to the middle of each petal loop in Round 8.
- Final Reminder: Always use a cup-style candle and never leave it lit unattended. The candle holder is meant to be decorative and protective, but fire safety is paramount.
Your beautiful crocheted flower tealight candle holder is ready to be used!
Video tutorial: