 by
by It sounds like you’re looking to crochet a baby blanket in a square shape! This is a fantastic and popular choice for baby blankets, offering a classic look and often a simpler construction than rectangular blankets. Crocheting a square blanket, especially for beginners, is a great way to practice working in the round, increasing stitches evenly to maintain a flat shape, and mastering basic stitches.
For a baby blanket, especially in warm Phnom Penh, the yarn choice is crucial. You’ll want something soft, gentle on delicate skin, and easy to care for.

Choosing the Right Yarn for Your Square Baby Blanket
- 100% Cotton: An excellent choice for warmer climates. Cotton is breathable, soft, absorbent, and very easy to wash. It provides good stitch definition and a lovely drape.
- Baby-Specific Acrylics: Many yarn brands offer acrylics designed for babies. These are usually incredibly soft, often anti-pilling, and hypoallergenic. Acrylic is durable, machine washable and dryable, and comes in a huge range of colors.
- Cotton Blends (e.g., Cotton/Bamboo, Cotton/Acrylic): These can offer the best of both worlds, combining natural fiber comfort with synthetic durability.
- Avoid: Wool (unless it’s superwash and guaranteed non-itchy), very textured or “hairy” yarns (which can be irritating or shed), or very thin, delicate yarns (which might make the blanket too flimsy).
Yarn Weight: For a baby blanket, DK (Double Knitting) weight / Light Worsted (Category 3) or Worsted Weight (Aran / Medium / Category 4) are the most common and versatile choices. DK will result in a lighter, drapier blanket, while worsted will create a slightly thicker, cozier one.
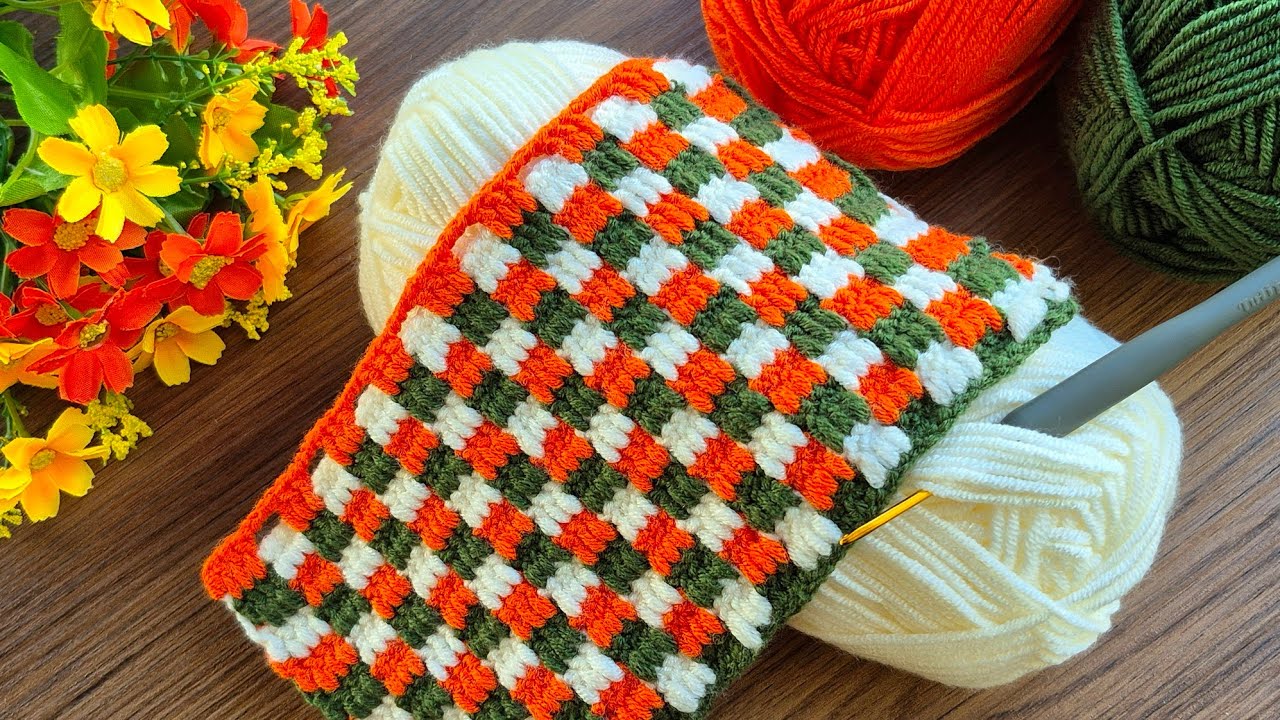
How to Crochet a Square Baby Blanket: Granny Square Style
A popular and easy way to crochet a square baby blanket is by making a large granny square. This method starts from the center and builds outwards in rounds, naturally forming a square shape. It’s excellent for beginners as it uses simple stitches and creates a beautiful, open fabric.
1. Essential Materials You’ll Need
- Yarn:
- Worsted Weight Cotton or Baby-Specific Acrylic Yarn: Approximately 800-1200 yards (around 400-600 grams, or 4-6 standard skeins). The exact amount will depend on your desired finished size and your tension. You can use one solid color, or multiple colors for a striped or rainbow effect!
- Crochet Hook:
- A 5.0mm (US H/8) or 5.5mm (US I/9) hook. This size is typically recommended for worsted weight yarn and creates a comfortable, slightly relaxed fabric that drapes well.
- Scissors: For cutting yarn.
- Yarn Needle (Tapestry Needle): Essential for weaving in yarn tails.
- Stitch Marker (Optional but helpful): To mark the beginning of rounds or corner stitches, especially when you’re starting out.
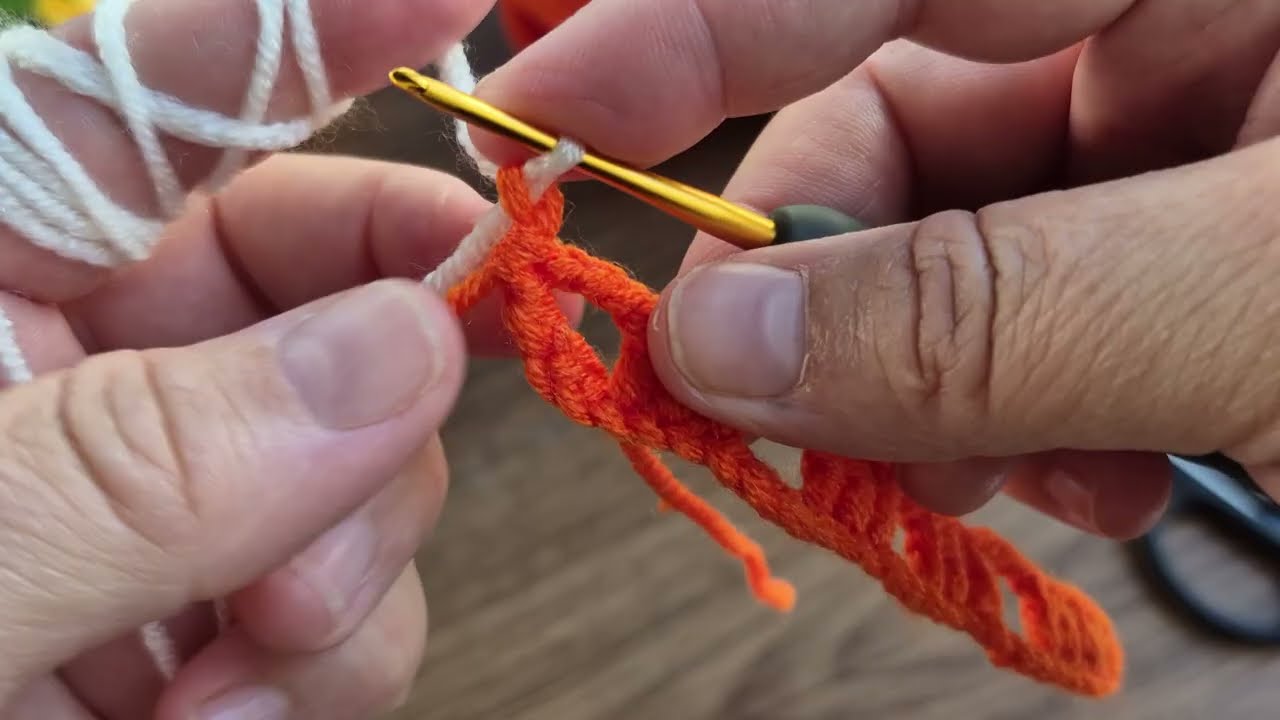
2. Basic Crochet Stitches You’ll Use
This project relies on fundamental crochet stitches:
- Magic Ring (MR) / Adjustable Ring: (Highly Recommended!) Creates a neat, hole-free center for your square. Alternatively, you can
ch 4andsl stto the first chain to form a ring. - Chain (ch): For starting, creating spaces, and turning.
- Slip Stitch (sl st): For joining rounds.
- Double Crochet (dc): Your primary stitch for the body of the blanket.
- Fasten Off: To securely end your work.
- Weaving in Ends: Hiding yarn tails for a neat and professional finish.
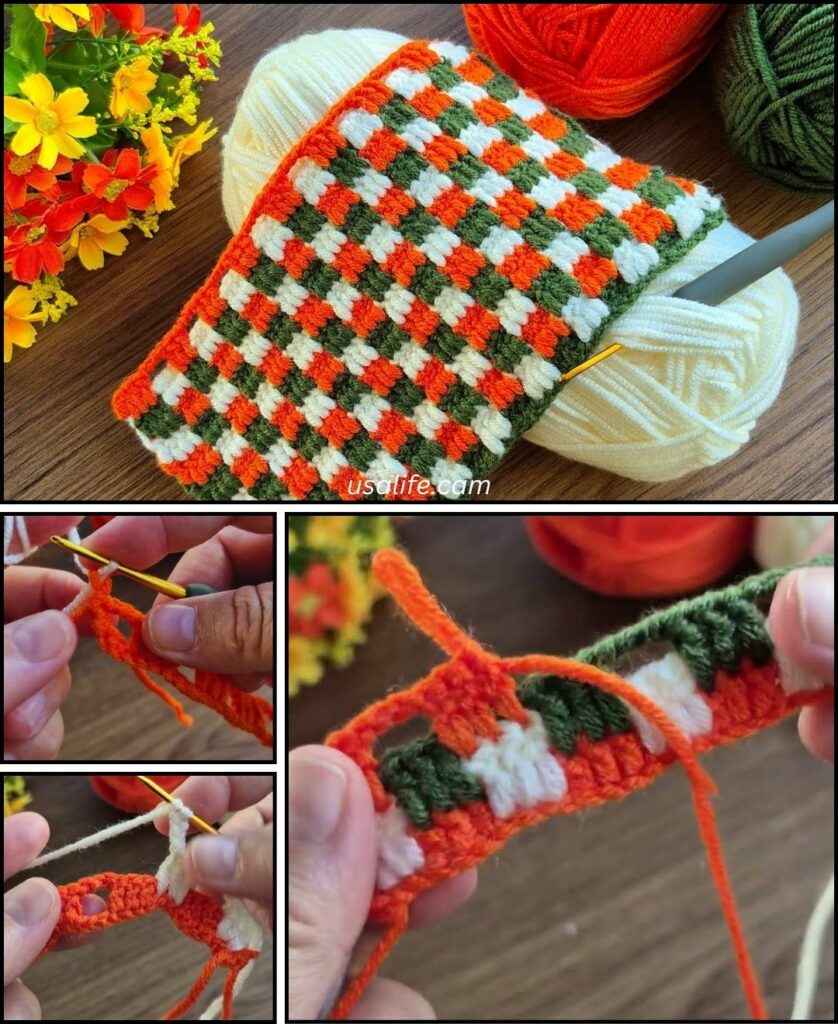
Crochet Square Baby Blanket Pattern (Granny Square Style)
This pattern starts small and grows. You’ll continue repeating the last round until your blanket reaches the desired size.
Abbreviations (US Crochet Terms):
- MR: Magic Ring
- ch: chain
- sl st: slip stitch
- dc: double crochet
- st(s): stitch(es)
- ch-sp: chain space
(...): work stitches into the same stitch or space[...]: repeat instructions in brackets- FO: Fasten off
Step 1: Start the Center
Use your chosen yarn color.
- Create a MR.
- Ch 3 (counts as your first dc).
- Work 2 dc into the MR.
- Ch 2 (this creates your first corner space).
- Work 3 dc into the MR.
- Ch 2 (second corner).
- Work 3 dc into the MR.
- Ch 2 (third corner).
- Work 3 dc into the MR.
- Ch 2 (fourth corner).
- Join with a sl st to the top of the beginning ch 3. (You should now have 4 clusters of 3 dc, separated by 4 ch-2 spaces).
- Gently pull the tail of the MR to close the center hole tightly. Weave in this starting tail to secure it.
Step 2: Expand the Square (Repeat This Round)
This is the repeating round that will make your blanket grow larger and larger. You’ll work groups of stitches into the chain spaces from the previous round.
- Sl st into the next 2 dc to get to the first ch-2 corner space.
- Ch 3 (counts as your first dc).
- Work (2 dc, ch 2, 3 dc) into the same ch-2 corner space. (This is your first corner, creating a new corner chain space and cluster).
*Work (3 dc, ch 2, 3 dc) into the next ch-2 corner space (this forms your next corner).*- Repeat from
*to*two more times. - Join with a sl st to the top of the beginning ch 3.

Step 3: Continue Growing Your Blanket
Repeat Step 2 for every subsequent round. As your blanket grows, you’ll find that new “side” spaces (ch-1 spaces between the 3-dc clusters) will form. The general rule for a granny square is:
- Corners: Always work
(3 dc, ch 2, 3 dc)into the ch-2 corner space. - Sides: Work
3 dcinto any ch-1 space along the sides.
So, for Round 3 and beyond, the full instruction for a repeating round looks like this:
- Sl st into the next 2 dc to get to the first ch-2 corner space.
- Ch 3 (counts as 1 dc). Work (2 dc, ch 2, 3 dc) into the same ch-2 corner space.
*Work 3 dc into the next ch-sp (the “side” space that now exists).- Work (3 dc, ch 2, 3 dc) into the next ch-2 corner space.
* - Repeat from
*to*two more times. - Work 3 dc into the last ch-sp along the side.
- Join with a sl st to the top of the beginning ch 3.
- Continue repeating this pattern until your blanket reaches your desired square size. A common size for a baby blanket is approximately 36 x 36 inches (91 x 91 cm). This will likely take many rounds (e.g., 25-35+ rounds, depending on your yarn, hook, and tension).
Step 4: Fasten Off
Once your blanket has reached its desired size:
- After completing your last stitch in the final round, cut your yarn, leaving a tail about 6-8 inches (15-20 cm) long.
- Yarn over your hook, and then pull the cut tail completely through the loop on your hook.
- Pull the tail firmly to create a knot and secure your work.
Step 5: Weave in All Ends
This is a crucial step for a neat, finished blanket, especially if you’ve used multiple colors.
- Thread your yarn needle with any remaining yarn tails.
- Carefully weave each tail into your stitches on the wrong side of the blanket. Go back and forth through several stitches (about 2-3 inches) to make sure it’s secure and won’t unravel with use or washing. Avoid pulling too tightly, which can distort the fabric.
Step 6: Blocking (Highly Recommended)
Blocking makes a significant difference for crochet blankets, especially granny squares. It helps to:
- Even out your stitches and tension.
- Flatten the blanket so it lies perfectly flat and square.
- Define the stitch pattern and open up the lace-like texture.
- Method:
- Gently wet your finished blanket (you can submerge it in cool water with a tiny bit of mild soap, then gently squeeze out excess water without twisting, or simply mist it thoroughly with a spray bottle).
- Lay it flat on a blocking mat, a clean towel, or any flat, even surface where it can dry undisturbed.
- Gently stretch and shape the blanket into a perfect square. You can use rust-proof pins to hold it in place along the edges if you have them.
- Allow it to air dry completely. This might take several hours or even overnight. Do not use heat (like a hairdryer) as it can distort the yarn and ruin your work.
Tips for a Successful Square Baby Blanket
- Consistent Tension: This is the most important factor for a flat, even blanket that doesn’t curl or wave. Practice makes perfect!
- Counting Stitches/Spaces: In granny squares, ensuring you have the correct number of clusters and chain spaces in each round is key to maintaining the square shape.
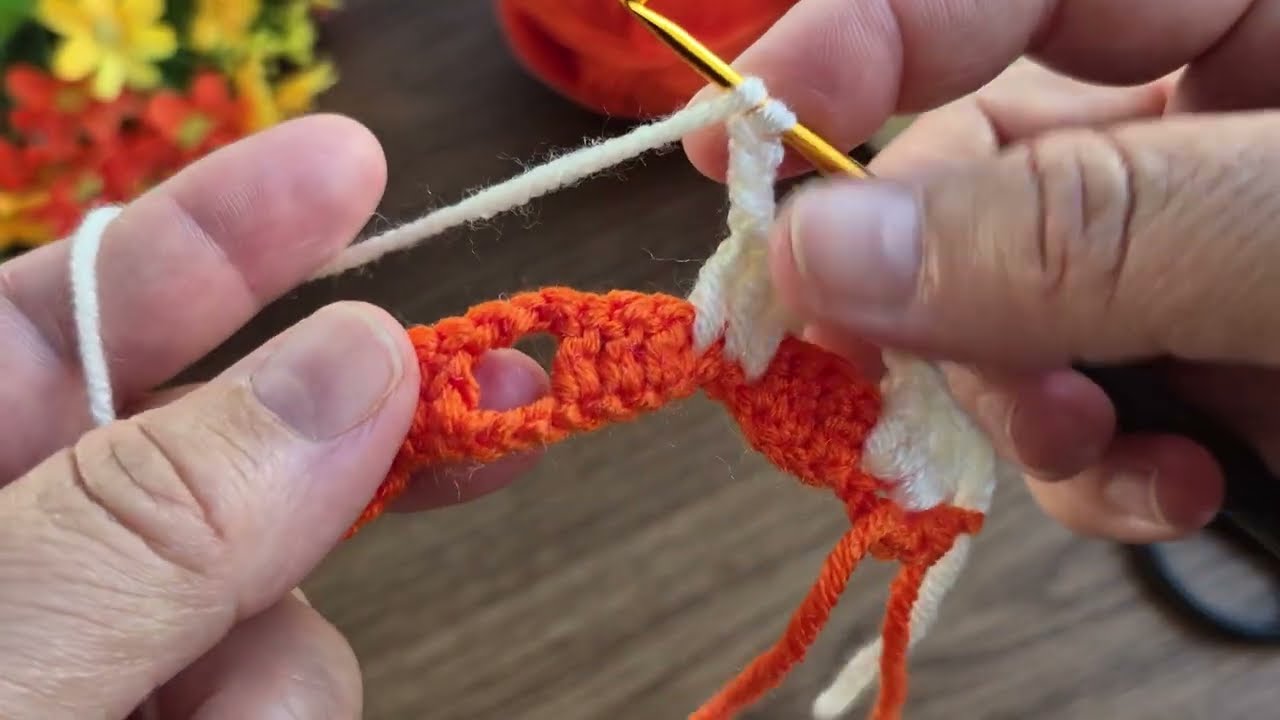
- Color Changes: If using multiple colors, change colors neatly at the end of a round by completing the last yarn over of the joining slip stitch with the new color.
- Yarn Quality: For baby items, prioritize softness and washability. Always check your yarn label for washing instructions.
- Relax and Enjoy: Crocheting should be enjoyable! Don’t stress too much about perfection. Every handmade item has its own unique charm.
You’re now ready to crochet a beautiful square baby blanket! It’s a truly special and cherished item to create with your own hands. What colors are you thinking of using for your blanket?