 by
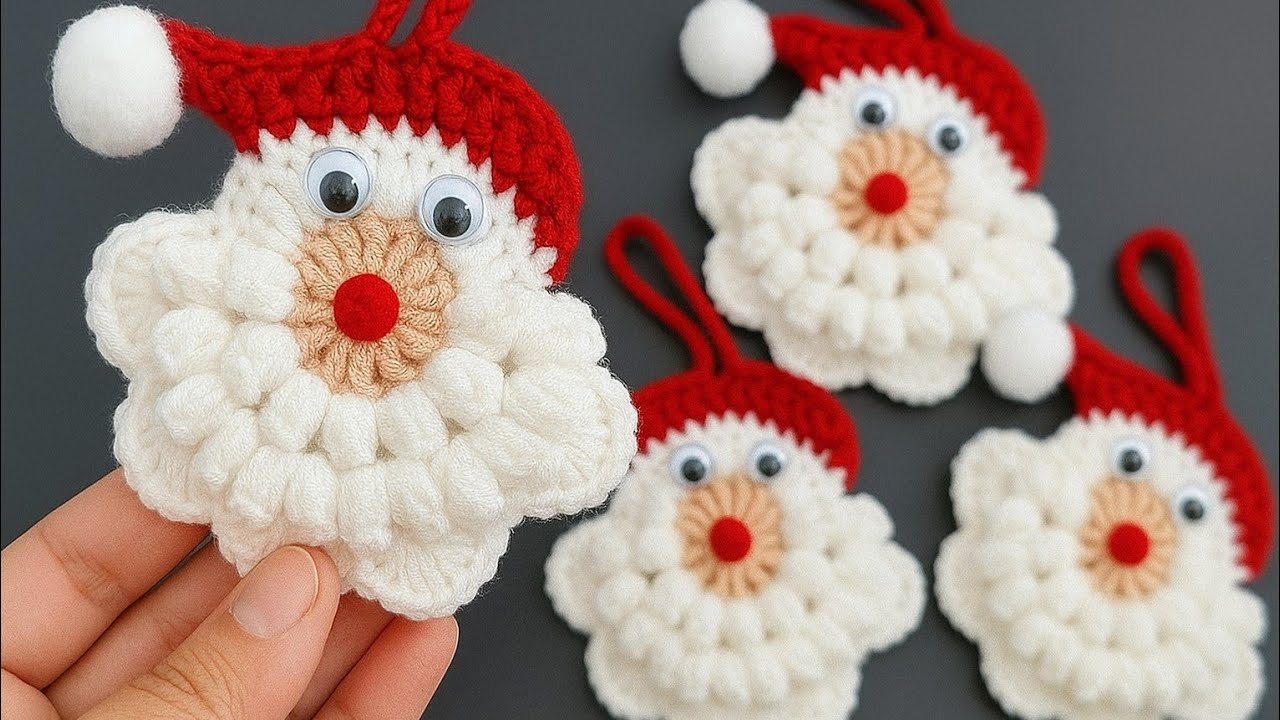
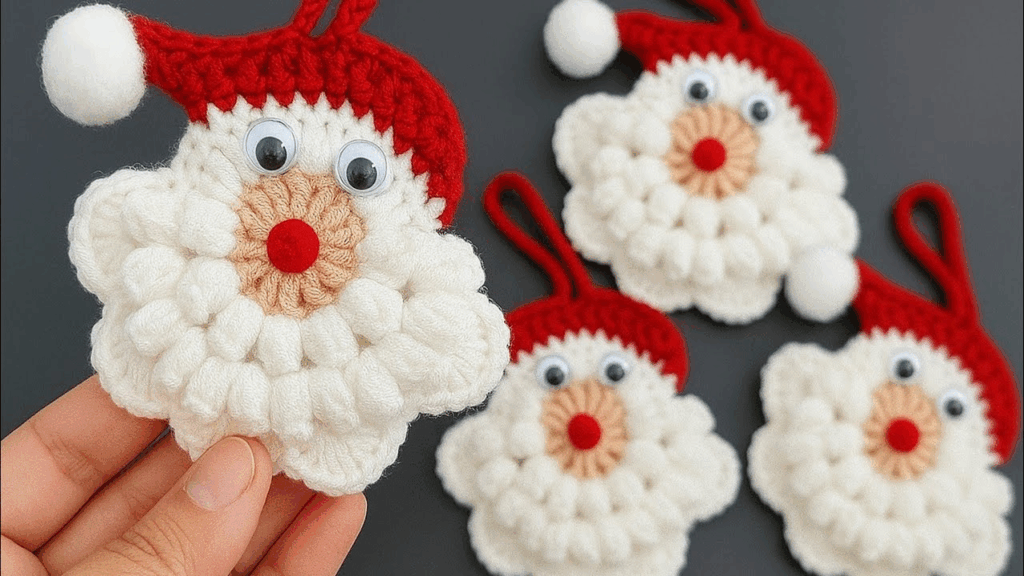
by Crocheting a Santa keychain or ornament is a fantastic, quick project that’s perfect for the holidays! It uses basic Amigurumi techniques—working in the round, increasing, and decreasing—to create a cute, miniature Santa figure.
Here is a detailed, step-by-step guide to crocheting a tiny Santa head with a hat.
Materials Needed
- Yarn: Small amounts of medium-weight yarn (worsted/size 4).
- Color A: Red (Santa’s Hat)
- Color B: White (Beard/Hat Trim)
- Color C: Peach/Beige (Skin Tone for Face)
- Crochet Hook: The size recommended for your yarn. Use a hook one size smaller for Amigurumi to ensure tight stuffing.
- Stuffing: Polyester fiberfill.
- Safety Eyes (optional): Small plastic eyes (about 5-6mm) or black yarn for embroidery.
- Keychain Hardware: A key ring or clip (if making a keychain).
- Scissors
- Tapestry Needle: For sewing and weaving in ends.
- Stitch Marker: Essential for working in the round.
Abbreviations
- ch: chain
- sl st: slip stitch
- sc: single crochet
- inc: increase (2 sc in one stitch)
- dec: decrease (work a single crochet two together, or sc2tog)
- st(s): stitch(es)

Part 1: The Face and Head (Color C & B)
We’ll start with the face color and add the white beard strip before shaping the head.
- Round 1: With Color C (Skin Tone), start with a magic ring. Work 6 sc into the ring. (6 sts)
- Round 2: inc in each stitch around. (12 sts)
- Round 3: [sc in the next st, inc] 6 times. (18 sts)
- Round 4 (Beard Strip): Drop Color C. Join Color B (White).
- Work sc in the first 12 stitches.
- Switch back to Color C. Work sc in the remaining 6 stitches. (18 sts)
- Note: Place safety eyes now, above the white strip, centered on the skin color.
- Round 5 (Beard Strip/Closing): With Color B, sc in the next 12 stitches.
- Switch to Color C. Work sc in the remaining 6 stitches. (18 sts)
- Round 6 (Start Shaping): Switch to Color C. Work dec (decrease) in the first 6 stitches (over the face area). sc in the remaining 12 stitches. (12 sts)
- Stuff Firmly: Stuff the head with fiberfill. Continue stuffing as you close the top.

Part 2: The Santa Hat (Color A & B)
The hat is shaped into a cone and sewn onto the top of the head.
- Hat Trim (Color B – White):
- ch 15. Join with a sl st to the first ch to form a ring.
- ch 1, sc in each stitch around. (15 sts)
- Join with a sl st. Fasten off Color B.
- Hat Body (Color A – Red):
- Join Color A to the top edge of the white trim.
- Round 1: sc in each st around. (15 sts)
- Rounds 2-4 (Straight): sc in each st around. (15 sts)
- Round 5 (Decrease): [sc in the next 3 sts, dec] 3 times. (12 sts)
- Round 6 (Straight): sc in each st around. (12 sts)
- Round 7 (Decrease): [sc in the next 2 sts, dec] 3 times. (9 sts)
- Round 8 (Straight): sc in each st around. (9 sts)
- Round 9 (Decrease): [sc in the next st, dec] 3 times. (6 sts)
- Round 10 (Closing Tip): dec 3 times. (3 sts)
- Fasten off, leaving a long tail for the pom-pom and sewing.
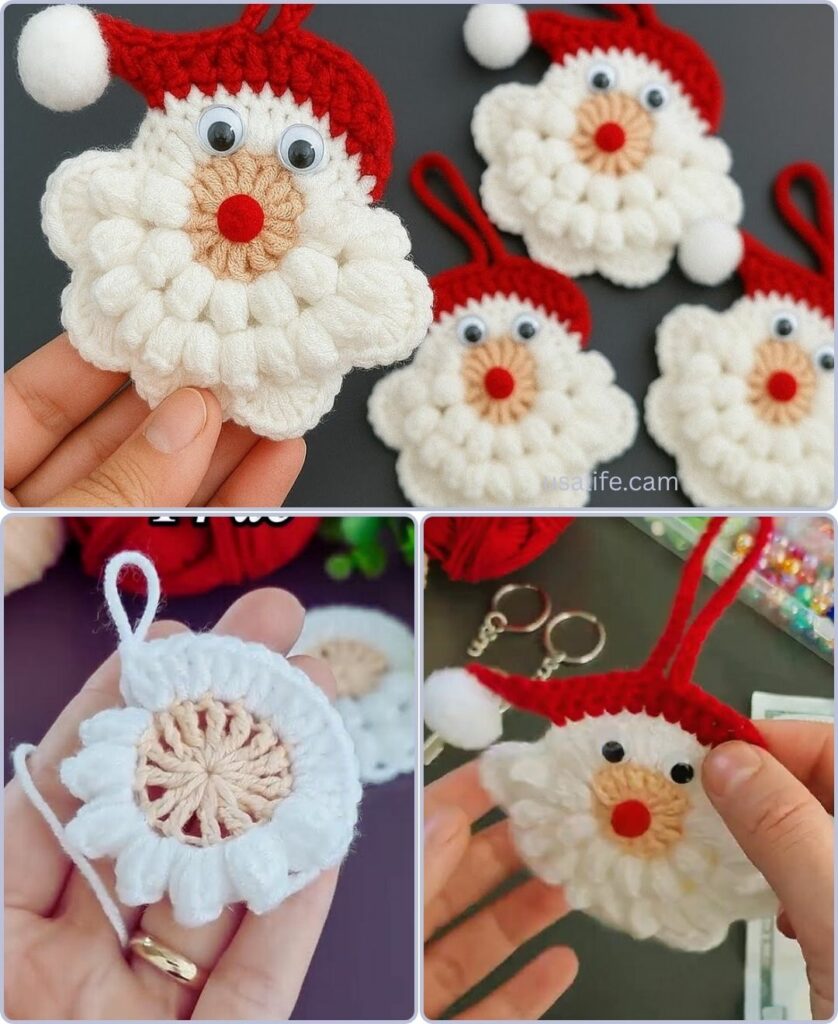
Part 3: Assembly and Finishing
- Attach Hat to Head: Place the white trim edge of the hat onto the top of the head (the unclosed section from Round 6). Use the yarn tail and tapestry needle to neatly sew the hat to the head around the entire rim.
- Make the Pom-Pom: Use the long tail from the hat. Wrap the yarn around two fingers about 10-15 times. Tie the wrapped yarn tightly in the middle, snip the loops, and fluff it into a tiny pom-pom. Secure the knot and trim any excess.
- Embroider Beard Texture (Optional): With white yarn, add small, looped stitches or french knots to the white strip to give Santa’s beard a fuzzy texture.
- Attach Keychain Loop:
- Join the red yarn to the very top tip of the hat (near the pom-pom).
- ch 15 (or desired length).
- sl st back into the same stitch where you started the chain.
- Fasten off and weave in the end.
- Attach Hardware: Thread the key ring or clip through the loop you just created.
Your adorable Santa keychain ornament is complete!
Video tutorial: